Black Gel Nail Polish: Stunning Ideas for Glossy Manicures
Black gel nail polish is more than a single bottle. This post follows it as a whole system: the starter kit that holds it, the bottle itself, the brush that lays it down, the nail art it makes possible, and the two finishes that change its whole mood.
If you are starting from zero, this is the post to read first, because it shows every piece in order, from tools to finished nails, and stays honest about which photos show products and which show real manicures.
Gel Nail Polish Starter Kit with Lamp and Tools: Shop the Look
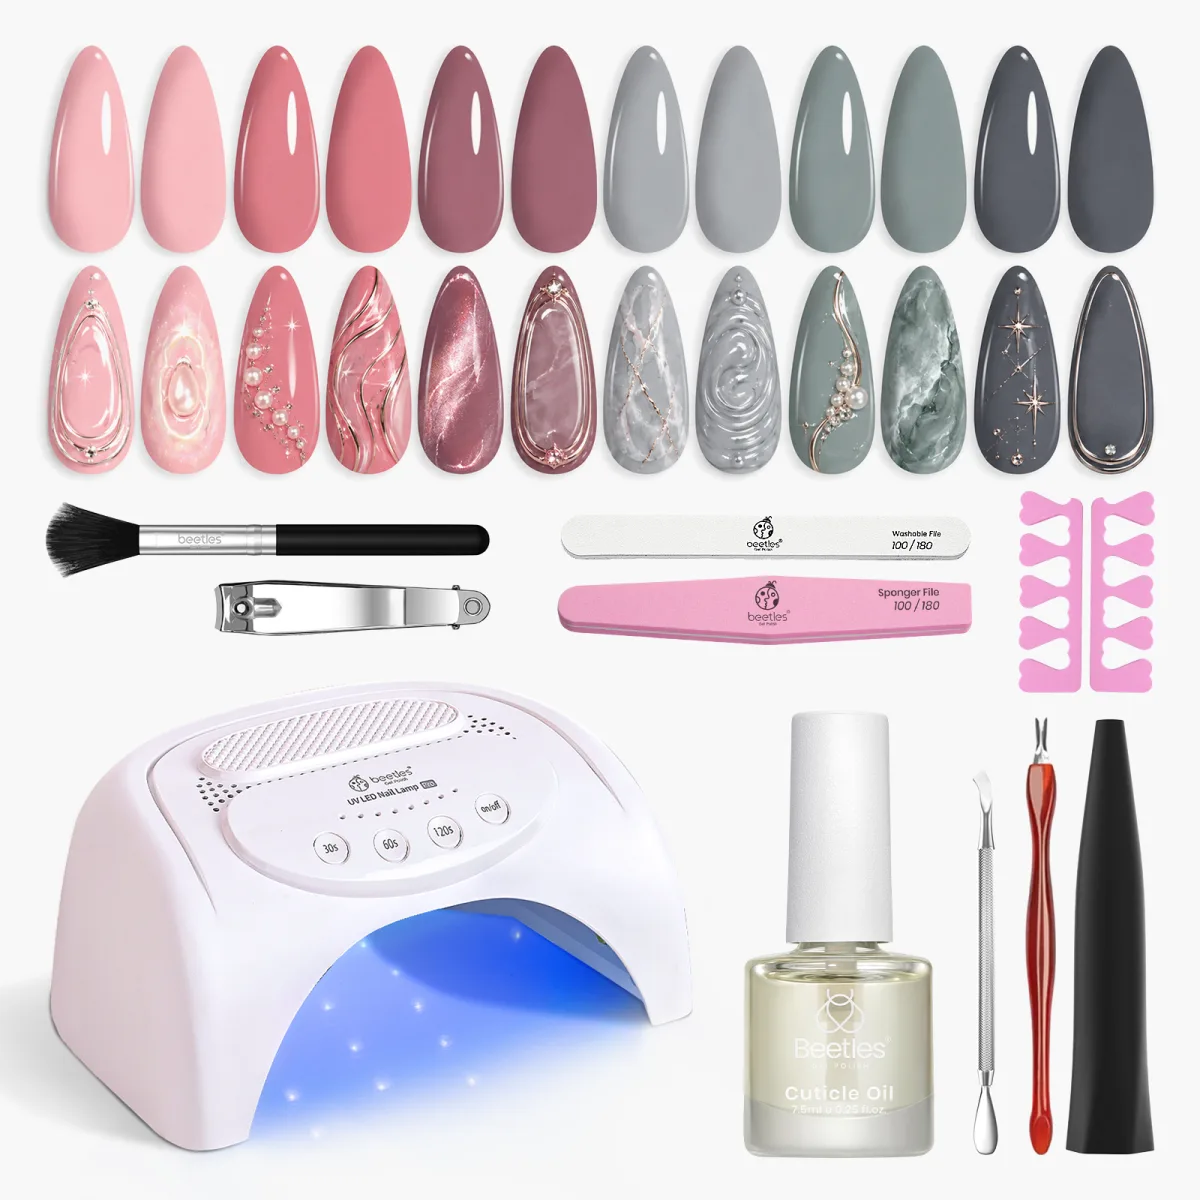
The first photo is a flat lay of a Beetles starter kit, and it is the only photo in the post that shows tools rather than nails. Twelve almond tips sit in two rows: the top row plain, in pinks, mauves, greys, sage and charcoal, and the bottom row decorated with pearls, marble, gold lines, stars and swirls. Around them sit a white UV LED lamp, a cuticle oil bottle, files, a brush, clippers, pink toe separators and cuticle tools.
This is what a beginner actually needs in one picture: colours to practise with, a lamp, and prep tools.
What a good starter kit should include
Judge a kit by the lamp and the prep tools, not by the number of colours. A kit with a weak lamp cures gel halfway, and half cured gel peels within days. The white UV LED lamp in this photo is the heart of the kit: without it, none of the gels here work at all, since gel needs lamp curing rather than air drying.
Files, clippers and cuticle tools matter just as much, because prep is what makes gel grip. The decorated tips are proof of what the kit builds towards: pearls, marble and gold lines are techniques you learn after the basics.
Starting with the kit, not with the shade
Beginners often buy one dramatic shade first and wonder why the result disappoints. A kit reverses that mistake: it gives you plain tips to practise on, neutral colours that forgive mistakes, and the tools to prep properly. Practise the full routine on a plain pink or grey tip before opening the black gel nail polish, because black shows every error. Once your coats are even on a forgiving shade, the same routine on black looks salon clean.
Black Gel Nail Polish Bottle in a Swirl of Black Gel: Shop the Look
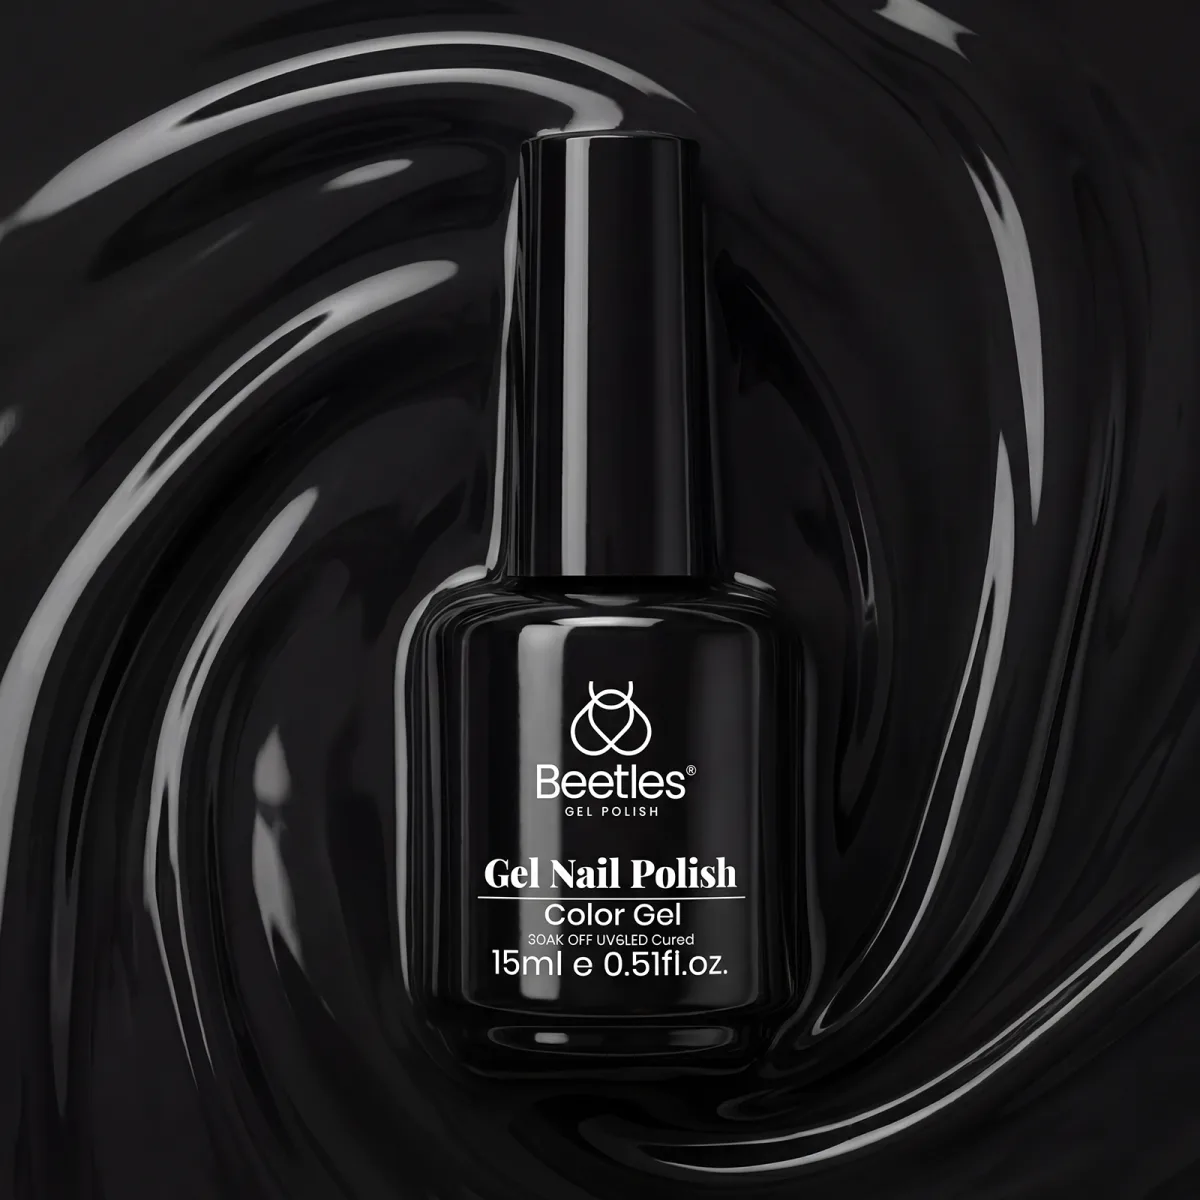
The second photo is a top down product shot: a Beetles black gel bottle standing in a swirl of black gel. This is the moment to judge the product honestly. The gel in the swirl is a deep, even black with a glossy, grain free surface. A swirl shot shows the gel’s body: thick enough to hold its shape, fluid enough to level smooth.
That balance makes a gel easy to apply: too thick drags, too thin floods the cuticle. The bottle is the colour gel step, used between base coat and top coat.
Reading a black gel from its swirl
A swirl photo tells you three things a hand photo cannot. First, the undertone: this black is neutral, with no blue or brown cast. Second, the finish: the surface reflects light evenly, so it cures to a smooth gloss. Third, the consistency: the swirl holds clean ridges, so the gel stays where the brush puts it.
Test any new black gel on one nail or a swatch stick in daylight before a full set. Indoor light warms black and hides its true depth.
Why black is the hardest shade to apply well
Black is unforgiving in a way pale shades are not. A streak in pink disappears under the next coat, but a streak in black shows as a dull line. Flooding the cuticle with black is harder to clean up, since dark pigment stains skin. The fix is the same routine this whole post repeats: thin coats, a wiped brush, and curing between coats.
Our Audrey Black shade guide follows this exact shade through its own five photos, from swatch to bottle, if you want to study the colour on its own before buying.
Black Gel Brush Sweeping Across Black Gel: Shop the Look
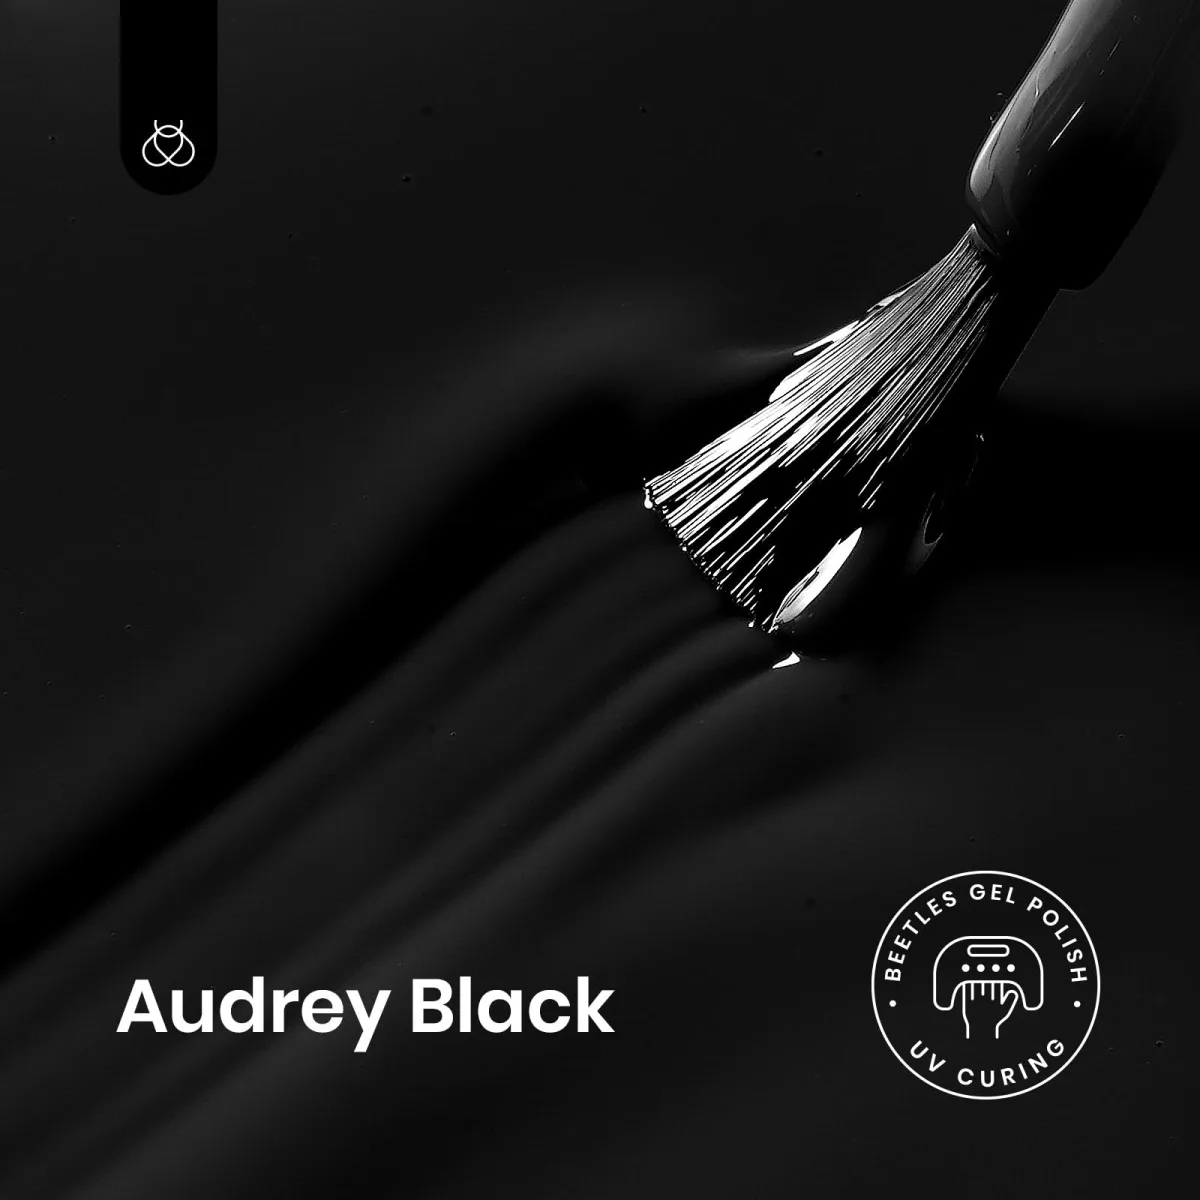
The third photo is a close up of the work itself: a brush loaded with black gel sweeping across a black gel surface. The shade name “Audrey Black” and a Beetles UV curing badge are printed on the image. What the photo shows best is the gel’s flow: it moves in a smooth, even ribbon with no dragging, no bare patches and no pooling at the edges.
That flow is the difference between a black gel nail polish a beginner can control and one that fights back. A brush loaded but not dripping is right for one thin coat, and the sweep shows the gel levelling behind the brush.
Loading the brush for a thin, even coat
Wipe one side of the brush on the neck of the bottle so the brush carries gel on one side only, then lay the gel down in the centre of the nail and push it gently towards the cuticle without touching the skin. Two thin coats beat one thick coat: thick dark gel wrinkles during curing and shows as a dull patch. Let each coat level for a few seconds before curing, so brush lines melt away.
Curing between coats, the brand’s way
Each thin coat needs its own cure before the next coat goes on. The brand’s own steps, shown in the infographic in our companion shade post, are base coat cured for 60 seconds, gel polish cured for 60 seconds and repeated two to three times, then top coat cured for 60 seconds, all in thin layers. Our gel curing guide covers the curing routine in full.
The same safety step applies here as with any gel set: the American Academy of Dermatology recommends a broad spectrum, water resistant sunscreen with SPF 30 or higher on your hands before a gel manicure.
Black French Nail Art with Bows and Pearls: Shop the Look
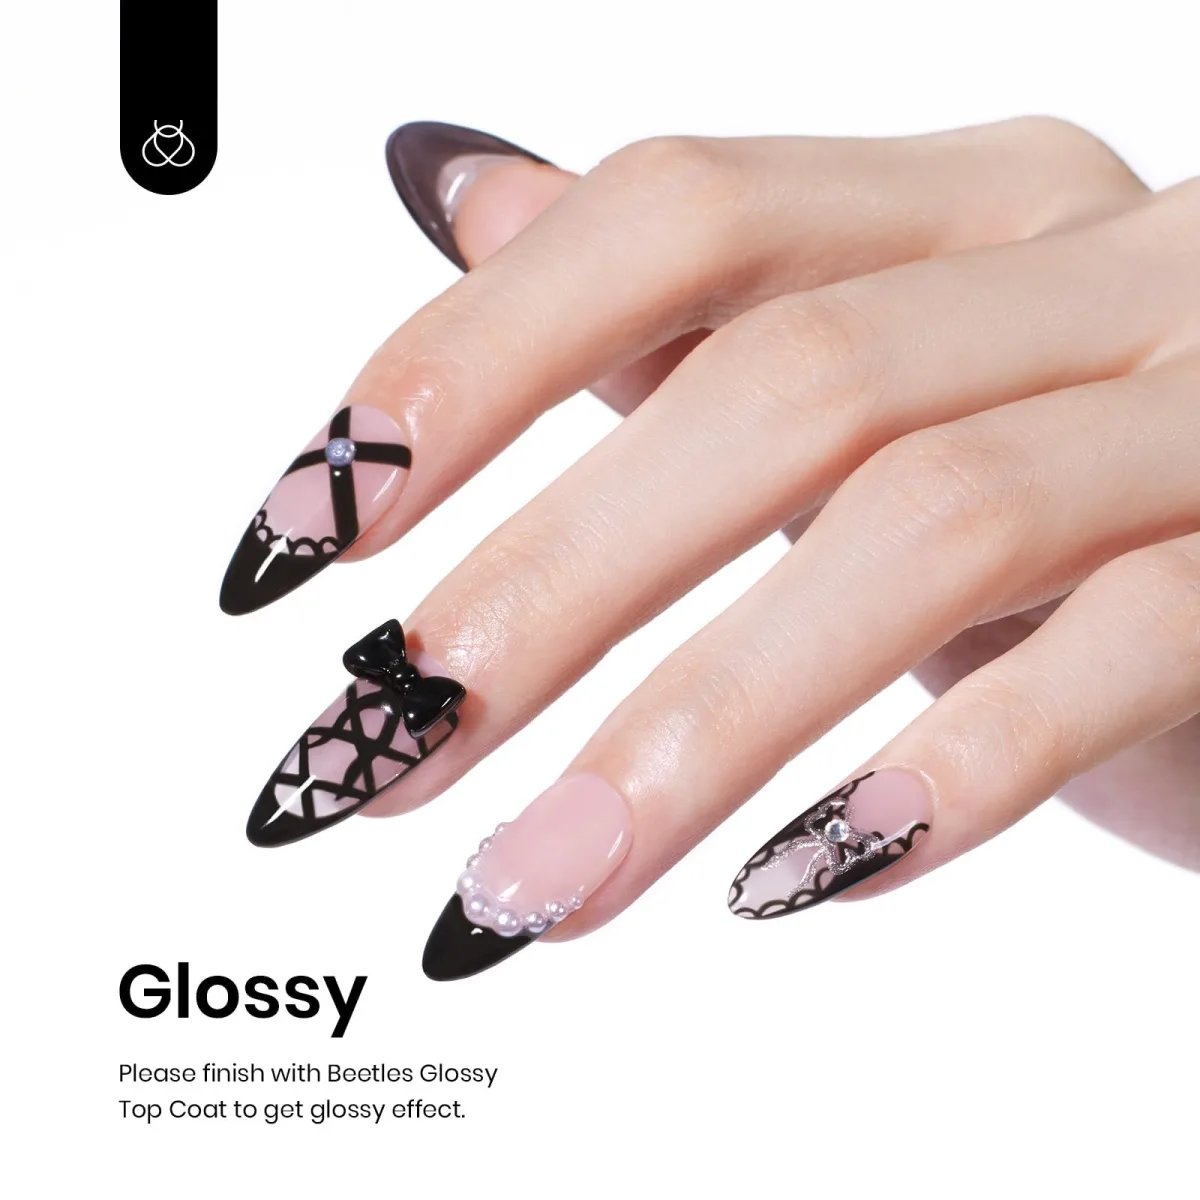
The fourth photo is the first real manicure in the post, and it is the most detailed: a hand with pale pink almond nails carrying black art. One nail has a black French tip with a lace edge. Another has a black bow painted over a lattice pattern. A third has a pearl edged black French tip, and a fourth pairs a silver bow with lace.
The photo’s own label says “Glossy: finish with Beetles Glossy Top Coat”, which is the brand’s finish guidance for this set. The pink base makes the black art wearable: black as decoration on pink is elegant and easy to wear daily.
Breaking down the four art nails
The lace edged French tip needs a steady liner brush and a light hand: paint the black tip first, then add the lace edge as a thin scalloped line along it. The bow over lattice needs two steps: a fine crosshatch for the lattice, cured, then the bow painted on top so the lines stay crisp.
The pearl edged French is the easiest of the four: paint the tip, place small pearls along the smile line into uncured top coat, cure, and seal around them. The silver bow with lace repeats the first two skills in a lighter colour.
Why a pink base makes black art easier
Black art on a pink base forgives mistakes that black art on a black base cannot. A wobble in a black line on pink cleans up with a flat brush dipped in acetone before curing. The same designs work on shorter nails: shrink the bow, keep the lace edge thin.
Matte Black Almond Nails with Glossy French Tips: Shop the Look
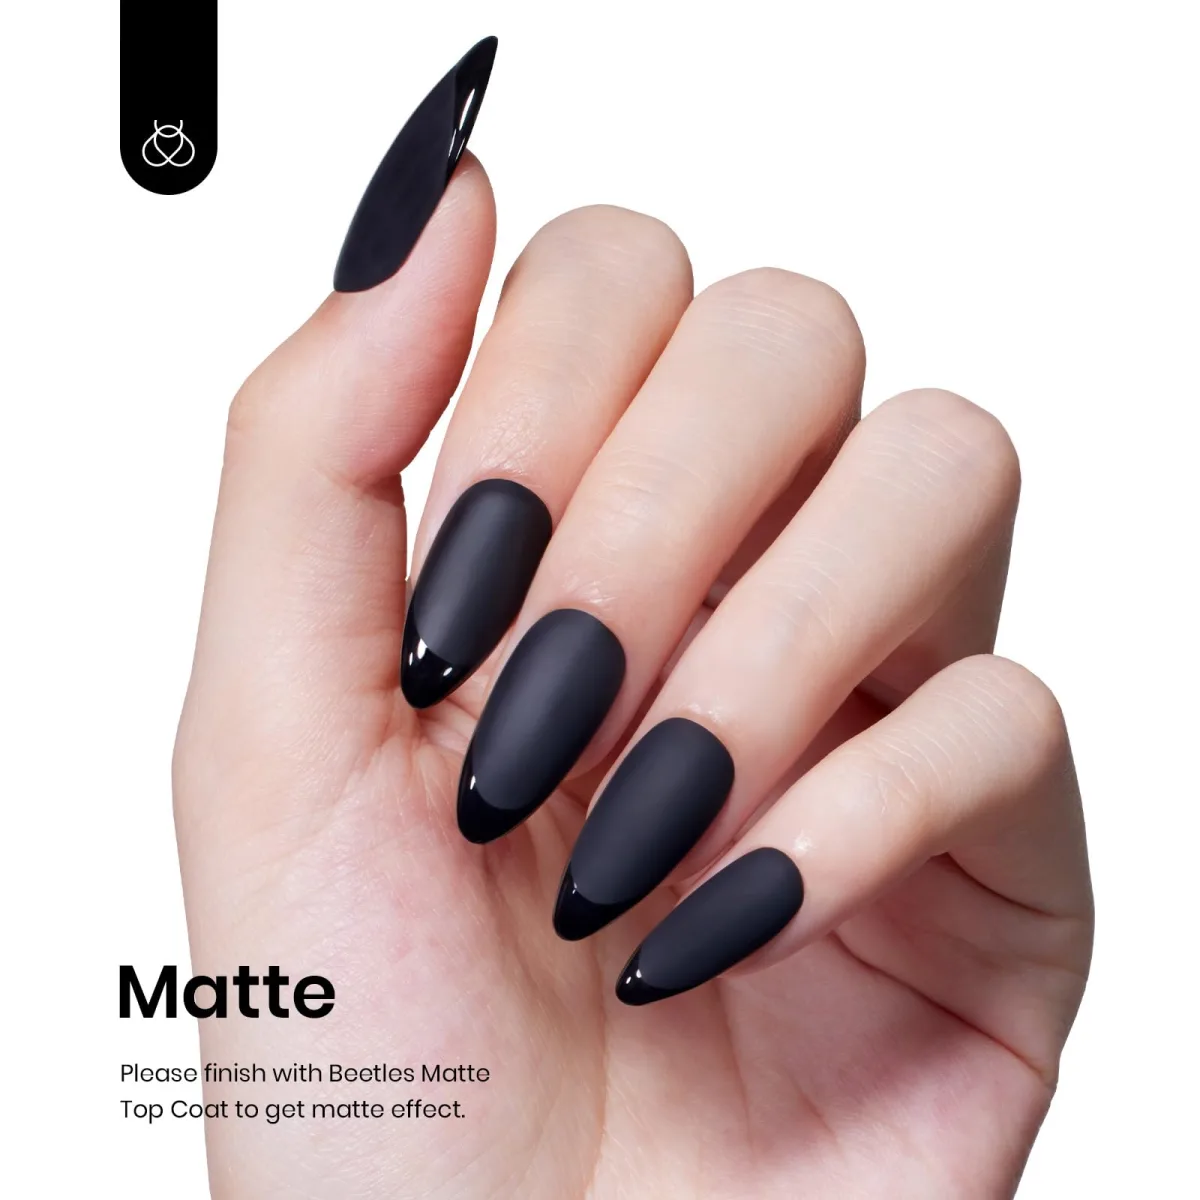
The last photo is the payoff of the whole system: a hand with matte black almond nails finished with glossy black French tips. The photo’s own label says “Matte: finish with Beetles Matte Top Coat”, the brand’s guidance for this look. Two finishes, one black gel nail polish, no extra shade needed. The matte base looks velvety, while the glossy tips catch the light and draw the eye to the nail shape.
Painting glossy tips over a matte base
The method is simple once the order is right. Paint two thin coats of black gel, curing between coats, then apply a matte top coat over the whole nail and cure. Once the matte surface is set, paint a glossy top coat only on the tips in a curved French line, using a thin liner brush or a guide sticker, and cure again.
Keep the smile line at the same height on every nail, and keep the glossy layer thin so it does not pool at the edge. Our matte top coat guide covers the matte step in detail, from application to keeping the finish flat through the week.
Keeping matte black looking matte
Matte black has one weakness: oil. Skin oil, hand cream and cooking oil all polish a matte surface shiny in spots, usually starting at the tips and edges. Wiping the nails with alcohol restores the flat look, and keeping oily products off the nails through the week slows the change. Matte also hides small flaws better than gloss, so chips and regrowth show less. When the set is done, soak it off rather than peeling.
How to Do Black Gel Nail Polish Nails at Home
- Start with the kit. Lay out your lamp, files, clippers, cuticle tools and cuticle oil, and practise the routine on a plain tip before opening the black gel.
- Prep the surface. File to your chosen shape, push the cuticles back, buff away the shine, and clean off all dust and oil so the gel grips.
- Apply a thin base coat, sealing the free edge, and cure for 60 seconds as the brand directs.
- Apply black gel nail polish in thin coats, curing 60 seconds between each as the brand directs. Two coats give full coverage; add a third only if streaks remain.
- Choose your finish. For glossy nails, apply a glossy top coat; for the matte set in this post, a matte top coat, then glossy tips only if you want the two texture look. Cap the free edge and cure for 60 seconds.
- Finish with cuticle oil on the skin around the nails, and sunscreen on your hands before any lamp session, following the dermatology guidance above.
Frequently Asked Questions
What does a black gel nail polish starter kit need to include?
A lamp, prep tools and colour options, in that order. The lamp cures every gel layer, so a weak lamp ruins the whole set. Files, clippers and cuticle tools make the prep that keeps gel on the nail. Colours matter last: plain neutrals for practise first, then black gel once your coats are even.
How many coats of black gel nail polish do I need?
Two thin coats give full coverage for most nails, since black gel nail polish is highly pigmented. Add a third thin coat only if streaks remain after the second. The coats must be thin: thick coats of dark gel wrinkle during curing and leave dull patches. Cure 60 seconds between coats as the brand directs, and cap the free edge with base, colour and top coat.
How do I paint glossy tips over matte black nails?
Paint two thin coats of black, cure between coats, then apply a matte top coat over the whole nail and cure. Once the matte surface is set, paint a glossy top coat only on the tips in a curved French line with a liner brush or guide sticker, and cure again. Keep the smile line even across all nails and the glossy layer thin so it does not pool at the edge.
How do I remove black gel nail polish without staining my nails?
File the shine off the top coat, then soak cotton pads in acetone remover, place them on the nails, wrap with foil, and wait until the gel softens before gently pushing it off. Never peel gel away, since peeling lifts layers of the natural nail. A base coat under the black also stops dark pigment from staining the nail plate, which is the main staining risk with this shade.
Black gel nail polish earns its place as a system, not just a shade: a kit, a brush technique, art to try on pink, and two finishes from one bottle. Start with the kit, practise on a forgiving shade, and follow Beautylicious Hub on Pinterest for more nail ideas like these.