DIY Gel Nail Extensions: Stunning At-Home Gel Nail Kits
DIY gel nail extensions pack a small salon into a box: tips, glue gel, a lamp and the cable to power it, everything you need to add length at home. The five photos in this post walk through the whole system in order, from the kit laid out on a table through the glue gel and mini lamp, to the full product list and the finished nails on real hands. If you have ever wondered what comes inside one of these kits, this is your unboxing tour.
Beetles DIY Gel Nail Kit with Mini UV Lamp for Instant Extensions: Shop the Look
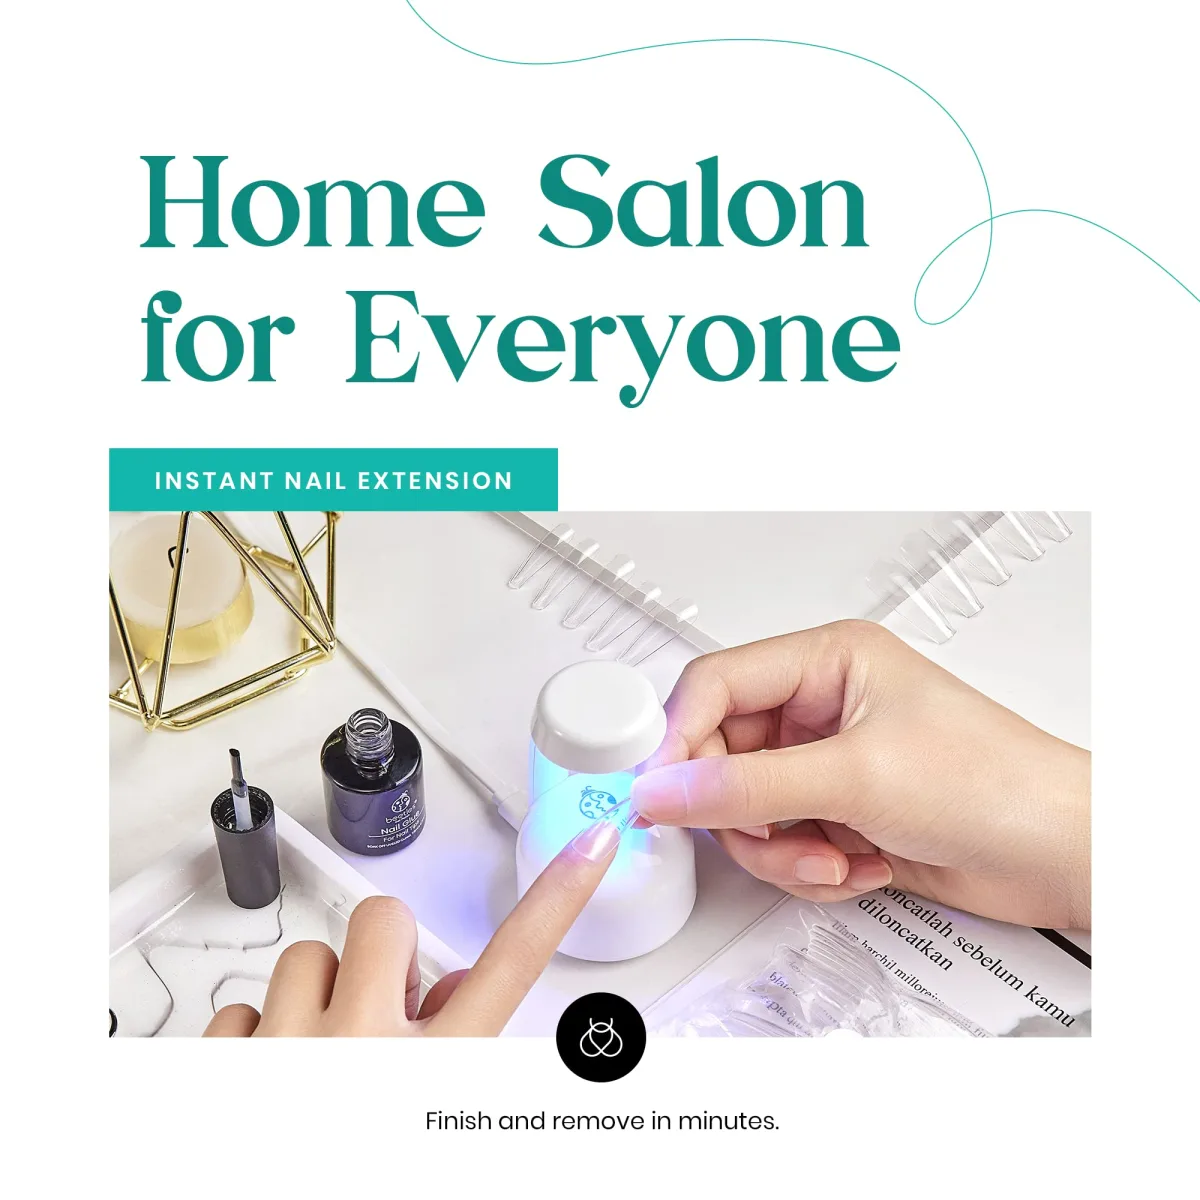
The first photo sets the scene for this whole post. A landscape product graphic headlined “Home Salon for Everyone” shows a white marble table laid out like a workbench: hands curing a finger under a small white mushroom-shaped UV lamp glowing blue, an open dark bottle of Beetles nail glue with its brush cap removed, clear coffin nail tips fanned out in a row, a USB cable, and a sealed bag of nail tips. Nothing about this photo pretends to be a finished manicure. It is the kit, laid out before the work starts: the salon comes to your table. DIY gel nail extensions start with a kit like this one.
What is actually on the table
Read the layout as a checklist. The tips are the length. The glue gel bonds them. The mini lamp cures the bond. The USB cable powers the lamp anywhere a port exists. Every item earns its place. Before buying any kit, ask one question: does it include all four working parts, or will you be ordering the lamp separately afterward? A kit without a lamp is not a complete system, no matter how many tips it ships with. DIY gel nail extensions need every piece shown here.
Setting up a kit corner at home
Olive and June’s extension guide puts it well: lay out your tools on a clean, flat surface and plug in the lamp before you start. Gel work is time sensitive once product is on the nail, so a set-up where everything is within reach beats rummaging through a drawer mid-manicure. Good light helps you see whether a tip sits straight before you cure it. Our gel curing tips explain how the lamp and cure times work once you are set up. DIY gel nail extensions go smoother with a set station.
2-in-1 Gel Nail Glue and Base Gel for Tip Extensions: Shop the Look
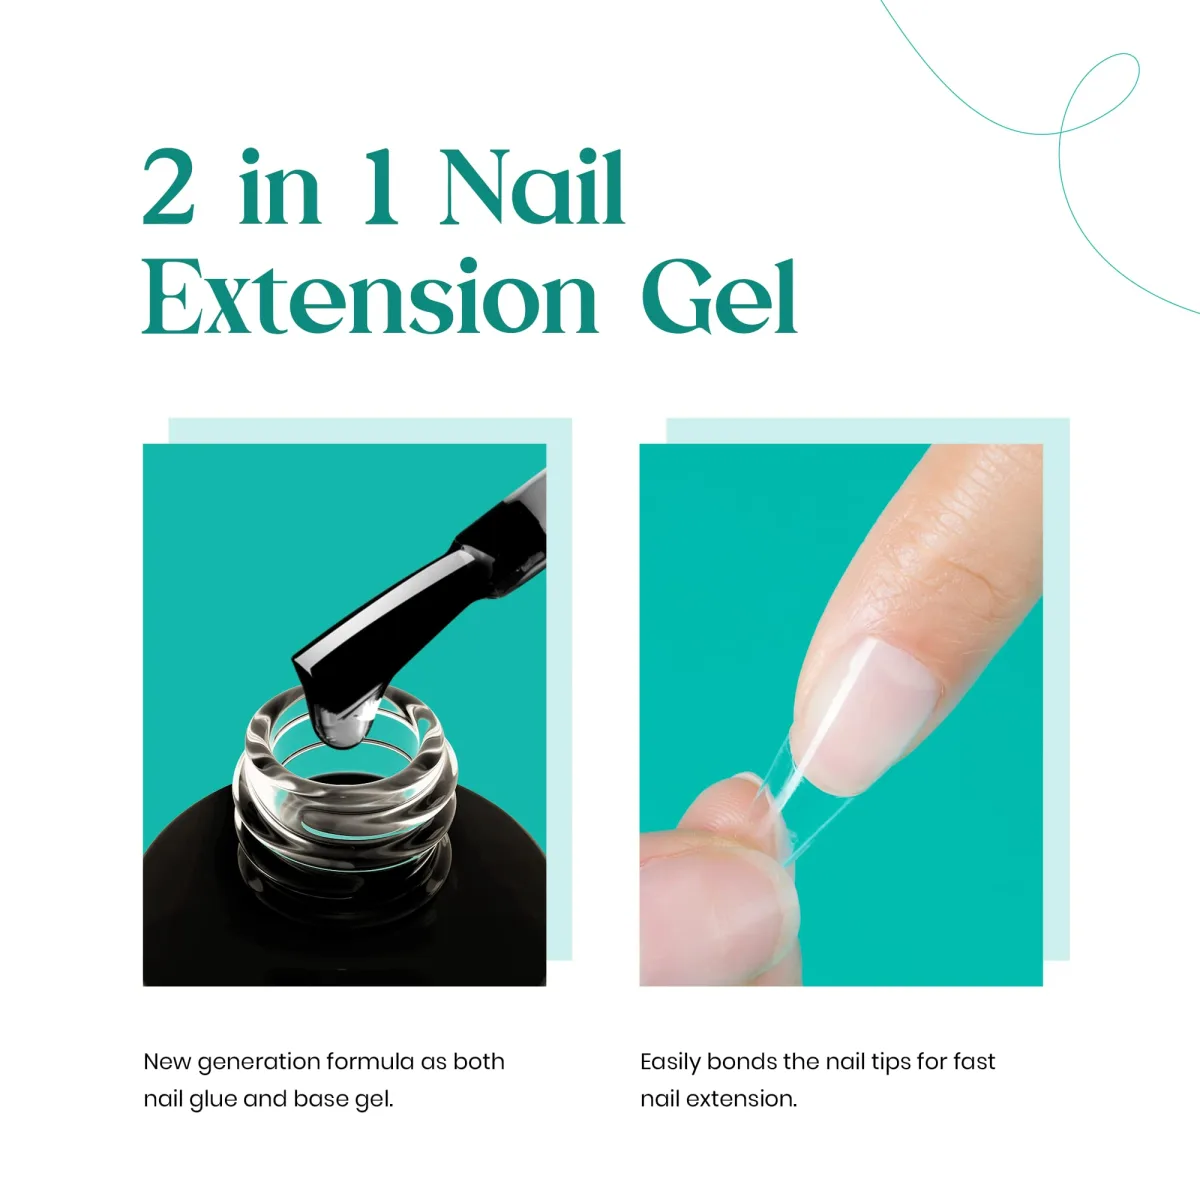
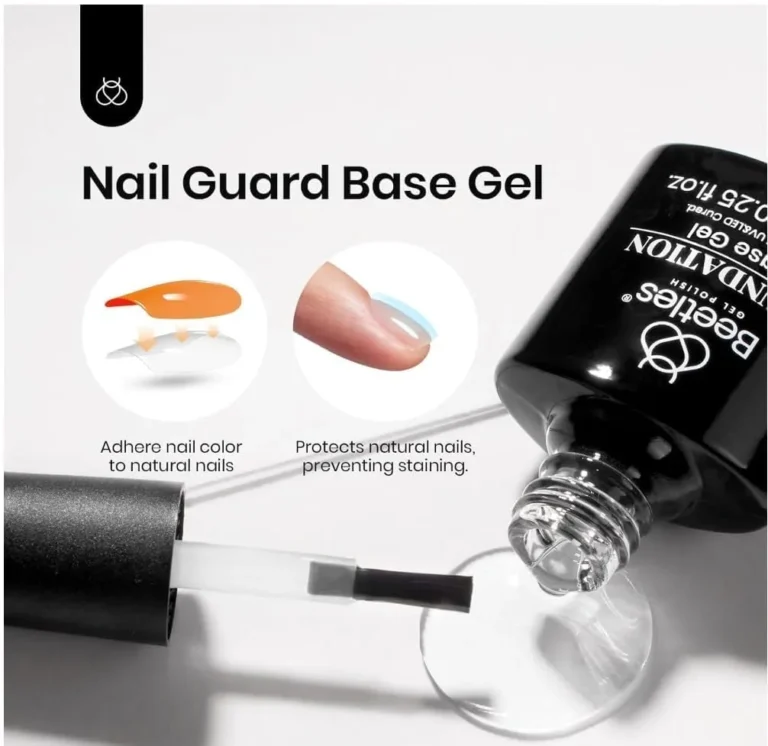
The second photo zooms into the kit’s most important bottle. A two-panel graphic titled “2 in 1 Nail Extension Gel” shows a brush lifting clear gel from an open black bottle on the left, and on the right a close-up of a clear coffin tip being pressed onto a natural pink nail. The captions describe the formula as working both as nail glue and as base gel. One bottle doing two jobs is what keeps a DIY kit compact. DIY gel nail extensions depend on this bonding step.
Glue and base in one bottle: how that works
In a traditional routine, base gel and tip adhesive are separate products with separate steps. A 2-in-1 formula combines them: the same gel that grips the natural nail like a base coat also holds the extension tip in place. Fewer bottles means fewer layers to cure, which helps beginners because every extra step is another chance for dust or uneven product to sneak in. The trade-off is control: you cannot adjust the glue separately from the base, so the application has to be right the first time. DIY gel nail extensions get simpler with a 2-in-1 bottle.
Bonding the tip without flooding the cuticle
The right panel shows the moment that matters most: the clear tip being pressed onto the natural nail. What the photo implies is precision at the cuticle. Gel that floods onto skin cures onto it, and Beetles’ own product warnings flag skin contact as an irritation risk. A thin, even layer of glue gel on the tip, pressed from the cuticle side outward so air bubbles push toward the free edge, keeps the bond clean. Bubbles trapped under a tip are weak points, so this one motion decides a lot about how the extension behaves. DIY gel nail extensions last longer with a clean bond.
Portable Mini LED Nail Lamp with Smart Sensor: Shop the Look
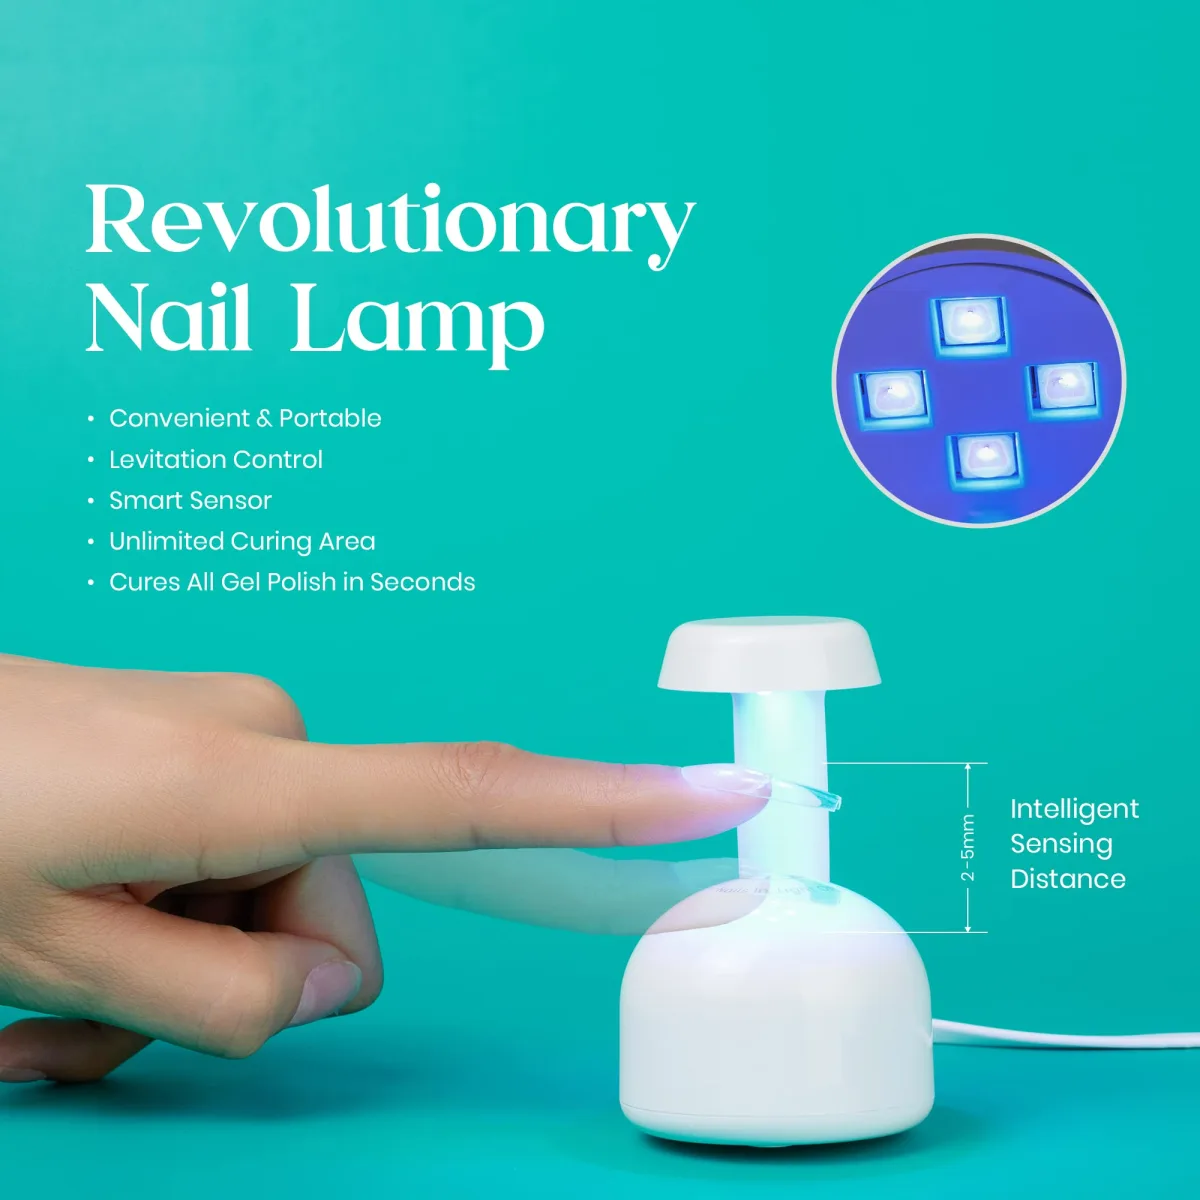
The third photo is devoted entirely to the lamp. A teal product graphic shows the small white mushroom-shaped UV LED nail lamp with a fingertip and clear coffin tip under the lamp head, glowing blue-purple. An inset circle shows the underside with four glowing UV beads, and a diagram labels the 2 to 5 mm intelligent sensing distance. The bullet list claims convenience, portability, a smart sensor and unlimited curing area. It is a humble little device for the job it does, because without it, none of the gel in this kit hardens at all. DIY gel nail extensions need a lamp that cures fully.
Why a lamp belongs in the kit
Gel is not polish. Polish dries in air; gel stays liquid until ultraviolet light triggers the reaction that hardens it. That is why a lamp is not an accessory to this kit but a core component, and why a kit that includes one is worth more than the parts list suggests. The smart sensor is practical: the lamp turns on when your finger goes under and off when it comes out, so you are not fumbling for a button with wet gel on your nails. DIY gel nail extensions stay liquid without UV light.
Portable does not mean optional: cure fully
The graphic’s bolder claims are ad copy, but the one instruction every official source agrees on is real: use a compatible UV or LED lamp and follow each product’s curing instructions. Beetles’ official guide says exactly that. Under-curing leaves gel soft underneath while the surface looks done, and soft gel lifts, wrinkles and can irritate skin. Cure each layer for the full time your product and lamp specify, even if the surface already looks dry. A portable lamp cures as well as a big one as long as you give it the full cycle.
500 Piece Clear Coffin Nail Tips with Glue Gel and Lamp Set: Shop the Look
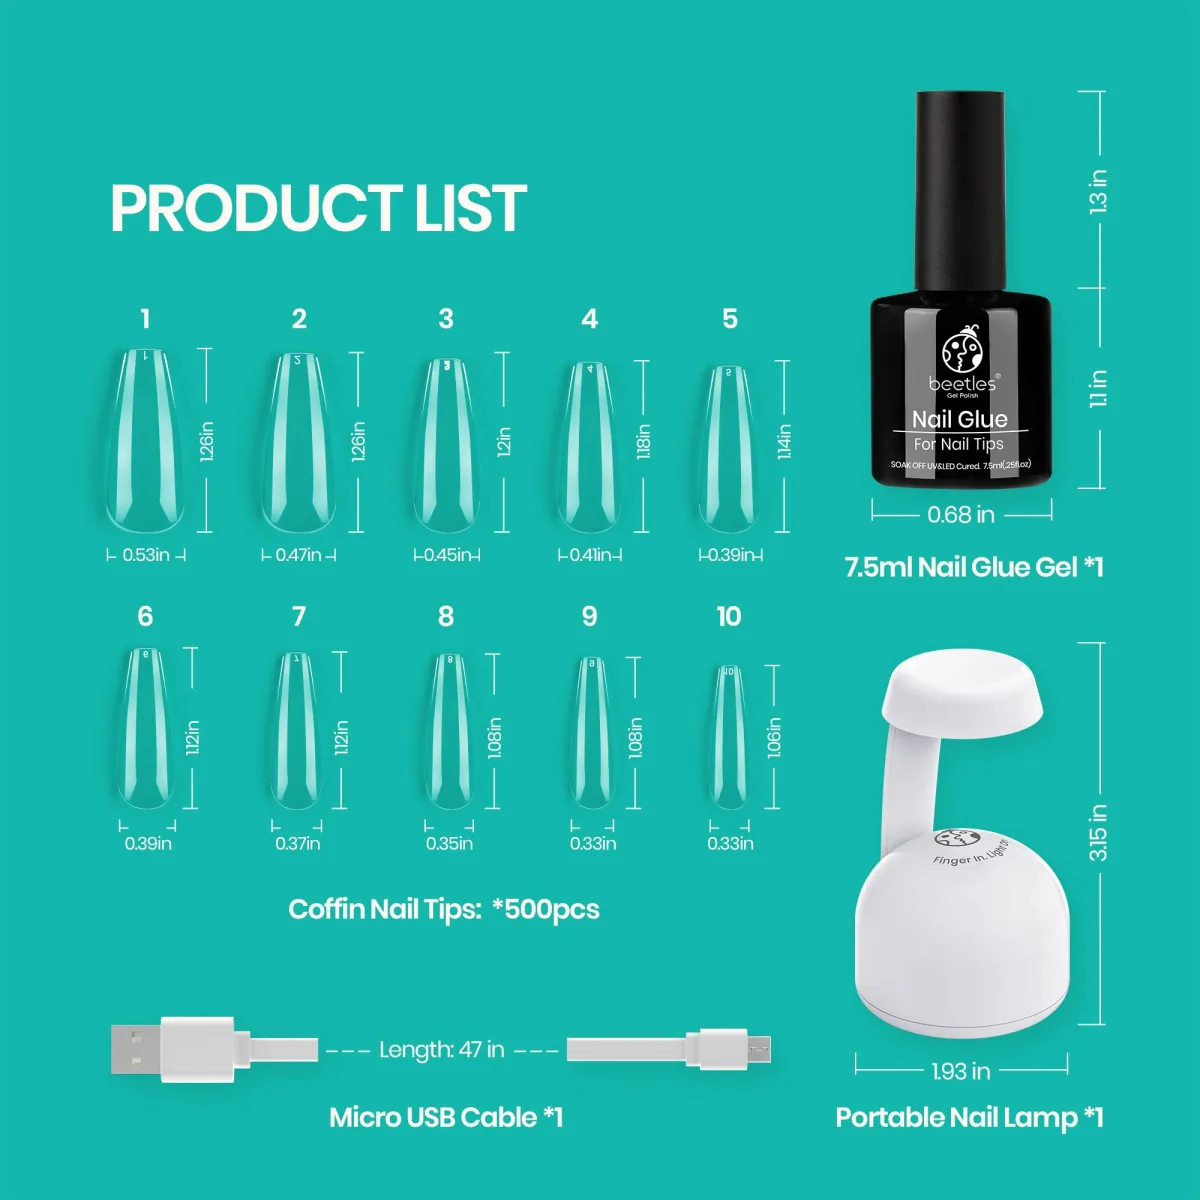
The fourth photo is the spec sheet, and for a DIY kit it is the most useful image in the set. A teal PRODUCT LIST graphic shows exactly what the box contains: 500 clear coffin nail tips in ten numbered sizes (tip 1 is 0.53 inches wide), one 7.5 ml bottle of nail glue gel, one portable nail lamp, and one 47-inch micro USB cable. No marketing language, just quantities. When comparing kits, this is the photo style you want, because it answers the only question that matters before buying: what do I actually get? DIY gel nail extensions offer plenty of sizes to try.
Size before glue: how to fit tips
The ten numbered sizes are the detail to notice: tips 1 through 10 cover a range of nail widths, and fitting happens before any glue is involved. Hold each tip against its natural nail and check it covers edge to edge without pressing into the sidewalls. Too narrow leaves the nail bed exposed at the sides. Too wide means the tip edges sit on skin, where gel lifts early. Sort a full set of ten first, so you are not hunting for sizes with glue already on your fingers. DIY gel nail extensions fit best when sized first.
Why 500 tips is a starter advantage
Five hundred tips sounds like a lifetime supply, and for a beginner that is the point. Your first sets will include mistakes: a tip bonded crooked, a size misjudged, a set worth redoing. With 500 pieces across ten sizes, a practice set costs almost nothing, so you can afford to remove and redo. The tips are the practice material; the lamp and glue are the durable investment. Our long coffin shape ideas show what this tip shape looks like once decorated. DIY gel nail extensions give beginners room to practice.
High-End Long Coffin Gel Nail Tips with Abstract Art: Shop the Look
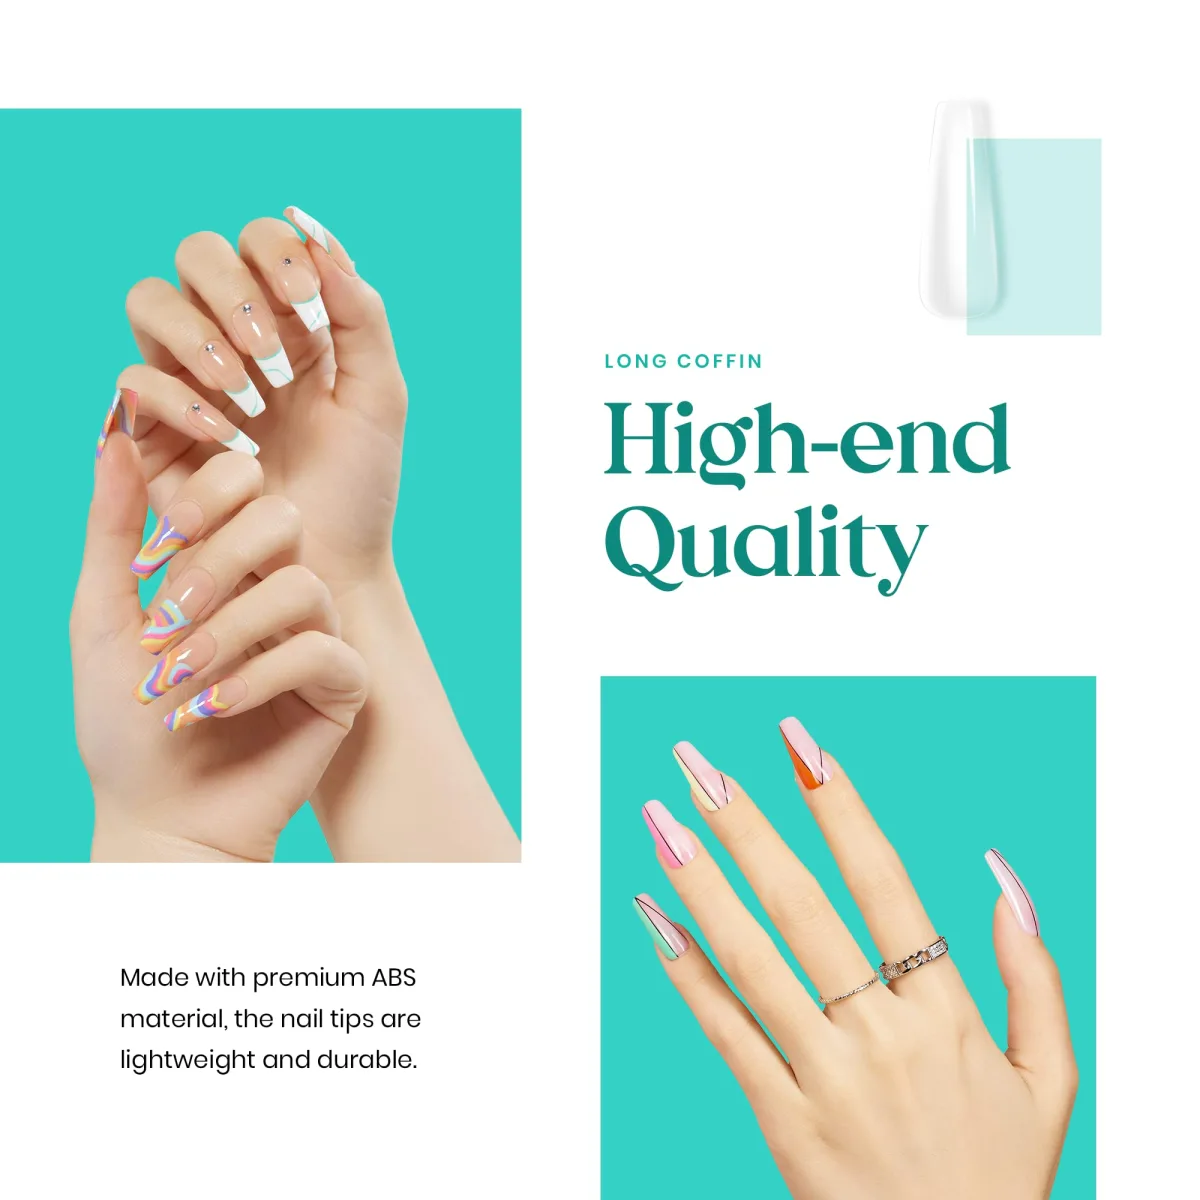
The final photo shows where all of this ends up. A composite graphic displays two hands against teal wearing long coffin nails in three styles, nude with white French tips, white tips with single rhinestones, and multicolour pastel abstract swirls, plus an inset of a hand in pale pink with fine dark line art. The headline reads LONG COFFIN / High-end Quality. These finished looks prove that clear tips, glue and a lamp can end in designs that look deliberate and styled. DIY gel nail extensions end with nails like these.
Three design styles from one tip shape
The observation is variety from a single starting point. Every nail in the insets began as the same clear coffin tip from the product list photo. One set went French, one went rhinestone, one abstract swirls, one line art. The tip shape is the constant; the decoration is the variable. That is the creative range of a DIY kit. You are not buying one look. You are buying the blank length every look starts from, and changing designs costs only polish and art supplies, not a new salon appointment.
From clear tip to art: the finishing layer
From the clear tips in photo two to these finished nails, the path runs through colour, art and seal. After bonding and shaping, the tips take gel colour like any nail surface, then art goes on top, and a top coat seals everything. Skipping the seal is the beginner mistake: art without top coat chips at the first sign of daily life. A thin no-wipe top coat over the finished design locks the French tips, rhinestones and swirls under one smooth layer. For the other main length method, our clear poly gel guide covers the sculpted alternative to tips.
How to Apply DIY Gel Nail Extensions at Home
- Set up your station. Lay out the tips, glue gel, lamp and cable on a clean, flat surface with good light, and plug in the lamp before you start.
- Prep your natural nails. Trim and file your shape, push cuticles back, lightly buff the shine off the nail surface, then clean away dust and oil.
- Sort your tip sizes. Match each natural nail to a clear tip that covers edge to edge without pressing into the sidewalls, and lay the ten out in order.
- Bond one nail at a time. Apply a thin, even layer of the 2-in-1 glue gel, press the tip on from the cuticle side outward to push out air, and hold it straight.
- Cure under the mini lamp for the full time your product instructions specify, checking that no gel has flooded onto the skin before curing.
- Shape and finish. File the tips to your final length and shape, apply colour gel in thin coats with curing between each, add your art, and seal with a thin top coat.
One safety step is worth adding. The American Academy of Dermatology recommends a broad spectrum, water resistant sunscreen with SPF 30 or higher on your hands before a gel manicure, since the polish is sealed using ultraviolet light.
Frequently Asked Questions
What should a complete DIY gel nail extension kit include?
Four working parts: clear extension tips in multiple sizes, a glue gel or 2-in-1 glue and base formula, a UV or LED lamp, and the cable to power it. If a kit is missing the lamp, budget for one separately, because gel cannot harden without it.
How do I find the right tip size for each nail?
Fit before glue. Hold each numbered tip against its natural nail and pick the one that covers edge to edge without pressing into the sidewalls. A tip that is too narrow exposes the sides; one that is too wide sits on skin and lifts early. Sort all ten before any product is open, and recheck after filing, since shaping changes the fit.
Can I remove gel tip extensions at home without damage?
Yes, with the soak-off method, not by peeling. Beetles’ official removal guide says to file the top coat first to break the seal, then lift the softened product away gently instead of forcing it, and finish with cuticle oil. Peeling a bonded tip pulls layers of the natural nail with it, which is the damage people blame on the kit when removal was the real culprit.
Do I really need a UV or LED lamp for DIY extensions?
Yes. The glue gel and any gel colour in these kits stay liquid until ultraviolet light cures them; air drying does nothing. That is why the lamp is part of the kit, not an optional add-on. Use it for the full cure time your product specifies per layer, because an under-cured layer looks dry on top while staying soft underneath.
Start with the kit, practice the bond, and follow Beautylicious Hub on Pinterest for more nail ideas like these.