Autumn Red and Orange Nails for Stunning Fall Looks
Autumn Red and Orange Nails for Stunning Fall Looks
Autumn red and orange nails are autumn in nail form, and this post treats them as a wardrobe, not a single shade. The five photos walk through it: the red-orange gloss manicure at its centre, the chrome powders that dress those tones up, black lace as their evening companion, Halloween sticker art for the orange and black days, and the sequence that keeps strong colour even. For autumn leaf art specifically, see our autumn leaves colors guide.
Black Lace Over Red and Orange: The Tonal Companion: Shop the Look
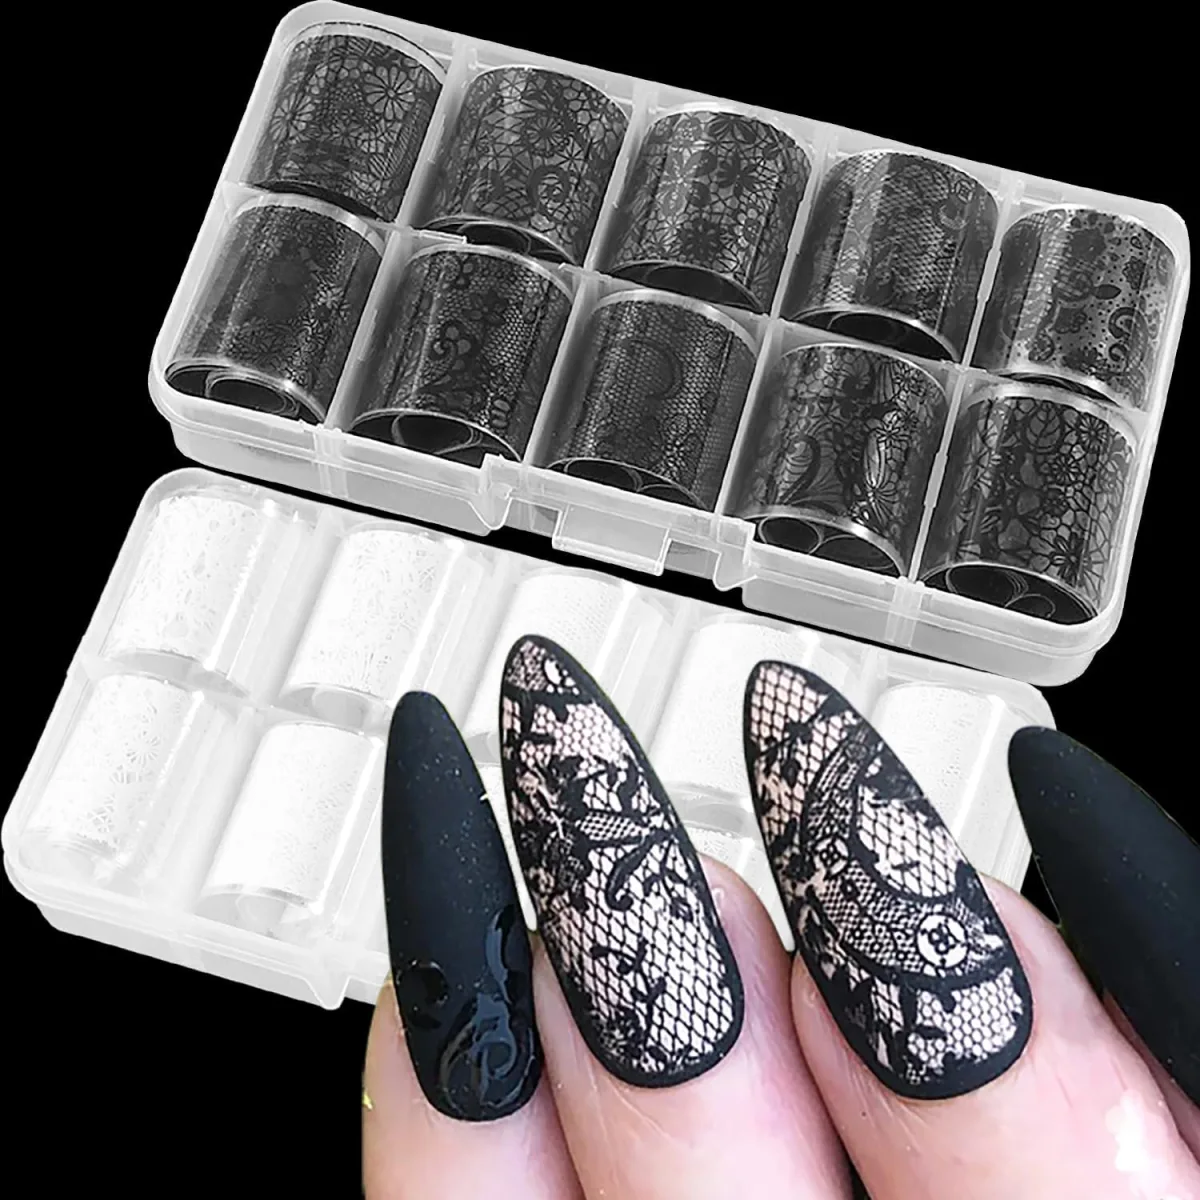
The first photo is the surprise of the set: rolled black lace transfer foils, floral, paisley and mesh patterns, stored in a divided box, with long stiletto samples in front, one solid matte black and two carrying the black lace overlay. No red, no orange. But lace is here for a reason: black is the frame that makes autumn reds and oranges look more expensive. Worn as an accent against a red-orange set, it gives the season’s colours their evening version. Autumn red and orange nails gain their evening version from this black frame, since lace softens bright sets without hiding them.
Why black lace works with autumn brights
Strong warm colours need contrast, or they blur into one hot mass. A black lace accent, on one or two nails, breaks up a red-orange set and makes the remaining colour nails look richer by comparison. The effect works because lace is patterned darkness, not flat black: the mesh and floral openings let the base show through, so the nail reads as texture rather than a void.
This pairing suits late autumn best, when the wardrobe turns dark and the bright October oranges start feeling too loud on their own. One lace nail per hand is enough. Two starts reading as a black set with red guests. Autumn red and orange nails stay balanced this way, because one patterned accent stops warm colour from turning into a single hot mass.
How lace foils actually attach
Transfer foils are the rolled films in this box, and they stick to a tacky surface. In practice that means a cured colour or a tacky base layer, pressed on, then sealed under top coat so the delicate film does not tear with wear.
The finish underneath changes the result: over a glossy red the lace looks sharp and graphic, over a matte black, like the solid sample nail in this photo, it reads soft and velvety. Foil is thin and tears if you fight it, so work slowly, press rather than drag, and accept that the pattern lands slightly differently on every nail. That irregularity is what makes it look like real lace instead of a print. Autumn red and orange nails benefit from this slow press, since a torn foil over a glossy red shows at once.
The Red Orange Gloss Manicure: The Core Look: Shop the Look
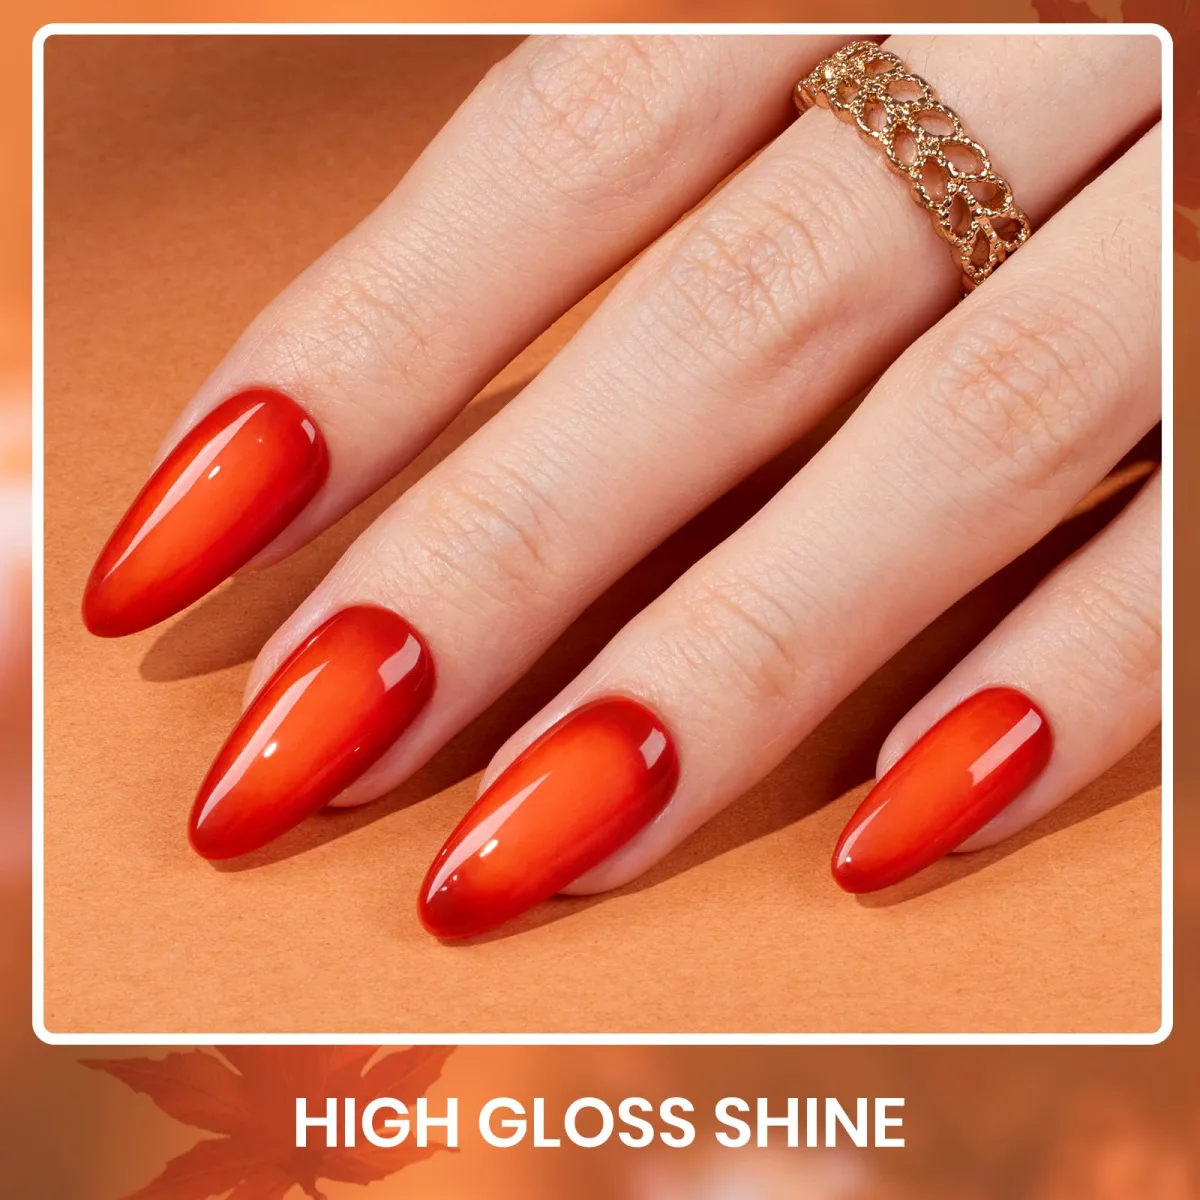
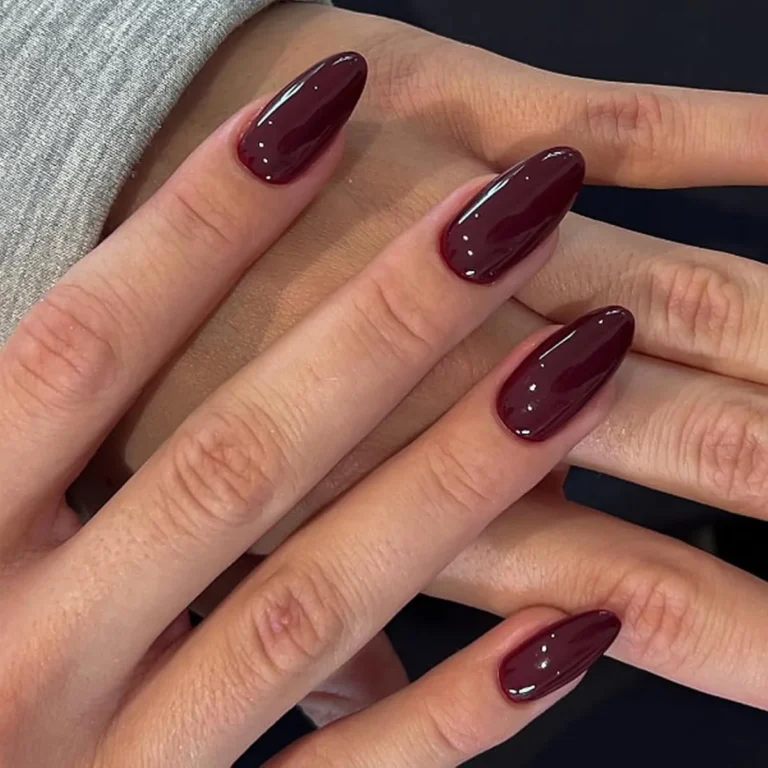
This is the tonal heart of the post. Long almond nails in a glossy gradient from deep red at the edges to bright orange-red in the centre, worn with a gold filigree ring, under the graphic’s own “HIGH GLOSS SHINE” banner. The gradient does what no single flat shade can: it lets red and orange share one nail without a hard line between them. Autumn red and orange nails meet in this gradient, where deep red at the edges and bright orange-red at the centre share one nail.
Which reds and oranges, and in what order
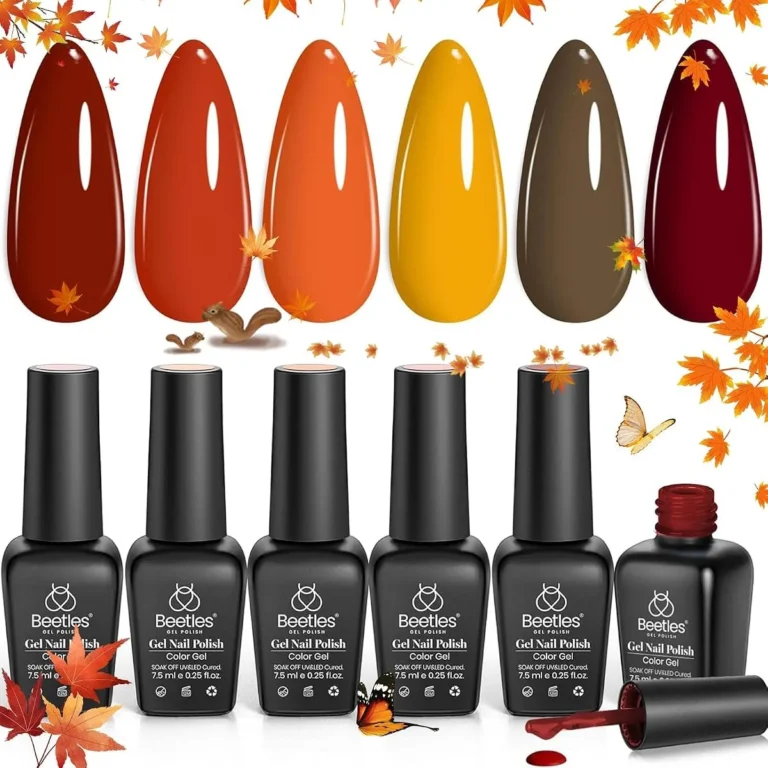
Autumn’s red-orange family runs a clear spectrum, and knowing the order makes styling easy. At the deep end sit oxblood and burgundy, nearly brown-reds for evenings. Then come crimson and classic red, the most versatile middle. Then burnt orange and terracotta, the earthy daytime pair. Then bright pumpkin and coral orange, the loudest end.
This photo places the deep end at the nail edges and the bright end in the centre, which flatters because the darkest colour frames the finger where the nail meets the skin. A full set in one flat burnt orange is the simplest autumn manicure there is. A set that melts from crimson to pumpkin, like this one, is the same family with more drama. For deeper reds on their own, our dark red gel nail polish ideas go further.
Picking your red orange by undertone
Warm oranges flatter warm undertones and can fight cool ones, while true crimson reds are forgiving across the board. If you are unsure, use the wrist test: greenish veins suggest warm, bluish suggest cool. One habit saves more disappointment than any rule: cure a test swatch first, since some warm shades shift cooler under the lamp. A spare tip, one coat, one cure, checked in daylight, tells the truth before the whole set commits. Bright colours show uneven nail lengths more than nudes do, so file to match first. Autumn red and orange nails suit most undertones once the test swatch confirms the shade, because crimson stays forgiving across the board.
Copper, Gold and Bronze: Chrome Powders in Autumn Metal: Shop the Look
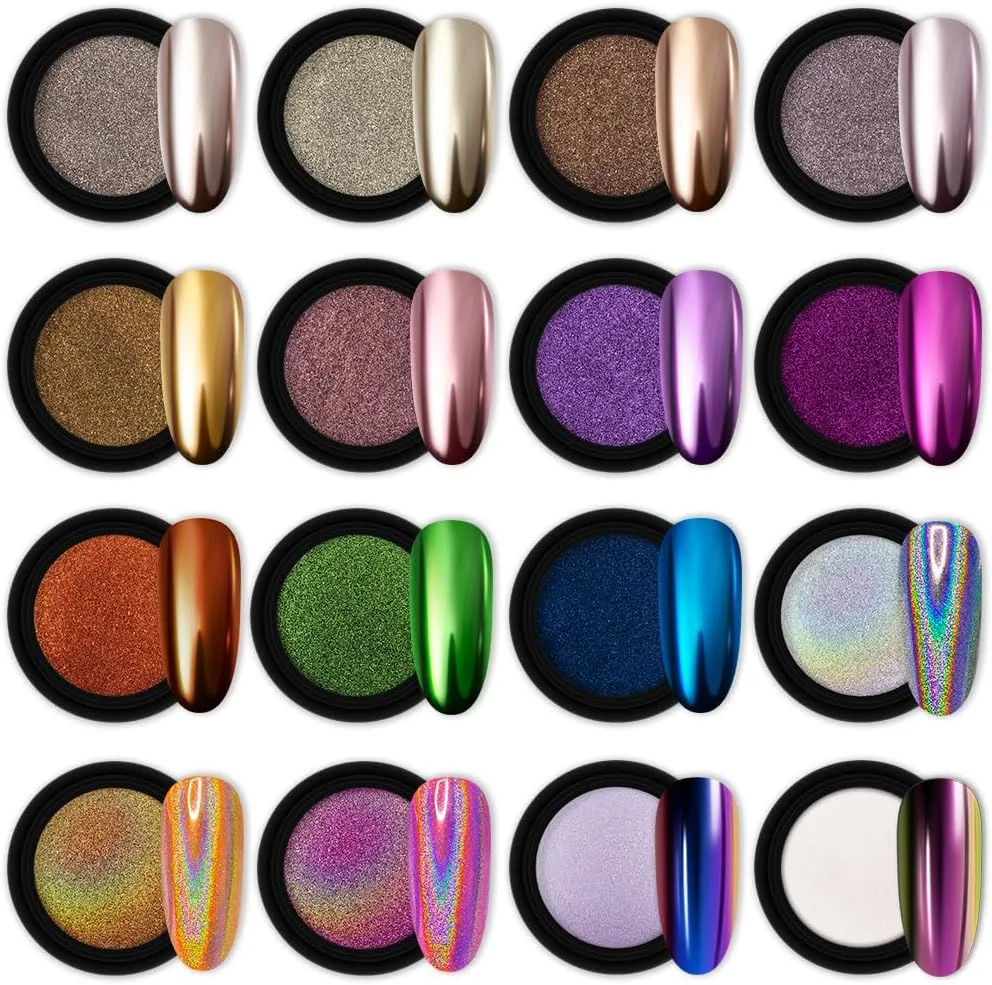
The third photo is a grid of sixteen chrome and mirror powder pots, each with its own almond sample tip: silver, champagne, bronze, mauve, gold, rose, lilac, magenta, copper orange, green, blue, holographic, iridescent gold, pink rainbow, blue-violet and magenta-gold duochromes. For an autumn red and orange wardrobe, three of these matter most: the copper orange, the gold and the bronze. Autumn red and orange nails take their metal accents from this grid, with copper orange, gold and bronze mattering most.
Which powder for which autumn mood
Copper is the daytime metal: it echoes burnt orange polish and looks natural with knits and denim. Gold is the evening metal: it picks up warm jewellery and pairs with crimson rather than orange. Bronze sits between the two and flatters the widest range of skin tones. The trick is to match the metal to the polish family, not to mix metals across one set. A copper chrome accent beside terracotta nails reads intentional; the same copper beside a cool silver-blue set reads accidental. For one combination that always works, wear solid burnt orange on most nails and put the copper chrome on the ring finger only. Our chrome nail powder guide covers the powder family in more depth.
How chrome powder goes on
Chrome is a technique, not just a product, and the general method is the same across brands. The powder needs a smooth, fully cured, non-tacky base, which is why it is usually rubbed over a no-wipe top coat rather than bare colour. A small amount goes on an applicator, gets buffed across the nail until the mirror effect builds, the excess is dusted away, and the whole thing is sealed under top coat so the metal does not rub off with wear.
Two honest caveats. The base colour changes the result completely: copper over orange and copper over black are different looks. And the mirror is only as smooth as the layers under it, so thin, even coats before the powder decide the finish. Autumn red and orange nails gain their mirror finish only over a smooth base, so thin coats before the powder decide the result.
The Application Sequence That Keeps Autumn Shades Even: Shop the Look
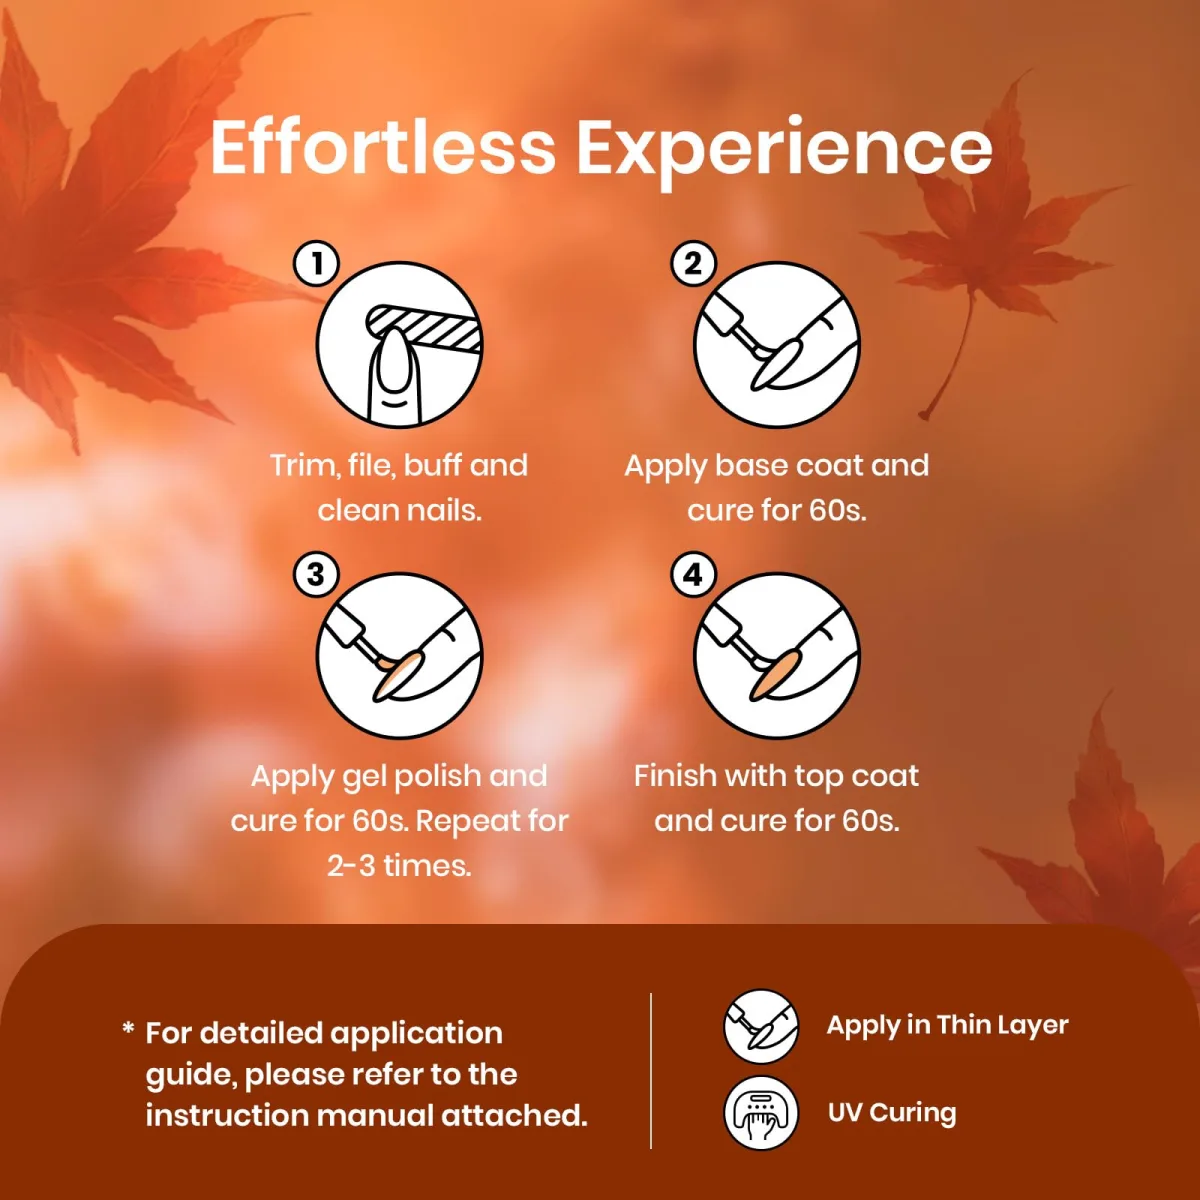
The fourth photo is the same “Effortless Experience” infographic used in our extension building post: four numbered steps, trim, file, buff and clean; base coat and cure; gel polish and cure, repeated two to three times; top coat and cure, with “Apply in Thin Layer” and “UV Curing” in the footer. It earns its place here for a different reason. Strong autumn pigments are the least forgiving colours to apply, so the sequence matters more for them than for a sheer nude. Autumn red and orange nails demand this sequence more than sheer nudes do, because strong pigments forgive no skipped step.
Two or three thin coats: the evenness rule
Deep reds and oranges show every streak. One thick coat of a strong pigment cures unevenly, wrinkles at the edges and leaves the centre darker than the sides. Two or three thin coats, each cured before the next, build the colour gradually, and that layering is what gives the gradient in this post’s second photo its smooth melt.
The infographic’s numbers are its own product’s timings, not a universal law; cure by your brand’s and lamp’s instructions. The transferable rule is the structure: prep, base, thin colour layers, top, with a cure between every layer. Autumn red and orange nails stay even when colour is built in thin, cured layers, since one thick coat wrinkles at the edges.
Keeping dark orange off the skin
The second reason this infographic matters is the cleanup it implies but does not show. Strong pigments stain. Gel that floods the cuticle or sits on the skin cures into a ragged dark edge that no top coat hides, and orange pigment on the surrounding skin is visible for days.
Clean up each nail before it goes under the lamp, not after: a wooden stick or a fine brush with a little cleanser, tracing the cuticle line while the gel is still wet. A base coat under the colour also helps, because it stands between the pigment and the natural nail and reduces the staining that deep reds and oranges leave behind. Autumn red and orange nails look cleanest when cleanup happens before curing, because orange pigment stains skin for days.
Halloween Stickers: Orange and Black Art on Nude: Shop the Look
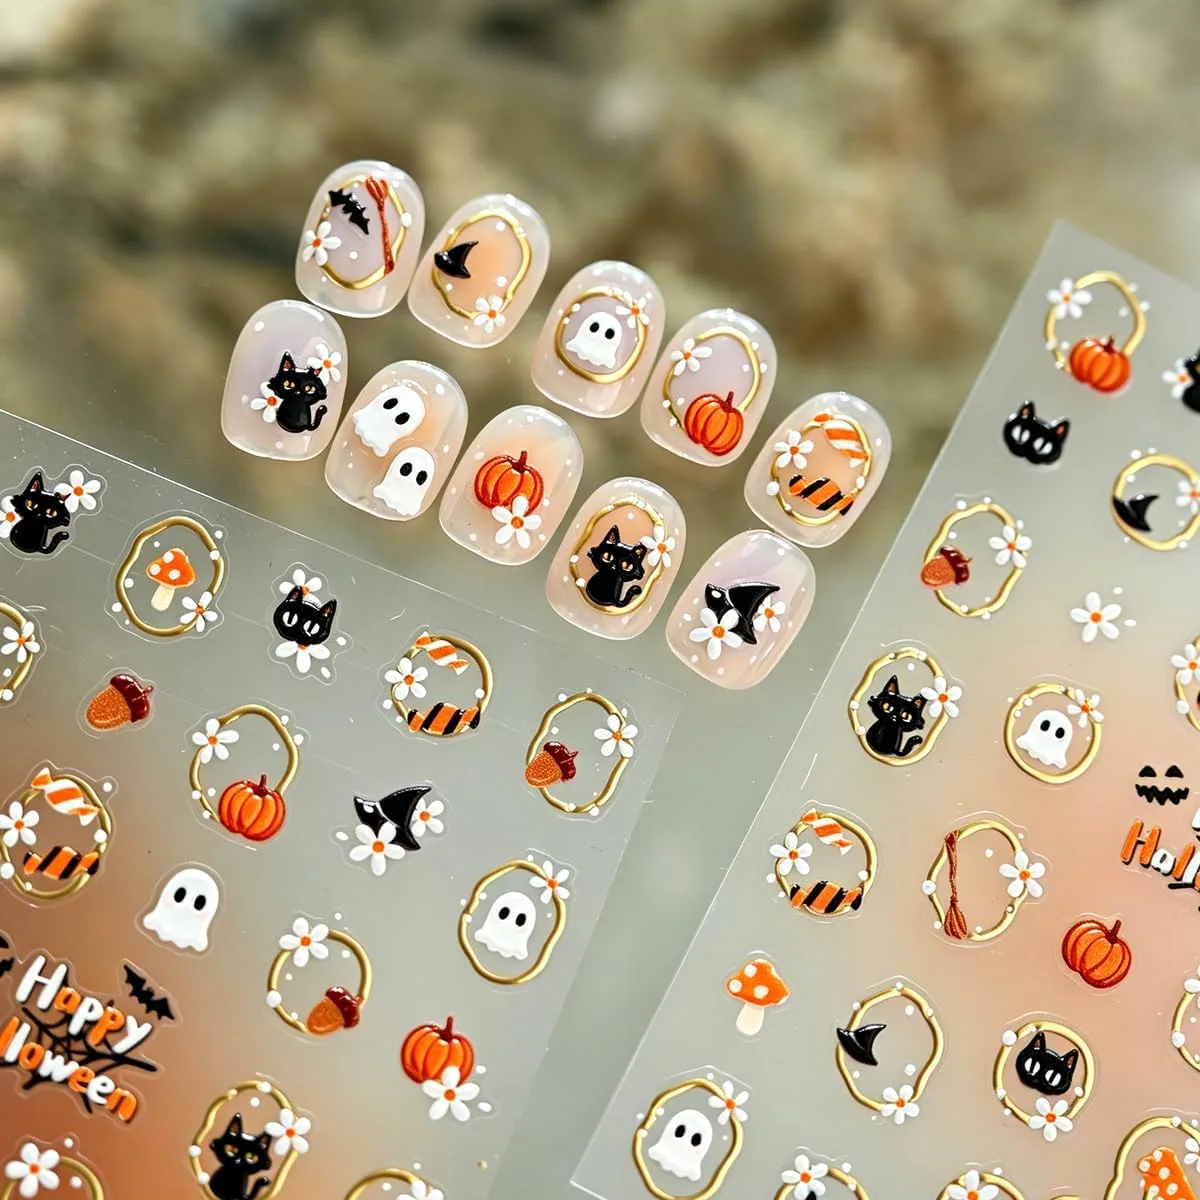
The last photo closes the tonal story at its most playful: a Halloween sticker sheet, black cats, white ghosts, pumpkins, mushrooms, candy corn, gold frames, daisies and “Happy Halloween” lettering, shown on short nude press-on tips decorated with the designs. Orange and black are autumn’s costume colours, and stickers are the lowest skill way to wear them. Autumn red and orange nails turn playful here, where orange and black stickers offer the lowest skill way to wear the season.
Nude bases make sticker art pop
Notice the base under the art: a sheer nude, not white and not clear. Nude does two jobs for sticker designs. It gives the black and orange motifs the contrast they need without the harshness of a white background, and it keeps the nail looking like a nail rather than a tiny canvas.
That is why the pumpkin and the black cat read so cleanly here. One design per nail is the rule that keeps sticker art chic instead of busy: a ghost on one nail, a pumpkin on the next, a gold frame on the third. The daisies and gold frames on this sheet are the quiet option for anyone who finds the cats and ghosts too literal. Autumn red and orange nails read cleanly over a sheer nude base, since the motifs gain contrast without a harsh white background.
Sealing stickers so they survive October
Stickers fail when their edges lift, and edges lift when they are left exposed. The method that works is a sandwich: cured colour or base, sticker pressed down firmly with no air under it, then top coat over the whole nail, wrapping the free edge so the film is fully encapsulated. Keep the sticker a hair inside the nail’s edges rather than flush with them, because a film that hangs over the edge catches on everything and peels.
Thick 3D style stickers need a slightly heavier top coat layer to level over them. Done right, a sticker set lasts the whole Halloween stretch; done wrong, the ghost is gone by the weekend. Autumn red and orange nails keep their sticker art only when the film is fully encapsulated, because exposed edges lift and peel.
How to Apply Autumn Red and Orange Nails at Home
- Prep first. Trim and file to matching lengths, push the cuticles back, lightly buff the shine off the natural nail, then clean the surface so it is dry and free of oil and dust. Bright colours punish uneven prep, so take your time here.
- Apply a thin base coat, capping the free edge, and cure for the time your polish and lamp specify. The base coat protects the nail from staining by strong pigments.
- Add the colour in two or three thin coats, curing each fully before the next. Clean up any gel on the skin before each cure, while it is still wet.
- Add your autumn detail: a chrome powder accent over a no-wipe top coat, a lace foil on one nail, or stickers pressed onto the cured colour.
- Seal everything with a thin top coat, capping the free edge again, and cure for the final time. Wipe only if your top coat is a wipe formula, then massage cuticle oil around each nail. Our step by step nail care routine covers the habits that keep nails healthy between autumn sets.
One safety step is worth adding. The American Academy of Dermatology recommends a broad spectrum, water resistant sunscreen with SPF 30 or higher on your hands before a gel manicure, since the polish is sealed using ultraviolet light.
Frequently Asked Questions
Which autumn red suits my skin tone?
Start with your undertone, then test. Warm undertones usually take burnt orange, terracotta and copper comfortably; cool undertones often do better with crimson and oxblood, which carry blue. Whatever the rule says, cure a test swatch on a spare tip first, because some warm shades shift cooler under the lamp.
Can I mix red, orange and black in one set?
Yes, with one anchor. Keep most nails in the red-orange family and let black appear once: a lace foil, a matte accent or a sticker design. Two or more black nails and the set becomes a black manicure with autumn guests.
How do I make a red to orange gradient at home?
Paint the deeper shade toward the cuticle and the brighter orange toward the tip, then blend where they meet with a latex makeup sponge before curing, working in thin layers. Cure between passes so the colours do not muddy. A glossy top coat at the end smooths the transition visually, which is why the gradient in this post’s second photo looks liquid.
Do chrome powders work on short nails?
Yes. Chrome is a surface effect, and a copper or gold chrome on short nails is one of the easiest autumn upgrades. The mirror only looks as good as the layers beneath it, so thin, even base coats matter more on short nails, where every flaw sits closer to the eye.
Pick your end of the red-orange spectrum, keep the layers thin, and follow Beautylicious Hub on Pinterest for more autumn nail ideas.