Healthy Gel Manicure Formula Features for Gorgeous Nails
A healthy gel manicure is not one product. It is the formula you choose, the way you apply and remove it, and what you do with your nails between sets. The five photos in this post tell that story from four angles: a shine advertisement, a healthy formula infographic, two press-on alternatives, and an everyday colour look.
Two of the photos show press-on nails rather than gel, and they are included on purpose: alternating with gentler options is one of the simplest ways to keep natural nails strong. A dermatologist backed step by step nail care routine sits behind everything below.
High Gloss Shine: What Keeps Gel Looking Wet and Smooth: Shop the
Look
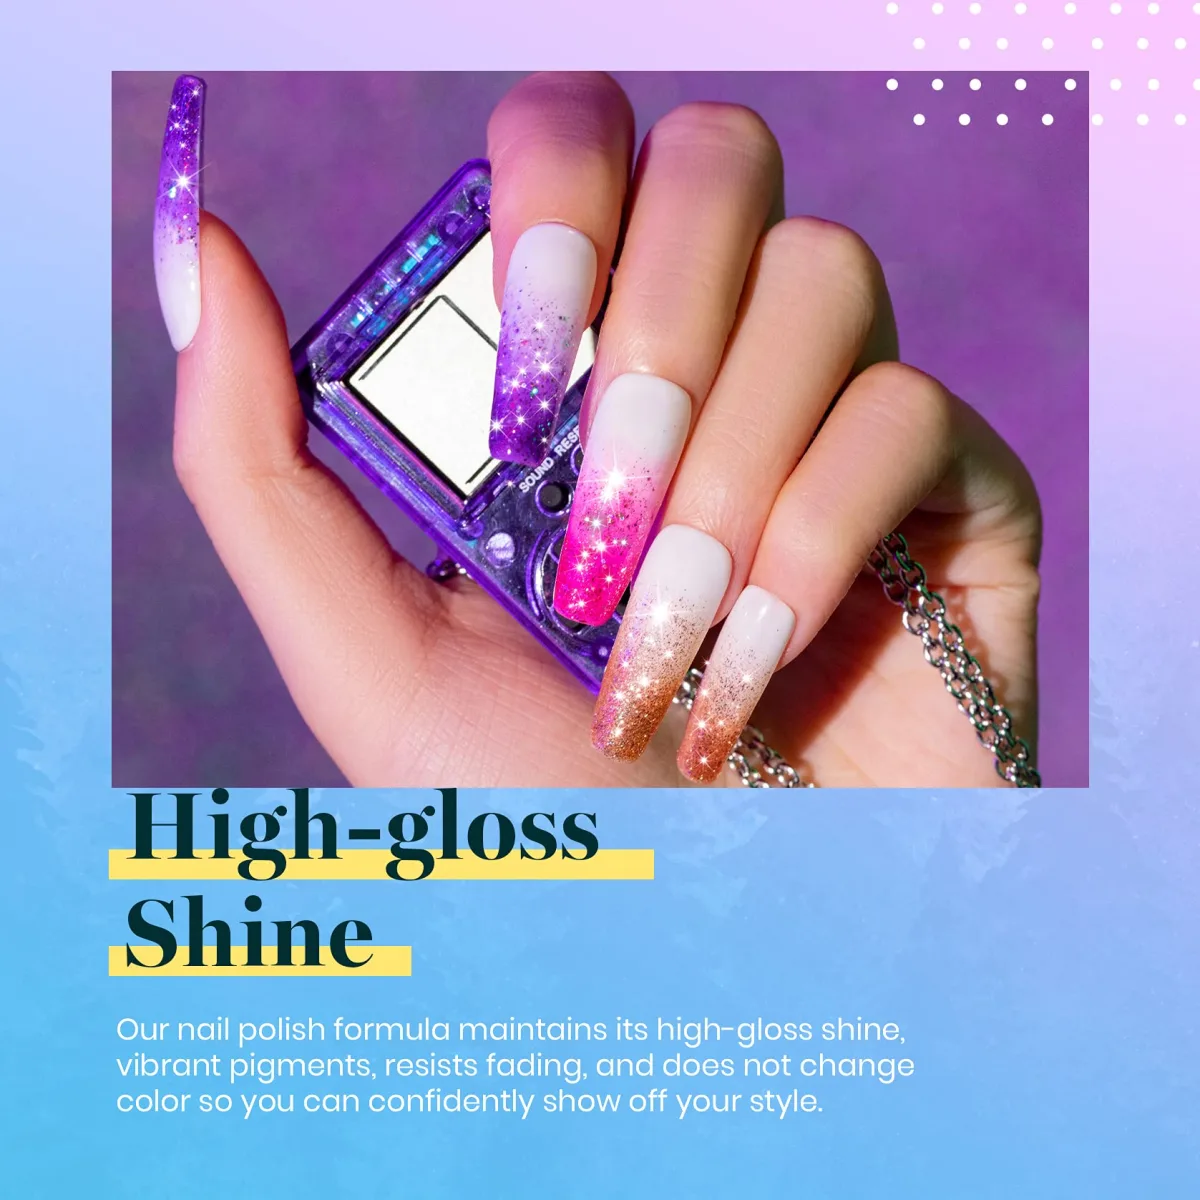
The first photo is an advertisement, and it should be read like one. Long coffin nails wear a white base with glitter fading down from the tips in purple, hot pink, and rose gold, and the hand holds a small purple glittery gadget. Across the bottom, the graphic’s own marketing text promises that the formula keeps its high gloss shine, carries vibrant pigment, resists fading, and does not change colour. Those are the brand’s claims as printed in the photo, not facts this post can verify, and the article treats them that way.
A healthy gel manicure keeps that wet look only when the top coat stays smooth, so thin layers and a capped free edge matter more than the brand on the bottle.
Where shine actually comes from in the layers
Gloss in a gel manicure is mostly a top coat achievement. The colour coats carry the pigment, but the wet look comes from a smooth, even top layer cured properly over thin colour underneath. That is why shine advice from nail professionals keeps coming back to the same points: work in thin layers, cap the free edge, and finish with a quality top coat. Our gel nail top coat guide explains what that final layer does. When gloss fades, it is usually fine scratches and tip wear on the top coat, not the colour failing underneath.
That is why a healthy gel manicure is judged by its top coat at week two, not by its shine on day one.
What the ad does not tell you
An advertisement shows the best day of a manicure. It does not show what keeps that gloss past the first week, and it does not show the habits that dull it. Detergents and long soaks in water are hard on gel, so wear gloves for cleaning, and use cuticle oil daily to keep the skin around the nails from looking dry against a glossy set.
Gloves for cleaning and daily cuticle oil are the small habits that keep a healthy gel manicure looking fresh past the first week.
The No Glue Manicure: Burgundy Press-Ons as a Gel Break: Shop the Look
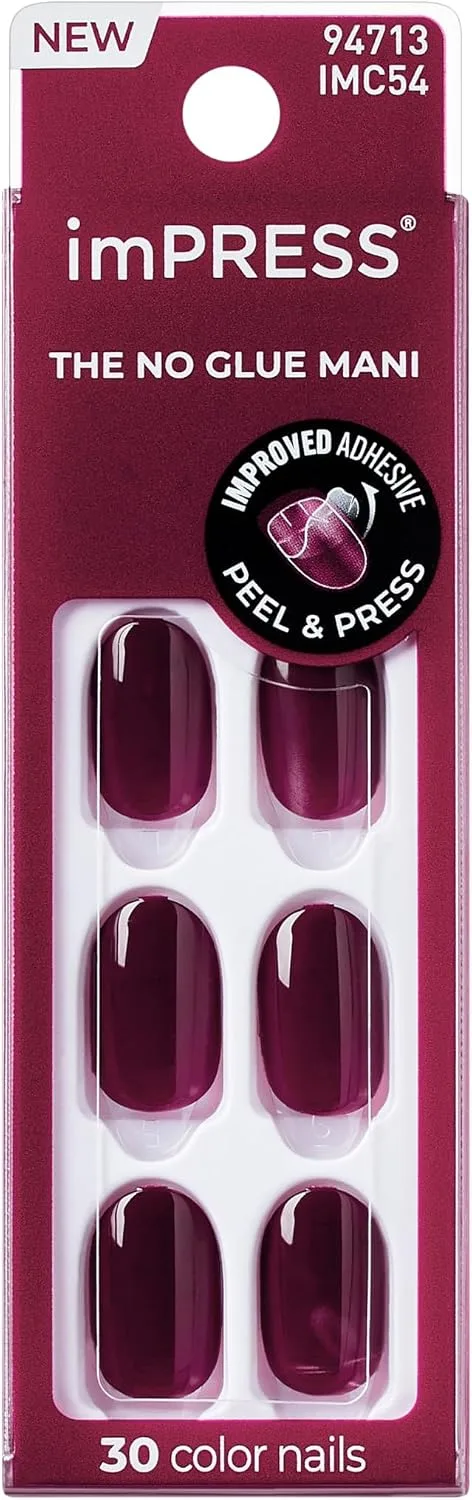
The second photo is not gel polish at all. It is a package of imPRESS press-on nails in deep burgundy, thirty nails in a short oval shape, with a badge reading “improved adhesive, peel and press”. The name on the box says it plainly: the no glue manicure. The nails stick with a pre applied adhesive tab, so there is no brush on glue, no UV lamp, and no acetone soak at the end. For a post about healthy manicures, this is the break week in a box.
A press-on week is not a failure of a healthy gel manicure routine; it is the break that lets natural nails recover between gel sets.
What peel and press means for your nails
A gel manicure asks three things of your nails: filing before application, UV light to cure, and a soak in remover to take it off. Press-ons with adhesive tabs skip all three. You size each nail, press it on, and wear it. When it is done, you ease it off instead of soaking. The American Academy of Dermatology recommends giving nails breaks between gel manicures, and a press-on week is exactly that kind of break, worn in deep burgundy instead of bare nails.
Making the break week count
A break only repairs if you let it. Keep the nails and cuticles moisturised through the week, since hydration is what the nail plate needs to recover its flexibility. Size the press-ons carefully: a tab that is too small lifts at the edges, and one that is too big presses on the skin. Do not pry a stubborn nail off, because peeling adhesive can pull up surface layers of the natural nail, which defeats the purpose of the break. For more press-on ideas, see our winter press-on nail post.
Use the break week to moisturise daily, so the next healthy gel manicure starts on stronger, more flexible nails.
9 Toxin Free: How to Read a Formula Label: Shop the Look
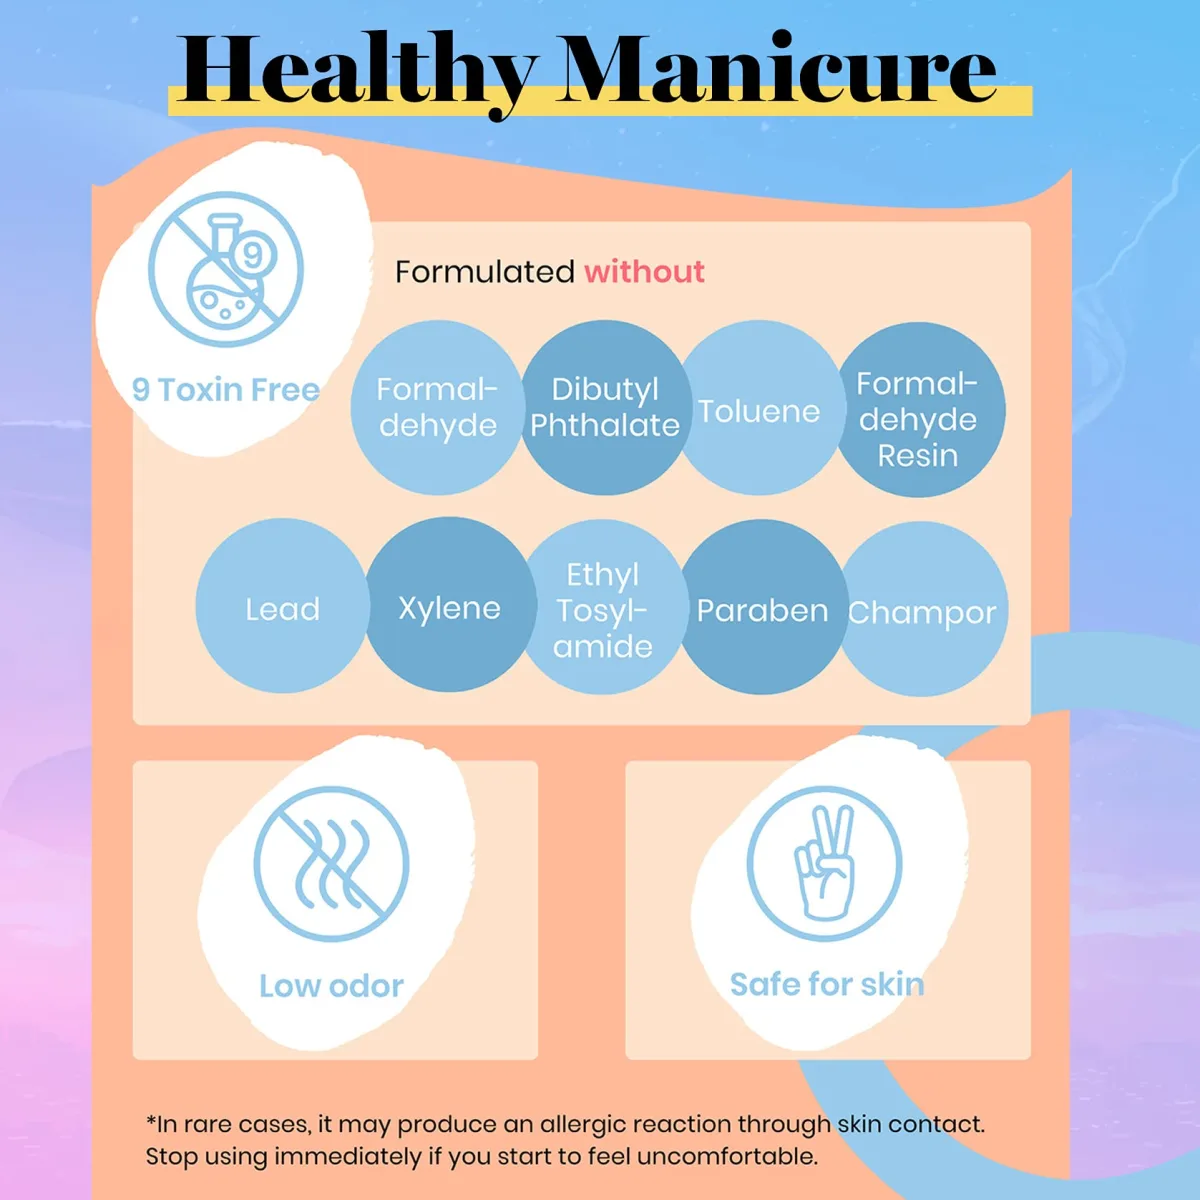
The third photo is the infographic the post title points to. Under a “Healthy Manicure” heading, a “9 Toxin Free” badge lists nine ingredients the formula is presented as being made without: formaldehyde, dibutyl phthalate, toluene, formaldehyde resin, lead, xylene, ethyl tosylamide, paraben, and camphor (spelled “Champor” in the image). Two more badges read “low odor” and “safe for skin”. Read it as the brand’s presentation of its own formula, not an independent lab report; what follows explains the ingredient families in general terms, so you can read any such label with understanding.
Reading the nine names on the label is the first skill of a healthy gel manicure, because a free from claim only helps when you know what was left out.
The nine names on the graphic, explained
These nine are the classic free from list of the nail industry, and each has a reason for being there. Formaldehyde is regulated as a carcinogen and is a known allergen; formaldehyde resin is less toxic but can still trigger allergies. Dibutyl phthalate, or DBP, is described by clean beauty formulators as toxic to the nervous and endocrine systems.
Toluene is a volatile solvent linked to headaches and respiratory irritation. Camphor can yellow the nails and irritate airways. The remaining names complete the list of ingredients health conscious brands have been removing for years.
What free labels do and do not promise
A “free from” label tells you what is not in the bottle, and nothing about what replaced it or how the formula behaves on your skin. That is why the small print at the bottom of this very graphic matters more than the badges: it warns of possible allergic reaction through skin contact and says to stop using the product if you feel uncomfortable. Gel ingredients deserve that caution.
Methacrylates in gel polish can cause allergies, and allergies happen more when polish is misused, especially gel cured onto the skin. Newer EU rules have banned the photoinitiator TPO as a reproductive toxicant, so checking current ingredient lists matters more than old assumptions.
A healthy gel manicure is not guaranteed by a badge on the bottle, but by thin coats, gentle removal, and real breaks between sets.
Black Press-Ons: The Same Gentle Week, a Different Mood: Shop the Look
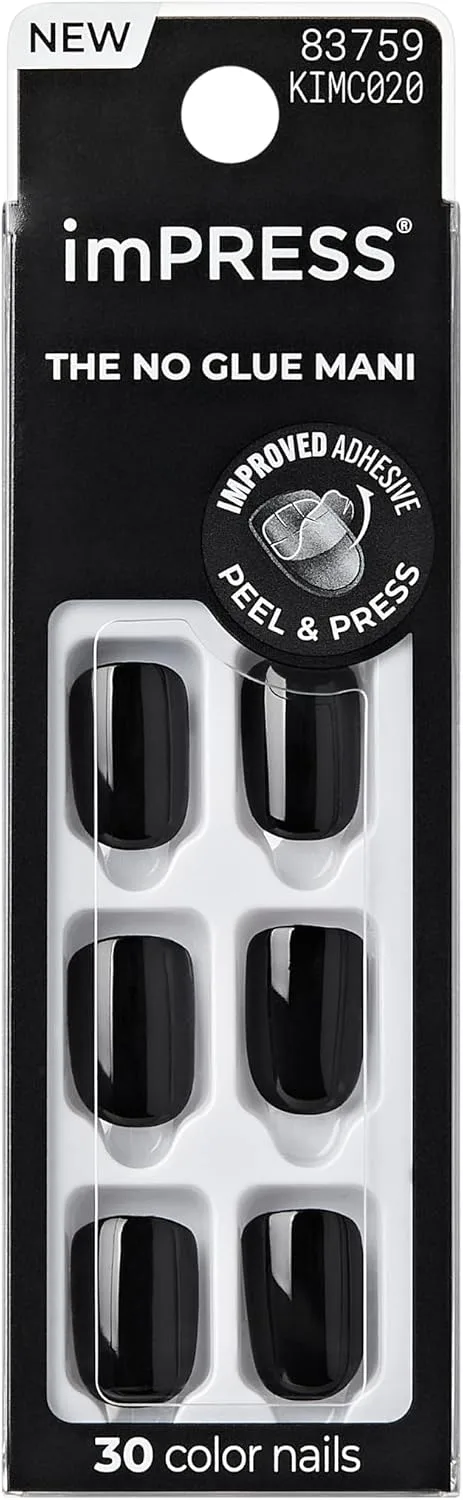
The fourth photo is the same idea as the second, in a different mood. Another imPRESS no glue press-on package, thirty nails, this time in solid black with a short square shape. The improved adhesive peel and press badge is the same. If the burgundy set was the break week dressed up, this is the break week dressed for evening, and it makes the same point: the gentle option does not have to look plain.
Black press-ons give the same gentle week as burgundy, and a healthy gel manicure routine welcomes any colour that lets nails rest.
Why black suits a low effort week
Black is the shade that looks deliberate with the least work. A solid black press-on set needs no art and no accent nail to read as finished, which matters when the whole point of the week is to do less to your nails. Short square is also the practical choice here: shorter nails take less force in daily life, and the squared tips of a press-on set keep their shape without the filing a grown out gel set would need. The colour does the styling, and your natural nails get to rest underneath.
When a week needs to be effortless, a healthy gel manicure plan can simply pause gel and let a solid black press-on set carry the look.
Removing press-ons without damage
The removal is where a press-on break succeeds or fails. Soak the nails in warm soapy water for several minutes to loosen the adhesive, then ease each nail off from the sides, never by prying up from the tip. If one resists, soak longer rather than forcing it. Buff away any adhesive residue gently, then massage cuticle oil into each nail and the surrounding skin.
Warm soapy water and patience protect the nail plate, which is why a healthy gel manicure routine treats removal as carefully as application.
Bold Everyday Colour: The Habits Behind the Healthy Look: Shop the Look
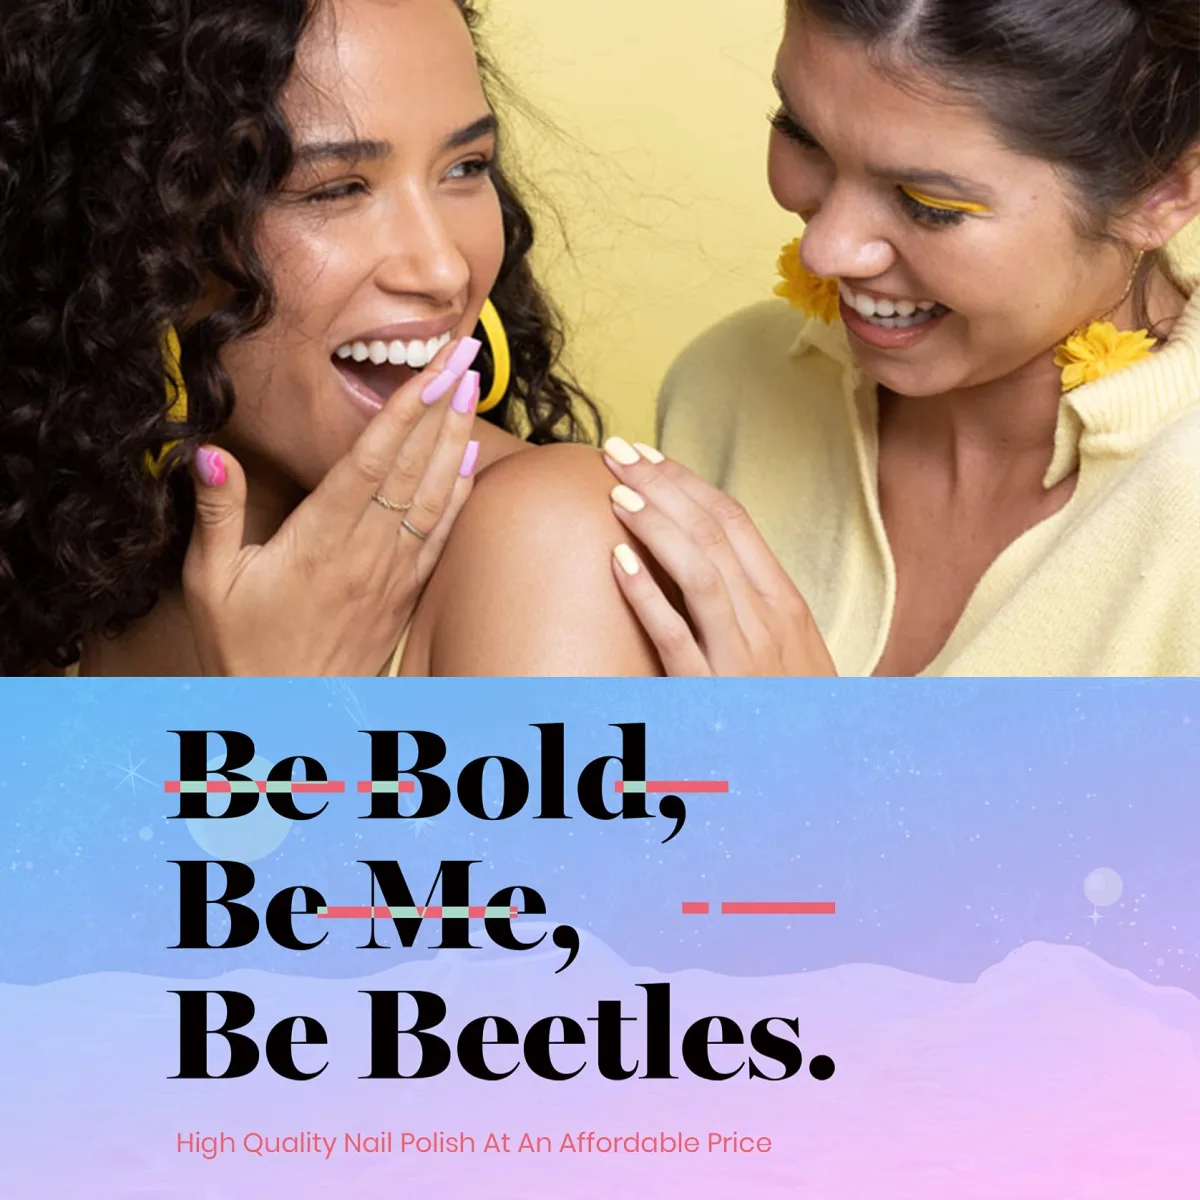
The last photo is a brand advertisement showing the everyday side of the story. Two women laugh against a yellow background, one wearing lavender or lilac nails, the other pale yellow or cream. The tagline reads “High Quality Nail Polish At An Affordable Price”. No formula details, no application steps, just colour worn confidently. That is the point this section makes: the healthy manicure shows in habits, not in any single photo, and the two women here are wearing the result of the routines the rest of this post describes.
The everyday look in this photo works because a healthy gel manicure is a set of habits, not a single product or shade.
Moisturise like it is part of the healthy gel manicure
The American Academy of Dermatology lists moisturising among its core gel manicure tips: keep the nails and cuticles moisturised, because hydrated nails are flexible nails and flexible nails resist the peeling and splitting that dry nails suffer. Make cuticle oil a daily habit, not a post manicure afterthought, and hand cream a cold weather essential, since heating and cold air dry the skin that frames every manicure. A glossy set with dry, ragged cuticles looks older than it is; the same set with cared for skin looks salon fresh.
Daily moisturising is the quiet core of a healthy gel manicure, because flexible nails chip less and hold polish longer.
Sun protection before the lamp
The AAD’s most specific gel manicure advice concerns the curing step itself: apply a broad spectrum, water resistant sunscreen with SPF 30 or higher to your hands before a gel manicure, since the polish is sealed using ultraviolet light. It takes seconds and addresses the one part of a gel manicure that involves UV exposure. Combine it with the rest of the routine, thin coats, capped edges, gel kept off the skin, gloves for cleaning, and real breaks between sets, and the healthy manicure stops being a formula claim and becomes a set of habits you can repeat.
Sunscreen before curing is a small step, but it belongs in every healthy gel manicure routine that uses a UV lamp.
How to Apply These Looks at Home
- Choose your route for the week. For gel, pick a formula whose label you have read; for a break week, size press-on nails to each nail so the adhesive tabs fit without touching skin.
- Prep gently. Push cuticles back, lightly buff only the shine off the natural nail, and clean the surface so it is dry and oil free. Aggressive filing thins the plate, so keep this step light.
- For gel, apply a thin base coat, capping the free edge, and cure for the time your polish brand and lamp specify. For press-ons, press each nail on firmly from cuticle to tip and hold for a few seconds.
- Add colour in thin coats, curing each coat before the next, and keep gel off the skin and cuticles at every layer, since skin contact is where irritation and lifting start.
- Finish with a thin top coat for gel, or a final press and check for press-ons. Then massage cuticle oil around each nail and keep moisturising daily through the whole wear.
Frequently Asked Questions
What does 9 toxin free actually mean?
It means the formula is presented as being made without nine named ingredients, usually formaldehyde, dibutyl phthalate, toluene, formaldehyde resin, lead, xylene, ethyl tosylamide, parabens, and camphor. It is a manufacturer’s label claim, not an independent safety certification. Use it as a starting filter, read the full ingredient list, keep gel off your skin, and stop using any product at the first sign of irritation, exactly as the infographic’s own small print advises.
Are press-on nails healthier than gel?
They skip the three hardest steps of gel: buffing before application, UV curing, and the acetone soak for removal. That makes a press-on week a genuine break for the nail plate, which dermatologists recommend between gel sets. Removal still needs care, so soak in warm soapy water and ease nails off rather than prying, and moisturise through the break.
How often should I give my nails a break from gel?
The American Academy of Dermatology recommends breaks between gel manicures without fixing a schedule, so watch your nails instead of the calendar. Thinning, peeling, white spots, or ridges that were not there before are the signals. During a break, keep nails short, moisturise daily, and consider a press-on week like the ones in this post’s photos rather than going straight back to gel.
Can gel polish cause allergies?
Yes, and the risk is real enough that regulators track it. Methacrylates in gel polish can cause allergic reactions, sometimes showing as itchy skin around the nails or lifting. The risk rises when gel is cured onto the skin or applied too thickly, so keep every layer off the skin and cuticles, work in thin coats, and stop using a product immediately if irritation appears. Anyone with a known gel allergy should talk to a dermatologist before continuing.
Wear the colour, keep the habits, and follow Beautylicious Hub on Pinterest for more nail ideas like these.