How to Apply Glitter Gel Polish Step by Step: Best Tips
When learning how to apply glitter gel polish, technique matters more than colour. The same six glitter shades can look smooth and expensive or thick and gritty, and the difference is entirely in the layers. The five photos in this post cover the whole process in order: choosing your shade from six glitter swatches, the finished full glitter hand you are aiming for, the brand’s three step method, and the glue route for wearing glitter without a lamp. If you want finished glitter set ideas rather than the how-to, our glitter gel nail polish set post covers the looks.
Learning how to apply glitter gel polish well starts with thin coats and patient curing.
Six Glitter Colours: Swatch Before You Commit: Shop the Look

The first photo is the shade choice step. Six glitter gel shades, each shown as an almond swatch tip beside a round swatch dot: silver holographic, gold, rose gold, hot pink, purple, and teal. The graphic’s small print notes that actual colours may vary from the swatches. Before any glitter goes on your nails, this photo makes the case for swatching: cure a spare tip first, because glitter looks different cured than it does in the bottle.
Fine glitter behaves differently from chunky glitter
Glitter type decides your technique before you start. Fine glitter, like the gold and rose gold shades here, sits almost flat and seals smooth under a normal top coat, giving a shimmer closer to a powder finish. Chunky glitter, like the holographic pieces in the silver and teal shades, has edges that stand up and catch on things, so it needs to be embedded under clear gel or extra top coat layers to feel smooth.
When nail guides say to know your glitter type, this is what they mean: choose fine glitter for your first attempt, because it forgives almost every beginner mistake that chunky glitter punishes.
Choosing fine glitter makes learning how to apply glitter gel polish smoother for beginners.
Pick your shade by finish, not just colour
Colour gets the attention, but finish decides how the manicure wears. The silver holographic and teal shades here are the boldest, full of shifting pieces that read as party nails. Gold and rose gold are the versatile middle, warm metallics that work for evenings and holidays. Hot pink and purple sit between the two, bright but smooth. Match the finish to the occasion, and remember that a glitter you love on one accent nail can overwhelm on all ten, so plan which nails carry the sparkle before you open the bottle.
The Full Glitter Reference: What You Are Aiming For: Shop the Look

The second photo is the goal. One hand, five long coffin nails, each nail a different full coverage glitter shade: silver holographic, purple, rose gold, teal, and hot pink. Every nail is coated edge to edge with no bare base showing through. The graphic around it makes bold marketing claims about speed and wear time, which this article does not repeat as facts. The value of the photo is visual: this is what even, full glitter coverage looks like when the layers are done right.
Reading the finished hand
Look past the colours and study the technique the photo demonstrates. Each nail shows consistent density from cuticle to tip, with no thin patches near the edges and no thick pooling at the sides. The free edges are clean, with no glitter hanging past the tip.
Why full glitter needs more than one coat
No glitter gel reaches this density in a single coat, and trying is the classic beginner error. One thick coat traps air, goes on lumpy, and cures unevenly. The professional approach is two or three thin glitter coats, curing between each, building the coverage gradually. Each thin layer adds particles without adding bulk, and each cure locks the layer flat before the next one goes on. Patience between coats is what separates the smooth hand in this photo from a gritty one.
Two thin coats show how to apply glitter gel polish for full coverage without bulk.
Glue and Remover: The No Lamp Glitter Route: Shop the Look
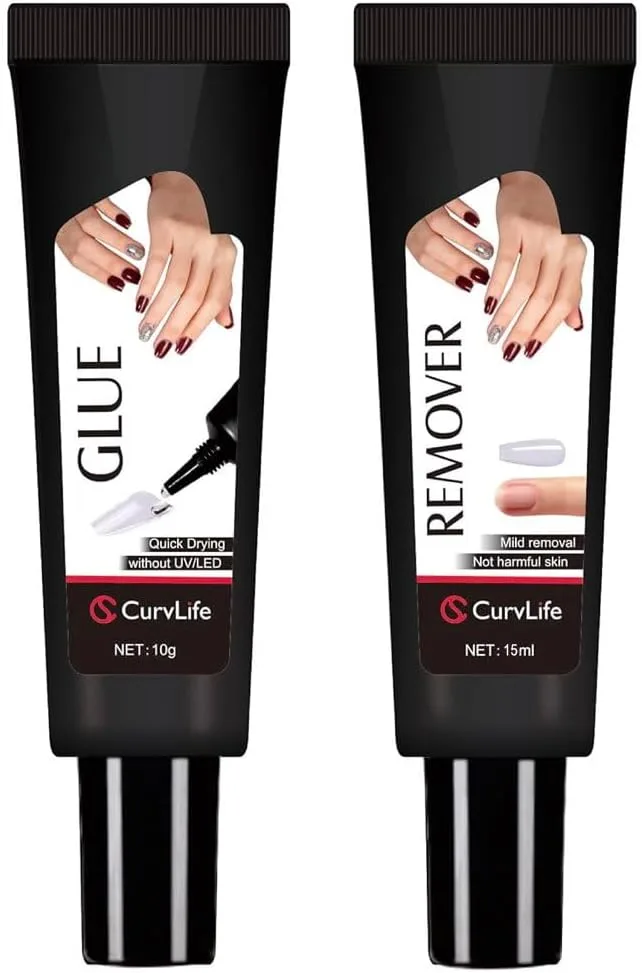
The third photo changes routes entirely. Two black squeeze tubes from CurvLife: a 10 gram nail glue marked “quick drying without UV or LED” and a 15 ml nail remover marked “mild removal”. The labels show press-on nail application and removal illustrations. These are not gel products, and this article does not pretend they are. They belong to the second way of wearing glitter: press-on glitter nails applied with glue, for everyone who wants the sparkle without a lamp.
When press-on glitter beats gel glitter
Choose the glue route when the situation suits it. Travelling without a lamp, wanting glitter for one weekend, giving your nails a break from gel, or simply not owning a UV or LED lamp yet: all of these are good reasons to press on glitter nails instead of painting them. The glue dries without any lamp, so the whole application happens in minutes at a table, and the look from across the room is the same sparkle.
Press-on nails offer another way to learn how to apply glitter gel polish without a lamp.
Keep the two routes separate in your head, though. Gel techniques and glue techniques do not mix, and gel polish should never be used as press-on glue.
Gentle removal is part of the method
The remover tube in the photo earns its place in a tutorial, because how glitter leaves your nails matters as much as how it goes on. For press-ons, soak in warm soapy water to loosen the glue, then ease each nail off instead of prying. For gel glitter, the method is different: file through the top coat to break the seal, then soak cotton in acetone based remover on each nail, wrapped in foil, for ten to fifteen minutes, and push the softened gel away gently.
In both routes, forcing the removal is what damages the nail underneath, never the glitter itself.
The Three Step Method: Apply, Cure, Layer: Shop the Look

The fourth photo is the tutorial’s core. The diagram reads: step one, apply the colour coat; step two, cure under a UV or LED lamp for 60 to 90 seconds; step three, apply twice for a better effect. That timing is the brand graphic’s own instruction for its system, so follow your own polish and lamp instructions for your products.
Below the diagram, two photos show the method in action: a hand holding a holographic cup with long nails including white square nails and glitter coffin nails, and four long square nails with white bases and rainbow glitter fading from the tips. Our gel nail top coat guide covers the sealing layer these looks depend on.
The diagram explains how to apply glitter gel polish in three simple steps.
Thin coats are the whole secret
Every reliable glitter guide agrees on one rule: work in thin layers. Thick gel causes unevenness and lifting, and glitter makes it worse because the particles add bulk. Thin, even layers build up beautifully, while one thick layer builds up badly. Cure each layer fully before the next goes on, cap the free edge with every layer including the base, and keep gel off the skin and cuticles, where cured edges lift first.
Thin layers prove how to apply glitter gel polish without unevenness or lifting.
Sealing glitter smooth with the top coat
Sealing is where glitter manicures are won or lost. After your final glitter layer is cured, the surface will feel textured, especially with chunky glitter. The fix is encapsulation: one or two thin layers of clear gel or top coat over the glitter, cured between each, until the particles are buried and the surface feels glassy.
Sealing well is the final step in learning how to apply glitter gel polish smoothly.
If the surface still feels gritty after curing, gently buff the high spots with a fine grit buffer and add one more top coat layer. Finish by capping the free edge again with the final top coat, which seals the glitter in at the tip where chipping starts.
Brush-On Glue: Precision for Press-On Glitter Nails: Shop the Look
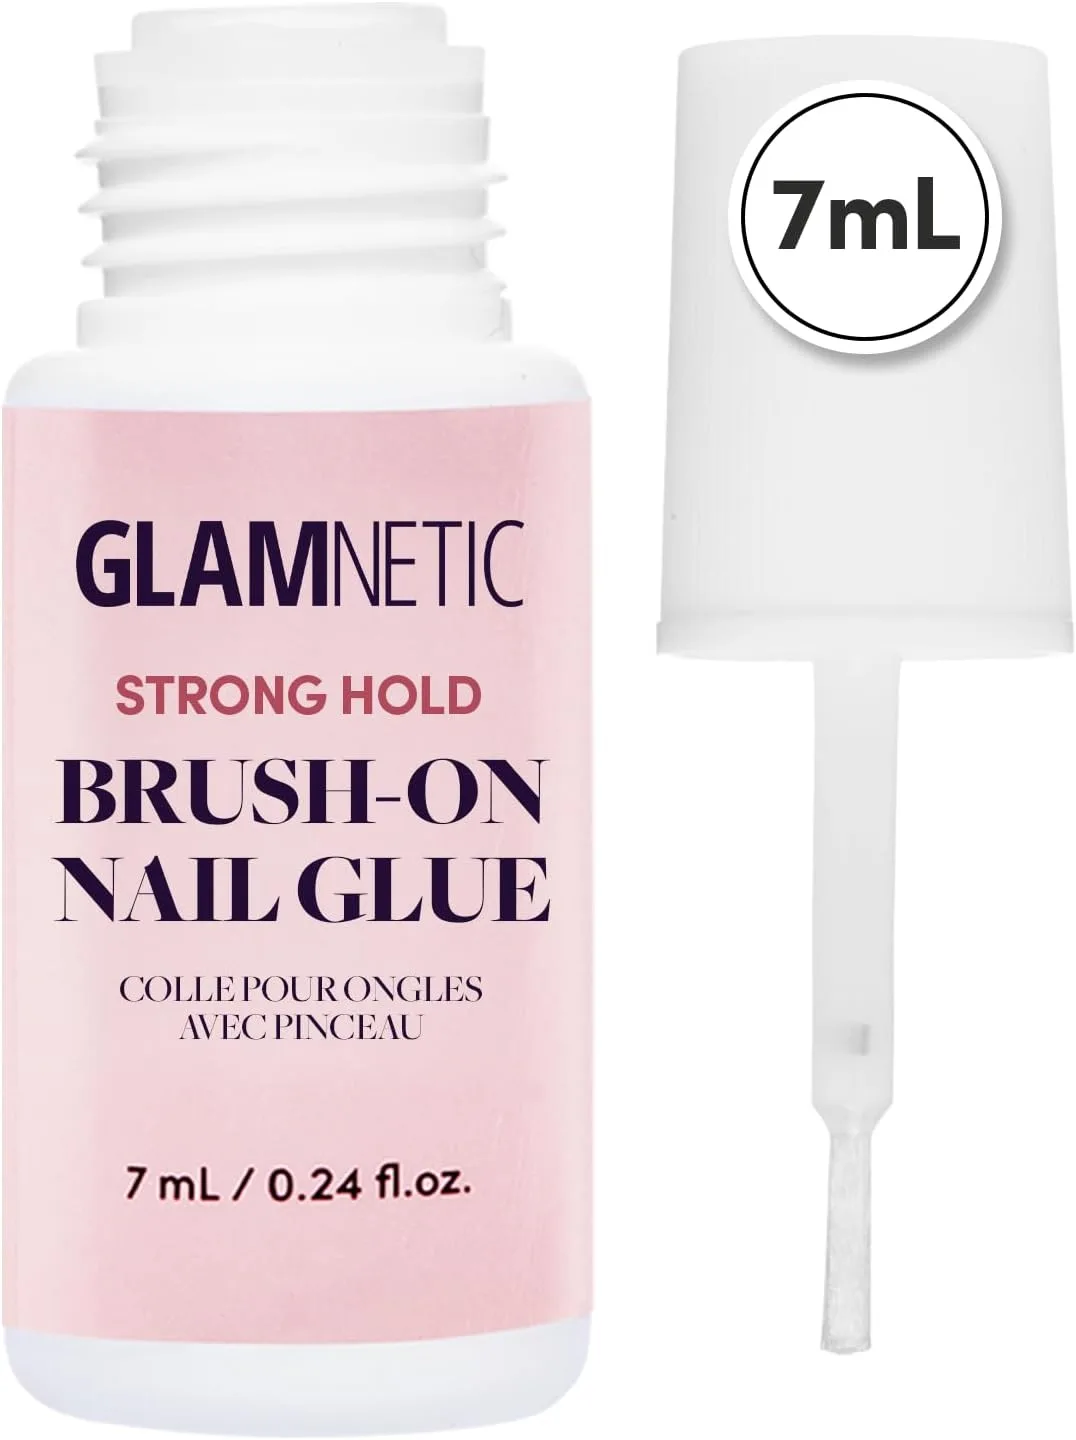
The last photo is the precision tool for the glue route. A Glamnetic strong hold brush-on nail glue bottle, 7 ml, with its brush applicator shown beside the open bottle. The brush is the whole point: it paints glue onto the nail in a thin, controlled layer, which is exactly what press-on application needs and exactly what squeeze tubes make harder. For glitter press-ons, where the nail surface is already textured, even glue coverage matters even more.
How a brush applicator changes the job
A brush turns glue application from squeezing into painting. You can coat the natural nail edge to edge without flooding the cuticles, and you can add a thin layer to the press-on itself for extra hold.
A brush gives control when you learn how to apply glitter gel polish on short nails.
Press, hold, and align
Application is a three move sequence. First, size every press-on before any glue is open, because a wrong size found mid application ruins the rhythm. Second, align the press-on with your cuticle line, leaving a hairline gap so no glue touches skin. Third, press down firmly from the cuticle toward the tip to push out air, and hold the pressure for the count the glue instructions give.
Work one nail at a time rather than gluing all five at once. If glue floods the skin, wipe it immediately before it sets, since cured glue on skin is both uncomfortable and unsightly against glitter.
Working one nail at a time is key when learning how to apply glitter gel polish at home.
How to Apply Glitter Gel Polish at Home
- Prep first. Shape your nails, push the cuticles back, lightly buff the shine off the natural nail, then wipe with an alcohol pad so the surface is dry and free of oil and dust.
- Apply a thin gel base coat, capping the free edge, and cure for the time your polish brand and lamp specify. For the press-on route, size each nail and set the glue aside until every size is confirmed.
- Apply glitter gel in thin coats, curing each coat before the next. Two thin coats give full coverage for most glitters; add a third only if the coverage is still patchy. For loose glitter, press it into a tacky layer or wet clear gel instead.
- Seal the glitter smooth with one or two thin layers of clear gel or top coat, curing between each, and cap the free edge with the final layer so the tips are fully sealed.
- Wipe away any sticky layer if your top coat requires it, then massage cuticle oil around each nail.
One safety step is worth adding. The American Academy of Dermatology recommends a broad spectrum, water resistant sunscreen with SPF 30 or higher on your hands before a gel manicure, since the polish is sealed using ultraviolet light. Our step by step nail care routine covers the habits that keep natural nails healthy between sets.
Following these steps helps anyone learn how to apply glitter gel polish at home safely.
Frequently Asked Questions
Why does my glitter gel feel rough after the top coat?
Chunky glitter has edges that stand up through a single top coat. The fix is encapsulation: add another thin layer of clear gel or top coat over the cured glitter and cure again, repeating until the surface feels smooth. If high spots remain, buff them very gently with a fine grit buffer before the next layer, taking care not to buff the glitter itself away. Fine glitter rarely needs more than the standard sealing.
How do I layer glitter without it getting thick?
Keep every layer thin and cure between coats. Two or three thin glitter coats build fuller coverage than one thick coat, because thin layers cure evenly and lock flat. If the bottle’s brush drags too much glitter at once, wipe one side of the brush before applying. Stop adding coats when the coverage looks even, since extra layers past that point only add bulk.
Keeping layers thin is essential when learning how to apply glitter gel polish without thickness.
Should a beginner start with fine or chunky glitter?
Start with fine glitter. It sits nearly flat, seals smooth under a normal top coat, and forgives uneven application, which makes it the forgiving choice for a first attempt. Chunky glitter gives a bolder, more textured look but needs careful placement and extra sealing layers. Once fine glitter feels easy, move up to chunky for accent nails before attempting a full set.
Patience and sealing are the keys to learning how to apply glitter gel polish well.
How do I remove glitter gel without damaging my nails?
Never peel it off, because peeling pulls layers of the natural nail away with the glitter. File through the top coat first to break the seal, then place acetone soaked cotton on each nail, wrap in foil, and soak for ten to fifteen minutes. Push the softened gel away gently with an orangewood stick, rewrap any stubborn nail for a few more minutes instead of scraping, and finish with cuticle oil.
Glitter rewards patience more than talent, so take the layers slow, seal them smooth, and follow Beautylicious Hub on Pinterest for more nail ideas like these.