Red And White Swirl Nails: Stunning DIY Extension Ideas
Most posts show you this finished swirl and skip everything that made it possible. These five photos do the opposite. Together they show the whole routine behind the look, in the order you would actually do it: the clear extension being built, the two small prep bottles that decide whether it stays on, the gel and the three ways to build with it, the drill that shapes and finishes the set, and only then the red and white swirl itself, painted over a sheer base on long almond nails.
Building the Clear Extension in a Dual Form: Shop the Look
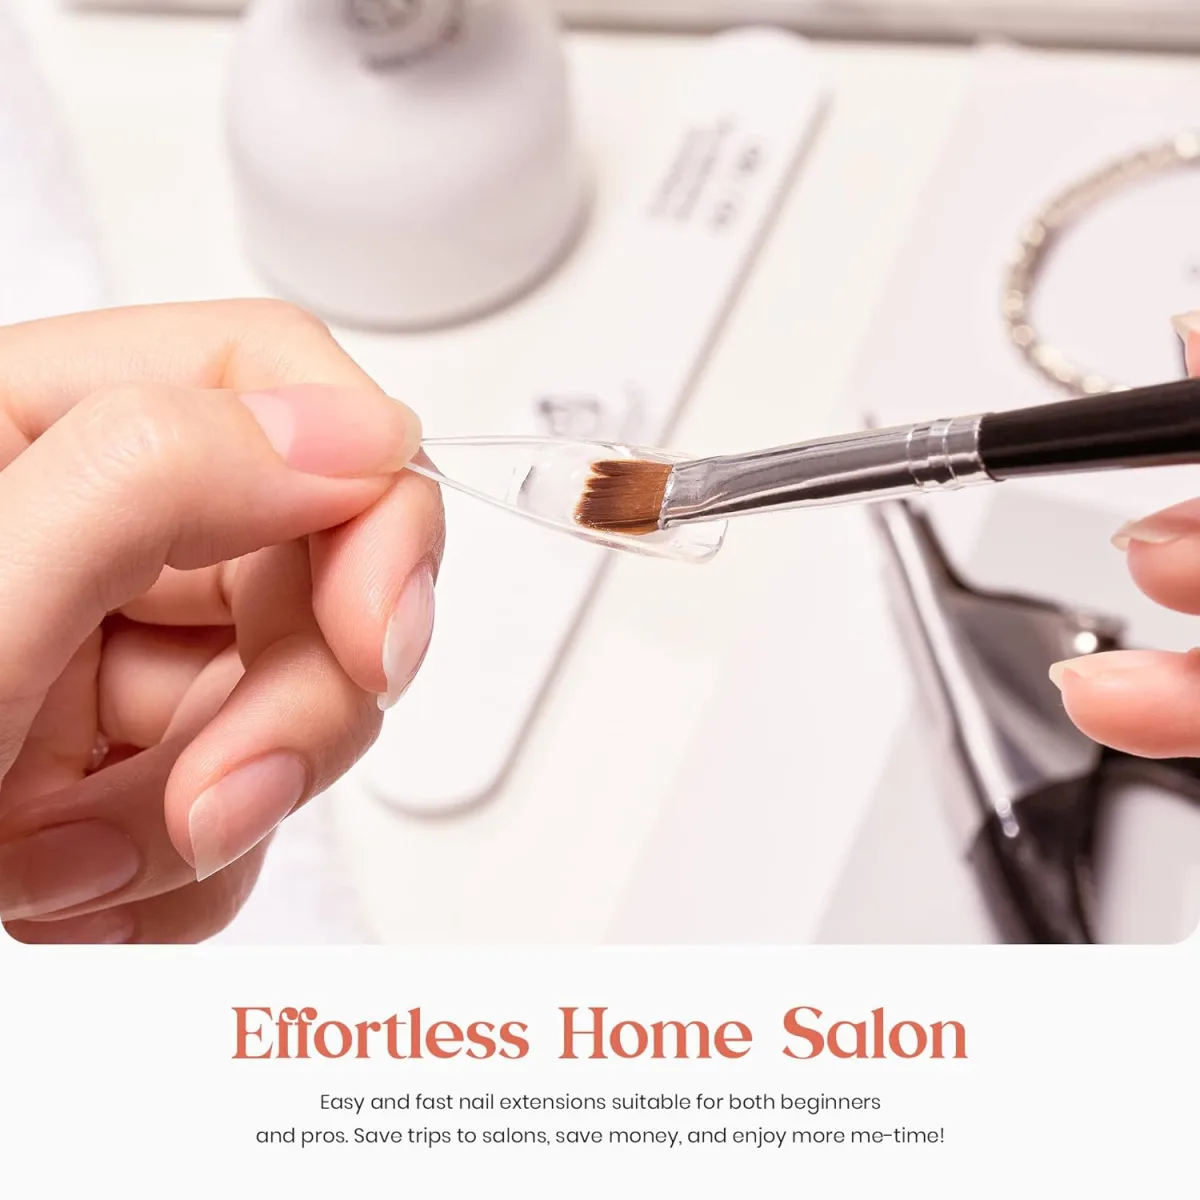
The first photo catches the build at its most honest moment. Clear gel is being brushed into a clear plastic dual form, the reusable mould that gives a home extension its shape. There is no colour anywhere yet, because colour is the last step of this manicure, not the first. Everything the finished swirl sits on is decided here, in this clear, unglamorous stage. A red and white swirl starts with this clear foundation, because the design only looks clean when the extension underneath is smooth.
What is happening in this photo
A dual form works like a stamp for gel. You brush the gel into the form, spreading it to the thickness and length you want, then press the form onto your prepared natural nail and cure it under the lamp. When the form is popped off, the extension is already shaped, with a smooth top surface that needs far less filing than a freehand build. The photo’s promise of an effortless home salon is really about this: the mould does the shaping work that takes the most practice by hand.
Getting the amount of gel right
The skill in this step is quantity. Too much gel floods toward the cuticle and cures in a ridge that has to be filed away. Too little leaves the tip thin and weak, and thin tips are where extensions snap. Aim for an even layer that is slightly thicker through the middle of the nail, where stress lands when you knock the tip. Work the gel with short brush strokes and keep it off the edges of the form, because whatever cures outside the line becomes extra filing later. A red and white swirl needs a level base too, since bands painted over a ridge cure unevenly and lose their crisp edges.
Prep Liquids: The Dehydrator and Primer Step: Shop the Look
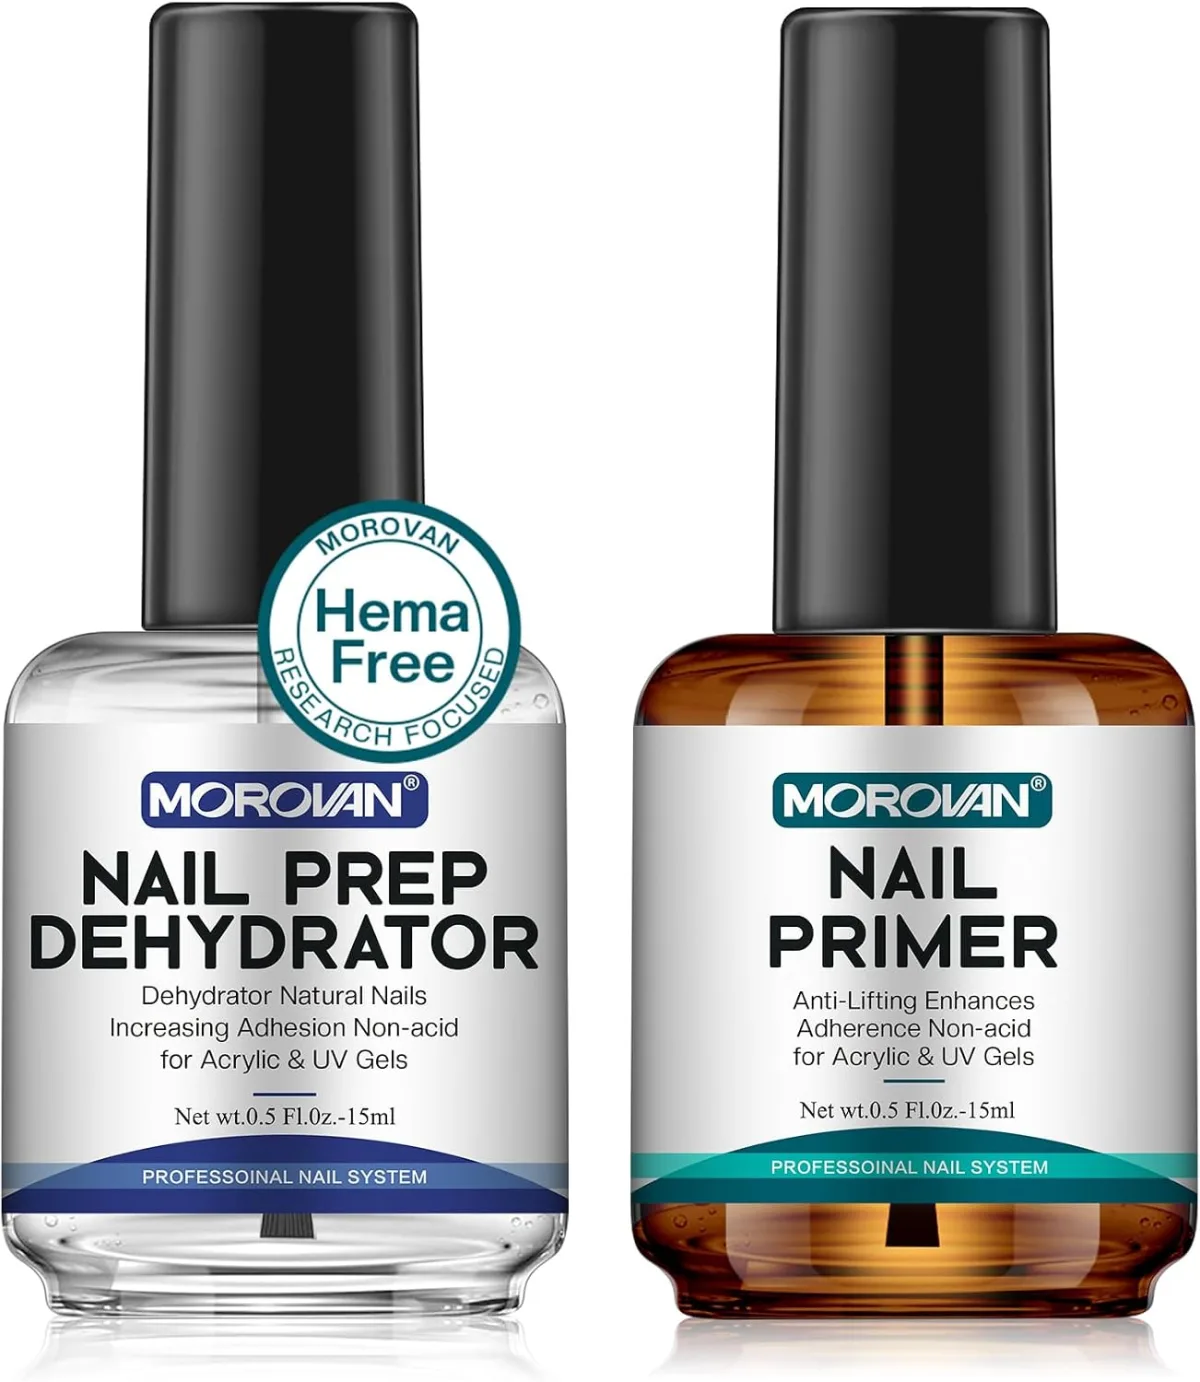
The second photo is two small bottles, and they carry more responsibility for this manicure than the colours do. One is a nail prep dehydrator, the other a nail primer, both from Morovan, both 15 ml. Extensions rarely fail because the gel was bad. They fail because the natural nail underneath still had oil or moisture on it when the gel went on. A red and white swirl will not last if the extension underneath lifts, so these two small bottles decide more than the final design.
What each bottle actually does
The dehydrator goes on first. Its job is to strip the surface of the natural nail of oil and moisture, leaving it dry and slightly chalky looking for a short window. That dry surface is what gel can grip. The primer follows once the dehydrator has flashed off. It works like a bonding layer between nail and gel, helping the extension hold at the edges, which is where lifting always starts. The primer in this photo is a non acid formula, the gentler type most home users should choose, and it is used in a very thin layer.
Order matters, and more is not better
Apply the two in the order above, on every nail, right before you build. The dehydrator only works while the nail stays untouched, so if you answer a message mid routine, dehydrate that nail again. With primer, resist the instinct to add a generous coat. A thick primer layer does not grip harder, it can pool at the cuticle, and anything that touches skin and then cures is a lifting point built into the set from day one. A red and white swirl is only as durable as this prep step, because primer pooled at the cuticle becomes a lifting point under any design.
One Gel, Three Ways to Build the Extension: Shop the Look
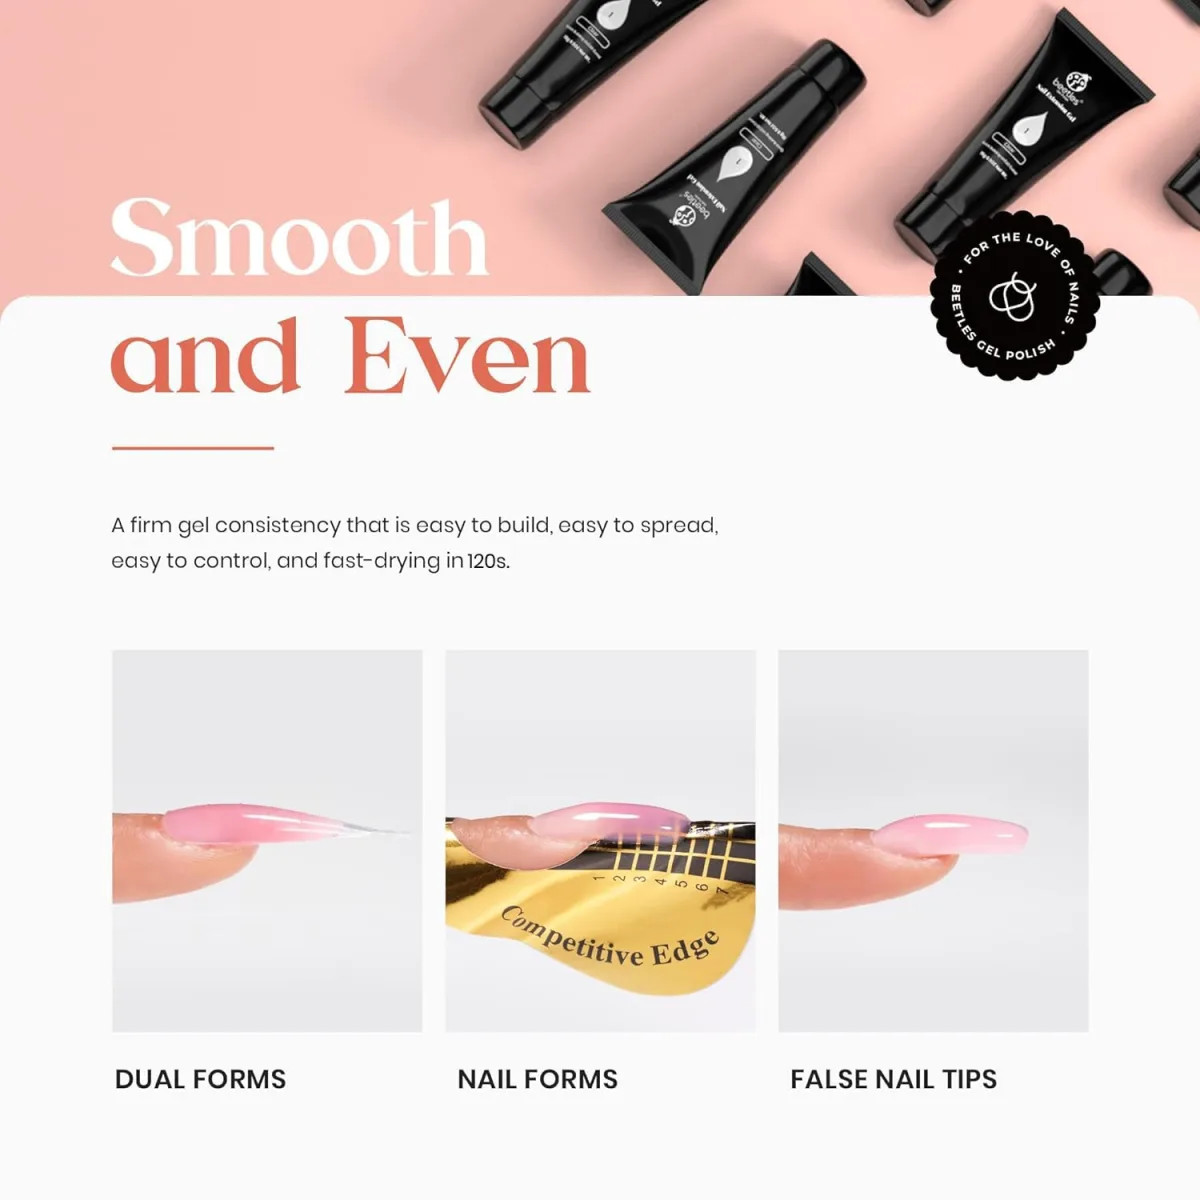
The third photo is a Beetles gel advertisement, and it quietly answers the question every beginner asks: does the building method change the result? It shows the same gel built three ways on three fingertips, labelled dual forms, nail forms and false nail tips. All three finished examples are solid, translucent pink and glossy. The gel is the same. The route to the shape is what differs. A red and white swirl works over any of these three builds, because the design sits on top of the finished extension rather than inside it.
Dual forms, nail forms and tips compared
Dual forms, the method in the first photo, mould the extension from above and suit beginners because the shape comes from the mould. Nail forms are the paper or sticker guides placed under the free edge, and the gel is sculpted freehand over them; they allow the most custom fit and demand the most skill. False nail tips are glued on first to add the length, then covered with gel for strength; they are the fastest route and the easiest to keep even. For the swirl look at the end of this post, any of the three works, because the design sits on top of the finished extension.
Why the gel looks smooth and even
The advertisement’s headline is about consistency, and there is a real point under the marketing. A builder gel that levels itself slightly after application hides small brush marks before curing, which is why these examples look smooth straight off the form. Self levelling only helps if the layer is thin and even to begin with. A thick, rushed layer levels into a thick, smooth lump, and no amount of levelling fixes the shape afterwards. A red and white swirl benefits from this self levelling, because smooth gel means the sheer base goes on flat before any bands are painted.
Shaping and Finishing With a Nail Drill: Shop the Look
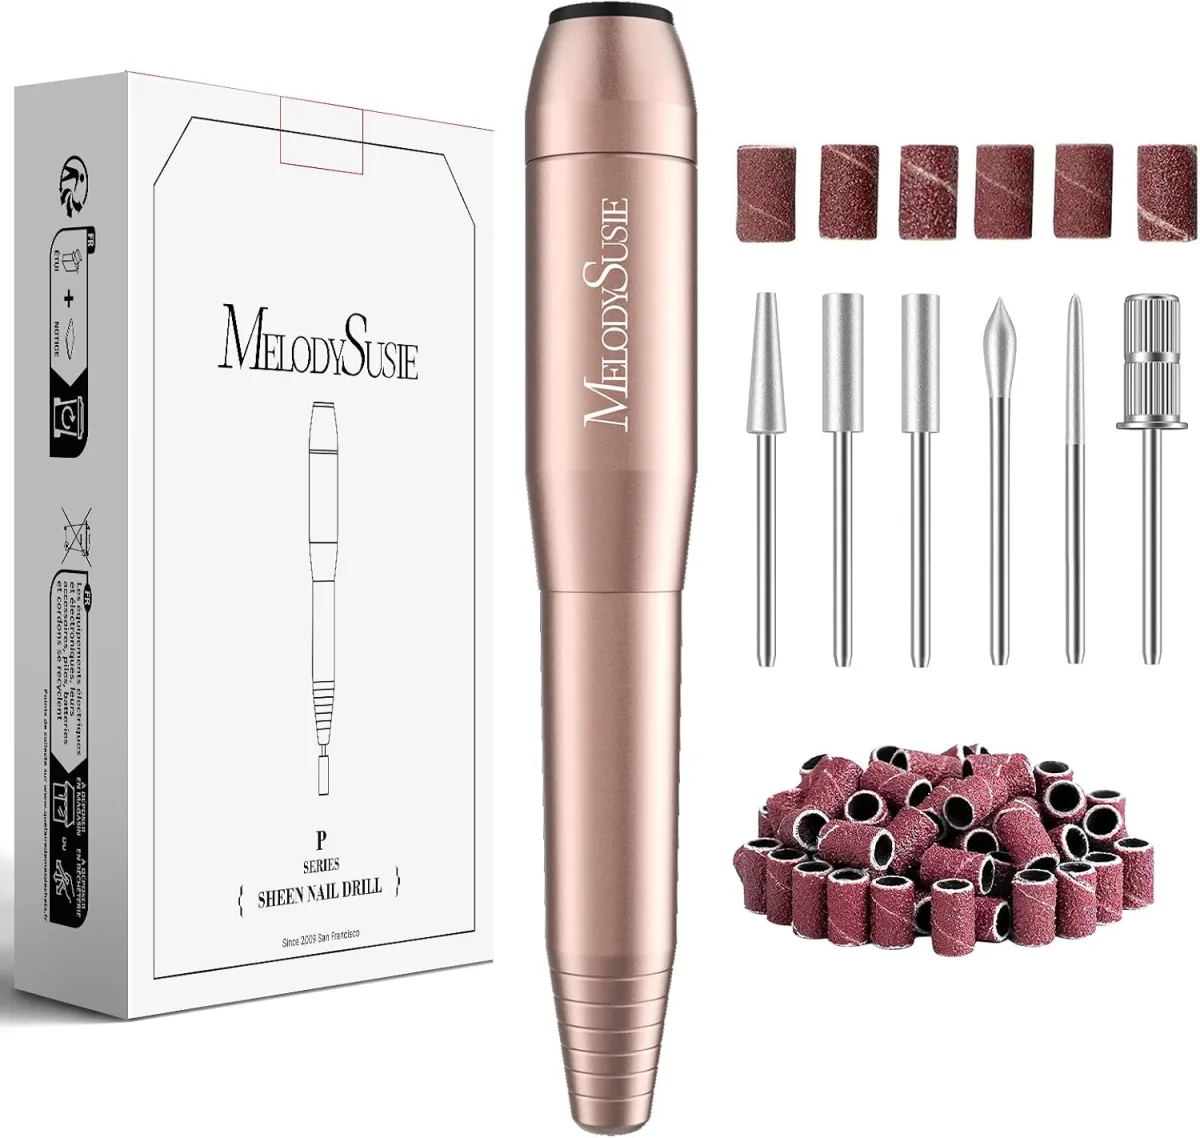
The fourth photo is the tool most home users either fear or rush out to buy: a pen style electric nail drill, the MelodySusie P Series Sheen, shown with its box, a set of drill bits and rows of sanding bands. In this routine the drill is not decoration. It is how a cured extension gets its final shape and how the surface is refined before colour goes on. A red and white swirl looks sharper after this refining step, since the surface must be smooth before the sheer base and bands go on.
What the drill does in this routine
Three jobs, mainly. It refines the sidewalls and tip after the extension comes off the form, faster and more evenly than hand filing alone. It smooths the surface and any ridge near the cuticle, so the sheer base colour of the swirl look goes on flat. And weeks later, it removes the bulk of the set quickly when the extensions come off, before the remainder is soaked or filed away. The sanding bands in the photo are the everyday workhorses for surface work, while the smaller bits handle edges and the area close to the cuticle.
Use a light touch and keep it moving
A drill removes material fast, which is exactly why beginners should start on the lowest speed and let the tool do the work without pressing down. Pressure creates heat, and heat on a nail is felt quickly. Keep the drill moving in short strokes instead of holding it in one spot, stop often to brush away dust and check the shape, and never run a bit across skin.
Practise first on a spare tip or an old set you are removing anyway. Ten careful minutes at low speed beats one confident minute at high speed. A red and white swirl painted on a heat damaged or grooved nail will not sit evenly, so this patient, low speed approach protects the design too.
The Finished Look: Red and White Swirl on Almond Extensions: Shop the Look
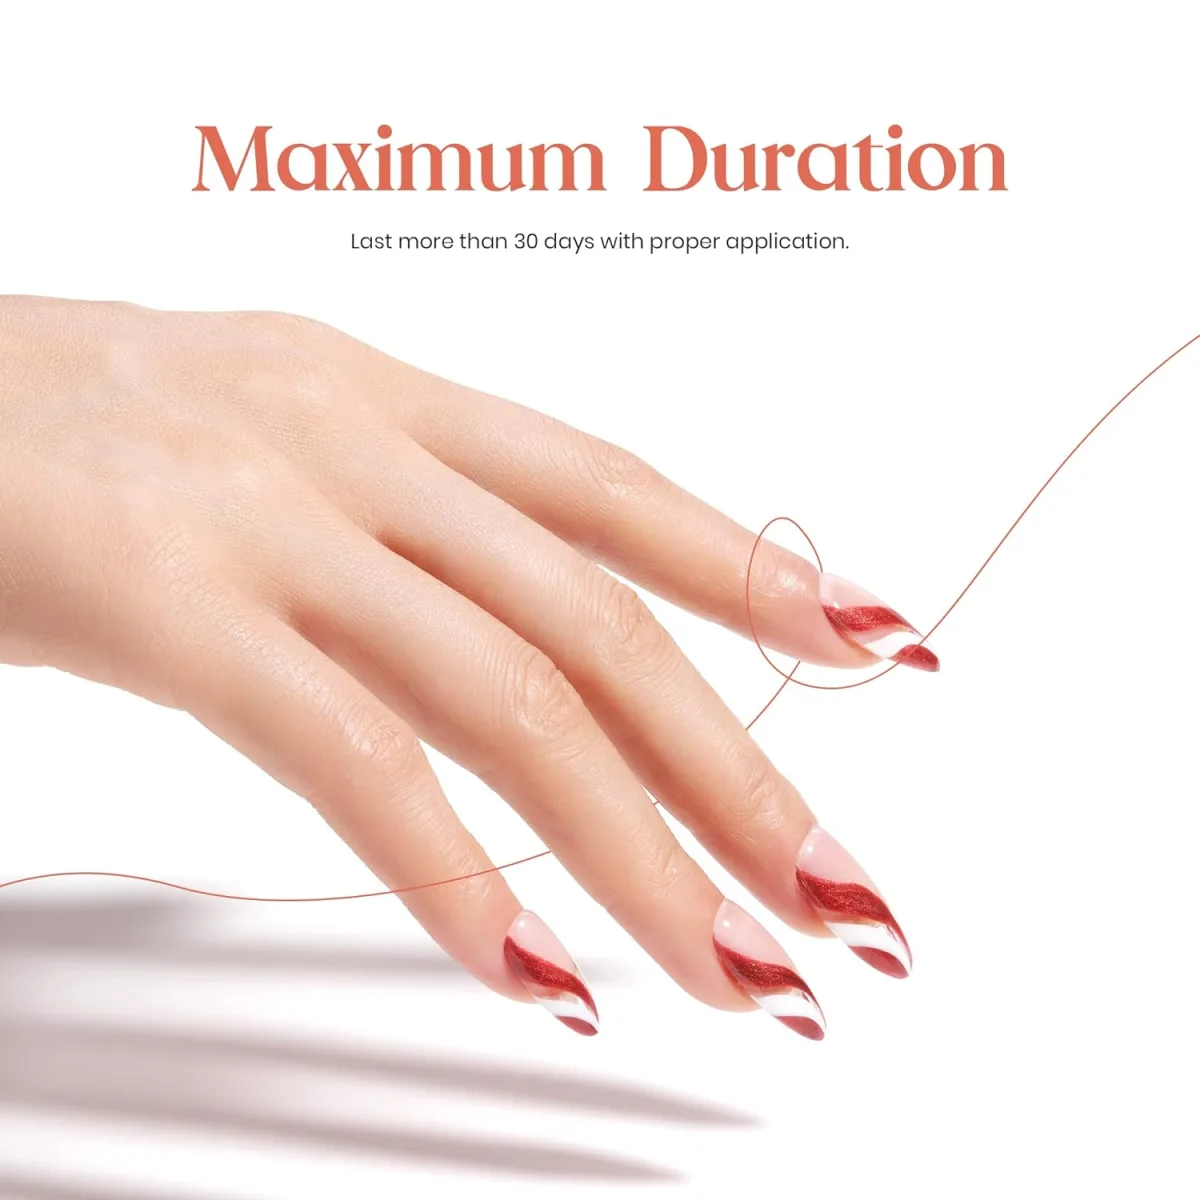
Here is what the whole routine was for. Long almond extensions with a sheer nude pink base, and across the tips, broad diagonal swirl bands in a shimmery deep red and a clean white. No accent nail, no extra art: the swirl is the entire statement. Our Christmas nail art ideas show where this colour pairing feels most at home, though worn like this, as abstract curves, it carries well beyond December.
Reading the design before you copy it
Two choices make this version work. First, the base stays sheer, so the natural nail tone warms the design and the swirl bands float over it. Second, the bands are broad and few. One or two wide curves cross each tip, kept diagonal so they follow the taper of the almond shape. Our nails shape guide explains why almond flatters curved art: the soft pointed tip gives a swirl room to travel. Thin, busy lines would fight the shape. These wide bands agree with it.
Painting the swirl: brush control and blooming gel
For crisp bands like these, paint them with a fine liner brush over the fully cured sheer base. Load the brush lightly, because a small amount of polish gives a thinner, more even line, and keep an acetone clean up brush beside you, since gel lines can be wiped away and redrawn before curing.
For a softer, feathered version, the blooming gel method does the blending for you: apply a thin blooming gel layer over the cured base, leave it uncured, draw the red and white on top, and cure the moment the spread looks right, because the colour keeps travelling until it is cured. This photo shows the crisp version. A red and white swirl painted this way keeps its bands distinct, because each colour cures separately instead of bleeding into the next.
How to Build This Look at Home
- Prep the natural nail. Push the cuticles back, lightly buff the shine off the surface, then apply dehydrator followed by a thin layer of primer, as in the second photo. Keep both off the skin.
- Build the extension. Brush clear gel into a dual form, press it onto the nail and cure for the time your gel and lamp specify. Nail forms or glued on tips work too, as the third photo shows.
- Refine the shape. Pop off the form, then shape the sidewalls and tip and smooth the surface with the drill at low speed, or with a hand file, until the almond outline is even.
- Paint the sheer base. Apply the nude pink base colour in thin coats, curing each coat fully. The swirl will only look clean if the base under it is fully set.
- Paint the swirl. With a liner brush, draw one or two broad diagonal bands of deep red and white across each tip, cleaning mistakes with an acetone brush before curing. For softer edges, use the blooming gel method described above. With regular polish instead, water marbling gives a similar swirl: alternating drops in room temperature water, dragged with a toothpick, with each nail dipped through the pattern.
- Seal and finish. Apply a thin top coat, cap the free edge at every layer including this one, and cure a final time. Massage cuticle oil around each nail.
One safety step is worth adding. The American Academy of Dermatology recommends a broad spectrum, water resistant sunscreen with SPF 30 or higher on your hands before a gel manicure, because the polish is sealed using ultraviolet light. Our step by step nail care routine covers the habits that keep natural nails healthy between extension sets.
Frequently Asked Questions
Why did my extension lift after only a few days?
Lifting almost always traces back to prep, not to the gel. Oil or moisture left on the nail, dehydrator skipped or applied too early, primer pooled at the cuticle, or gel cured while touching skin will each give the set an edge to lift from. Redo the prep in order, keep every product off the skin, and the same gel usually holds. A red and white swirl that lifts at the edges usually traces back to this prep, not to the red or white polish itself.
Dual forms, nail forms or tips: which should a beginner choose?
Start with dual forms. The mould supplies the shape, the top surface comes out smooth, and filing afterwards is light. Tips are the next easiest, since the length is ready made and only needs gel over it. Nail forms give the most custom result but ask for freehand sculpting skill, so they reward practice rather than a first attempt.
Why did my red and white swirls turn pink?
The colours mixed instead of sitting side by side. This happens when the base is not fully cured before the swirl goes on, when the bands are painted too thick, or when a blooming layer is left spreading too long. Cure the base completely, keep the bands thin, and cure sooner. A blush of pink at a blended edge is normal. A whole nail of pink means the red travelled too far. A red and white swirl turns pink when the colours mix, so curing the base fully before painting keeps the two bands distinct.
Can I use a nail drill as a beginner, or should I stick to a file?
You can, with the caution from the drill section above: lowest speed first, no downward pressure, keep the bit moving, and practise on spare tips before touching a set you are wearing. A hand file is slower but fully capable for shaping one set, so the drill is an upgrade, not a requirement. A red and white swirl also benefits from this choice, because the almond outline shaped here is what the diagonal bands will follow.
Pick the step you are missing, save the finished photo for reference, and follow Beautylicious Hub on Pinterest for more nail designs like these.