Blossom Gel Polish Ideas for Stunning DIY Manicures at Home
Blossom gel polish, better known as blooming gel, is the technique behind those soft, watercolour-like flower and marble effects that look hand-painted but need almost no brush skill. A clear specialty gel goes onto the nail uncured, and any colour dotted onto it spreads and blooms on its own, like ink in water. This post studies the technique through the photos: one shows real blossom work in three styles, and the others show the red shades and finishing steps that blossom art pairs with.
A blossom gel polish manicure starts with a pale base that lets colour bloom.
The Blossom Effect in Three Styles: Shop the Look

The first photo is the heart of this post. Titled “Stunning Effect Like Magic”, it shows three panels of genuine blooming gel work. The top panel: long stiletto nails in milky white with reddish-brown blossom marble and gold foil flakes. The bottom-left: long coffin nails in milky white with a red blossom watercolour and red dots. The bottom-right: almond nails where two wear navy blue fine glitter and two wear milky white with blue-purple blossom flowers outlined in gold.
Three styles in one photo show how versatile blossom gel polish can be.
Every panel uses the same trick: a pale, milky base that gives the spreading colour something light to bloom against.
That pale base is the quiet hero of every blossom gel polish design.
How the blossom effect actually happens
Blooming gel is a clear gel with a thin, slow-moving formula, applied over a cured base colour and left uncured. When you dot coloured gel onto that wet layer, the pigment spreads and diffuses across the surface instead of sitting where you placed it, creating the soft watercolour effect. The longer you wait before curing, the further the colour blossoms; nail artists recommend letting the design develop for about 10 to 30 seconds, then curing to freeze it.
Timing the cure is what keeps blossom gel polish from turning muddy.
Working one nail at a time matters, because the gel keeps moving until the lamp stops it, and our red and white swirl ideas show the same spreading technique in a red palette.
Working one nail at a time keeps blossom gel polish neat and controlled.
What the three panels teach
Each panel shows a different blossom personality. The brown marble panel is the most abstract: the colour spreads into stone-like veins, and the gold foil flakes sit on top to catch the light. The red watercolour panel is the softest: pink-red blooms fading into the milky base, a true blossom. The blue-purple flower panel is the most controlled: the blooms are outlined in gold after spreading, which turns soft watercolour into defined petals.
Each panel proves a different mood blossom gel polish can create.
The lesson is that blooming gel gives you the soft part for free; the detail you add afterwards, dots, outlines, foil, decides whether the nail reads as marble, flower or abstract art.
The finishing detail decides how a blossom gel polish set reads.
Reds That Bloom: Shop the Look
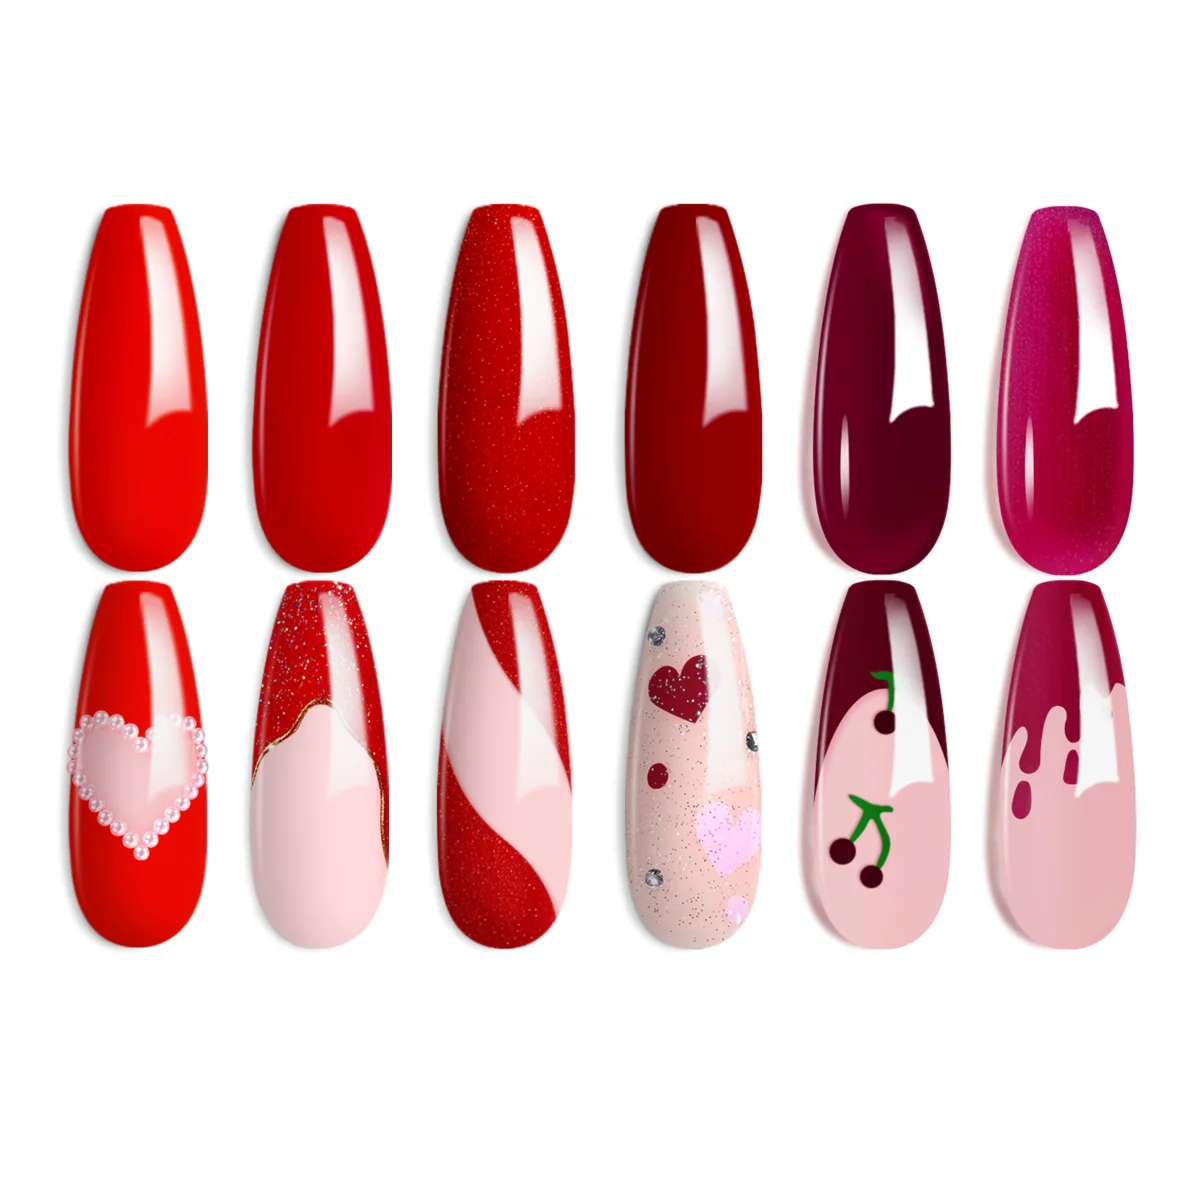
The second photo shows twelve almond swatch tips: six solid reds on top (bright red, classic red, red fine glitter, deep burgundy, plum, magenta-pink fine glitter) and six red-and-nude art tips below (a pearl heart on red, red glitter with a white swirl and gold line, a red glitter diagonal over nude, nude with red hearts and gems, burgundy with cherry art, a drippy burgundy-over-nude French). None of these are blossom art, but they are the shade library your blossom work draws from, and red is one of the best families to bloom with.
A red shade library is the best starting point for blossom gel polish art.
Which reds suit the blossom technique
Blooming works best with sheer, jelly or softly pigmented colours over a pale base, because heavy opaque pigment spreads into mud instead of petals. From this row, the best blossom candidates are the classic red, the magenta-pink and the burgundy, used in small amounts over milky white. The bright orange-red blooms beautifully too but spreads fast, so use smaller dots.
The red fine glitter is the exception: glitter particles do not diffuse, so glitter goes on after the bloom is cured, as decoration, not as the blooming colour. Our dark red gel nail polish ideas cover these deeper reds worn on their own.
Glitter goes on last, never mixed into blossom gel polish while it blooms.
Pairing blossom with the art below
The bottom row shows what to combine a blossom accent with. A full set of red blossoms would be a lot of movement on ten nails, so the photo’s logic is sound: wear the statement art on one or two nails and keep the rest in solid reds or simple designs. The pearl heart, the cherry art and the drippy French are all strong enough to share a set with a blossom nail, because they share the same red family. Mixing families, say a red blossom with a blue marble, is where sets start to look random.
One blossom accent keeps a blossom gel polish set wearable.
Classic Red as Your Canvas: Shop the Look

The third photo shows a hand holding a vintage black telephone handset inside a red phone booth, with short nails in classic bright red creme. There is no blossom art here at all, and that is the point. This is the canvas: a clean, confident red manicure on short nails, the kind of set that a blossom accent was invented for.
A classic red base is the canvas blossom gel polish was made for.
Why blossom loves a red base
A blossom accent nail stands out most against a strong, simple base, and classic red is the strongest simple base there is. Try this: nine nails in the red creme shown here, and the ring fingers in a milky white base with red blossoms blooming across them. The red dots in the first photo’s watercolour panel show exactly how that looks. Short nails suit this combination well, because the blossom has a smaller field to spread across, which keeps the effect delicate instead of blurry.
The everyday case for blossom
Most blossom tutorials show long, dramatic nails, but the technique is arguably more useful on short everyday nails. A small blossom on one nail turns a plain red manicure into nail art without any drawing skill, and if a nail chips, a solid red is easy to patch while art is not. This photo is a reminder that the blossom technique is a tool for real weeks, not just for photo shoots.
Glitter Top Coat Over Blossom Art: Shop the Look
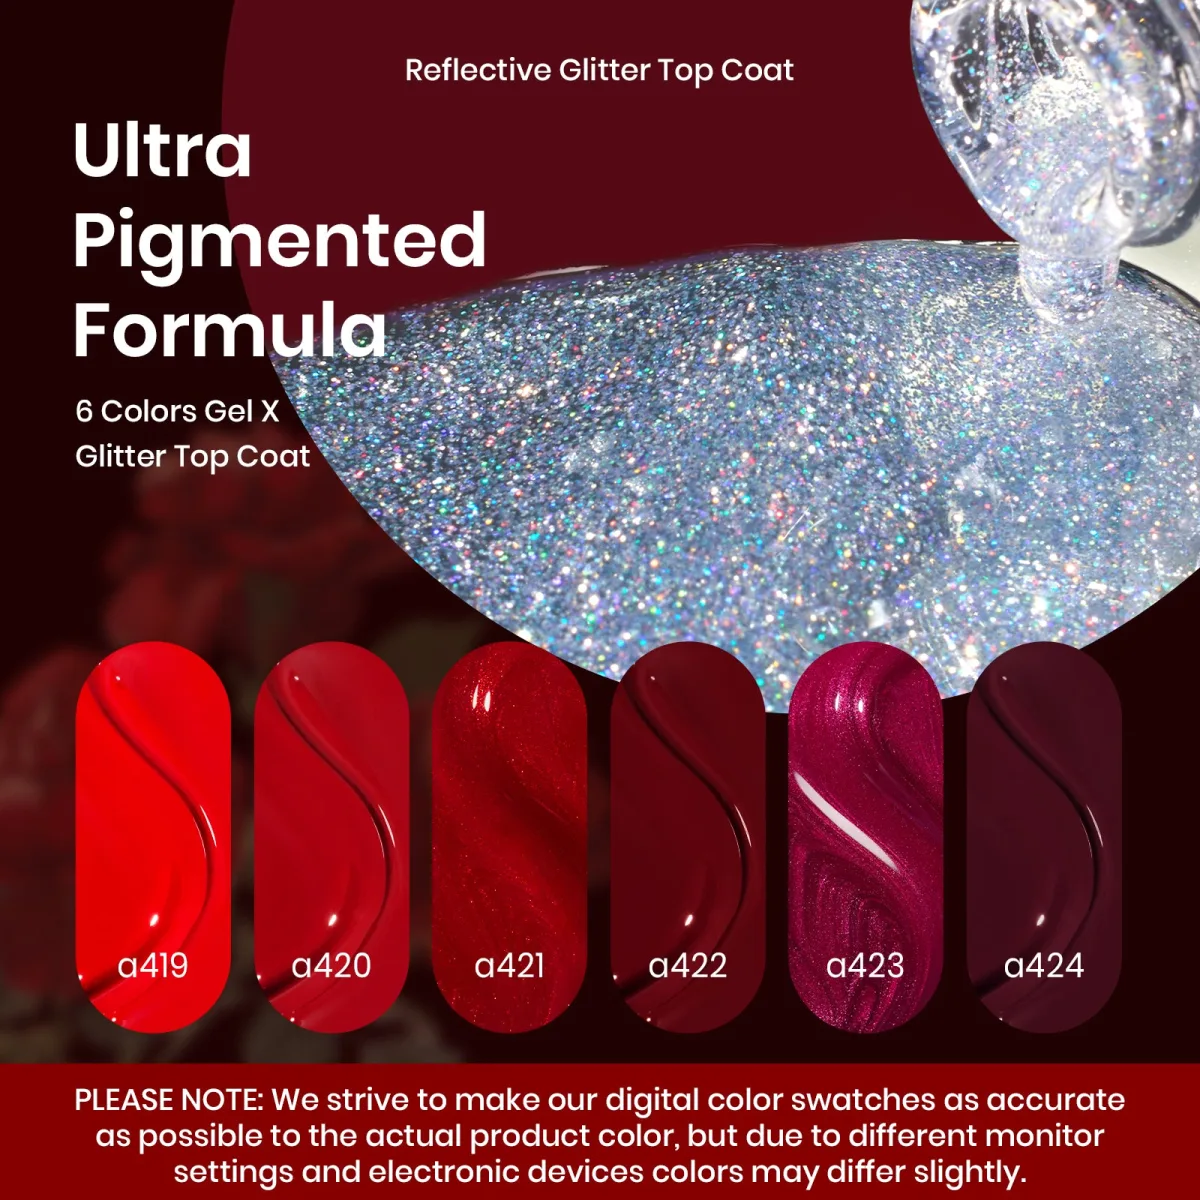
The fourth photo shows a reflective silver holographic glitter top coat being poured, with six red swatch tips below labelled a419 to a424 in the image (bright red, classic red, red fine glitter, burgundy, magenta shimmer, dark plum). The printed text calls it a glitter top coat formula. This is the finishing step for blossom art: once the blooms are cured and sealed, a glitter top coat adds the dimension that flat watercolour lacks.
When to add glitter to a blossom set
Glitter top coat works best as a final layer over cured blossom art, not mixed into the blooming step. Applied over the finished design, the holographic glitter sits on top of the soft blooms and catches the light as the hand moves, which gives the watercolour depth without disturbing the spread. The photo’s silver glitter is the most versatile choice: it reads as sparkle over any blossom colour. If you prefer the glitter to blend in, match the glitter family to the bloom, gold over warm reds, silver over cool blues and purples.
Matching the glitter family keeps blossom gel polish looking intentional.
Reading the shade row
The six red swatches in this photo repeat the lesson of the second photo with one addition: the labels printed in the image. Treat those as the image’s own labelling rather than verified shade names, and choose by eye instead.
The useful detail is the range: from bright red through magenta shimmer to dark plum, which mirrors the blossom-friendly reds. A blossom set that uses two reds from this row, one for the blooms and one for the solid nails, will always look coordinated. Our glitter gel nail polish set post explores the glitter side of this pairing in full.
Choosing by eye beats memorising shade names for blossom gel polish.
Blossom Meets Romantic Styling: Shop the Look
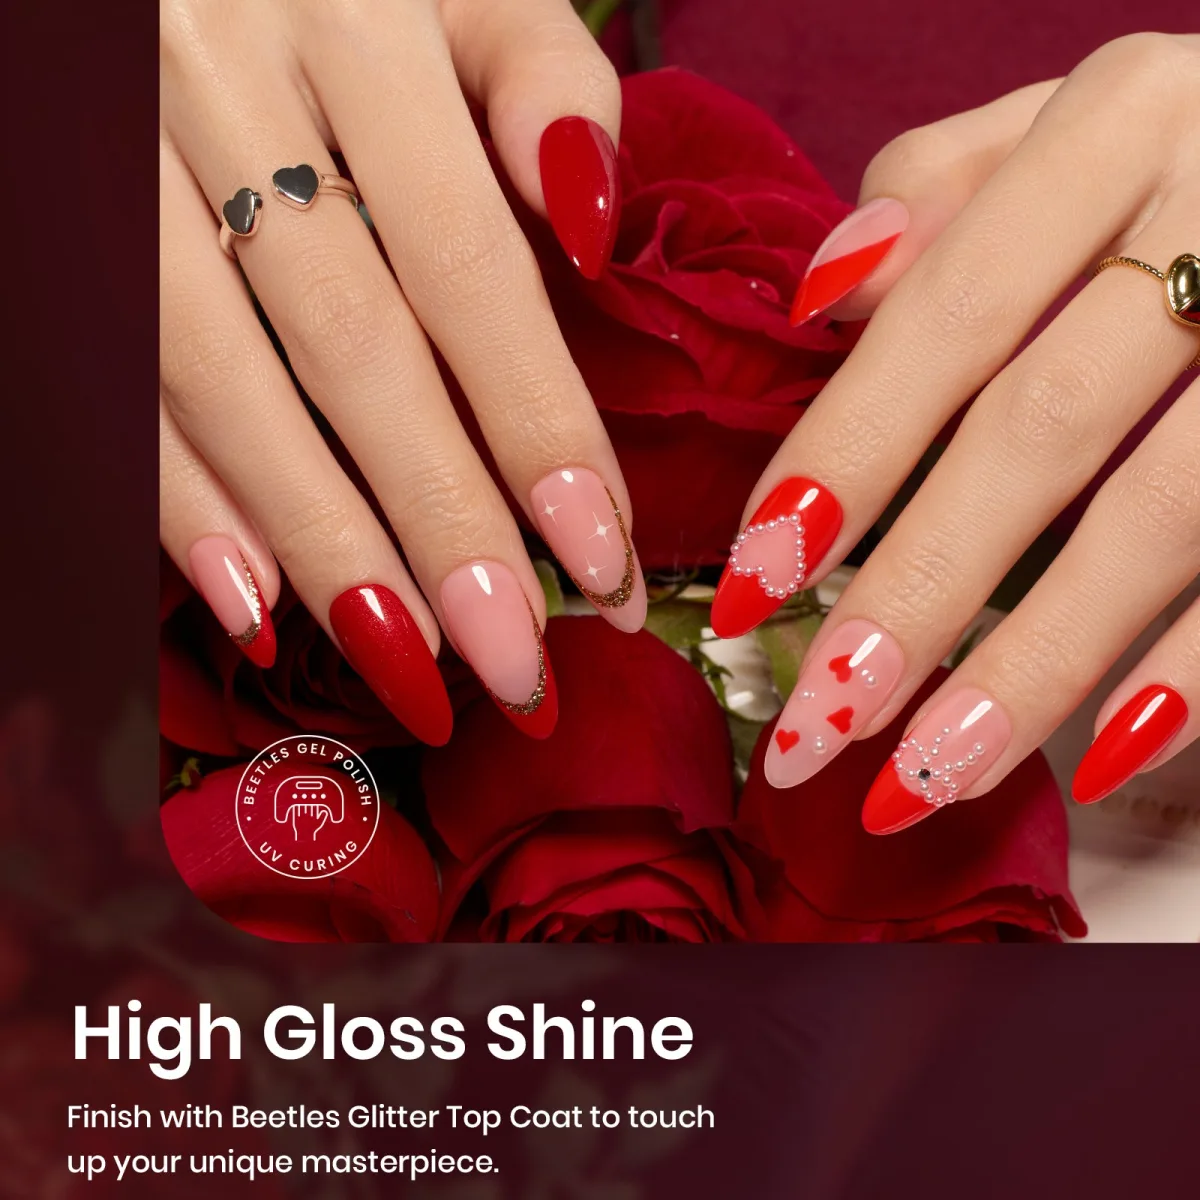
The last photo shows two hands with long almond nails in a romantic red styling: solid red nails, nude nails with red French tips, red nails with pearl heart outlines, nude nails with red hearts and gems, and gold glitter French outlines. The printed text suggests finishing with a glitter top coat. No blossom art appears here, but the styling is the natural home for it: hearts, pearls and soft reds are the motifs blossom art was made to join.
Adding a blossom nail to a romantic set
This set is already complete, which makes it the perfect example of where a blossom accent fits without redesigning anything. Replace one nude nail’s heart art with a milky white base and soft red blossoms, and the set gains a watercolour moment among the structured designs. The gold glitter French outlines in the photo show the finishing language to copy: gold details tie blossom art into romantic sets, just as the gold outlines do in the first photo’s blue-purple flower panel.
Keeping romance wearable
Romantic sets risk looking costumey when every nail carries art. The photo avoids that by alternating: solid red, then art, then nude, then art. Follow the same rhythm with blossom work, one or two blossom nails per hand, the rest solid or simply decorated. The pearl hearts and gems in this photo are applied after curing and sealed under top coat, and blossom art takes the same treatment: cure the blooms, add any dots or foil, then seal everything under top coat.
How to Apply These Looks at Home
- Prep first. Trim and file your shape, push the cuticles back, lightly buff the shine off the natural nail, then clean the surface so it is dry and free of oil and dust.
- Apply a thin base coat, capping the free edge, and cure for the time your polish brand and lamp specify. Then apply your base colour, milky white or nude for blossom work, in thin coats, curing each one.
- Apply a thin layer of blooming gel over the cured base colour and do not cure it. Keep the layer thin and even, and work one nail at a time.
- Dot or draw your chosen colours onto the wet blooming layer with a dotting tool or fine brush. Let the design develop for about 10 to 30 seconds, watching the spread, then cure to freeze it. Add any glitter, foil or detail art on top and cure again.
- Finish with a thin top coat, capping the free edge, cure for the final time, wipe if your system requires it, and massage cuticle oil around each nail.
One safety step is worth adding. The American Academy of Dermatology recommends a broad spectrum, water resistant sunscreen with SPF 30 or higher on your hands before a gel manicure, since the polish is sealed using ultraviolet light.
Frequently Asked Questions
What is the difference between blossom gel and blooming gel?
They are the same product under two names. Blooming gel is the technical term for the clear specialty gel that makes colour spread; blossom gel is the friendlier name some brands and posts use, referring to the flower-like effect it creates. Both work the same way: an uncured clear layer that lets dotted colour diffuse before curing.
Can I get the blossom effect without blooming gel?
Not really, and this is worth knowing before you waste polish. Regular gel polish stays where you put it, so dots stay as dots. The spreading happens because of the reaction between the pigment and the blooming gel layer, as nail experts explain. A thin layer of clear builder or top coat will not create the same diffusion.
Why did my colours spread too much and turn muddy?
Two common causes. First, the blooming layer was too thick, which lets colour travel too far; keep it thin. Second, you waited too long before curing. Watch the design develop and cure as soon as it looks right, usually within 10 to 30 seconds. Also start with less colour than you think you need, since you can add more but cannot take spread back.
Which base colours work best under blossom art?
Pale, milky bases: milky white, sheer nude, blush pink or a pastel. The blossom needs a light background to show its soft edges; over a dark base the spread disappears into the background. The first photo in this post shows the rule in action: every blossom panel sits on milky white.
Pick the blossom style that fits your week, and follow Beautylicious Hub on Pinterest for more blossom nail ideas like these.