Caramel Gel Polish: 5 Stunning At-Home Manicure Ideas
Caramel gel polish sits in the sweet spot between nude and brown, and that is exactly why it keeps showing up in autumn manicures. It is warm enough to read as a color, quiet enough to wear every day, and it pairs with glitter, marble and plain glossy finishes without a fight. For more warm browns in the same family, see our autumn brown nail looks.
The five photos in this post are honest about what they are: Beetles ad graphics and one clean product shot built around the shade Beyonce Caramel. So this post is built the same way. One section per photo, in photo order, describing what is actually visible: the shade itself, three finished nail looks, and the bottle they all come from.
Caramel Gel Polish Color Swatch Texture: Shop the Look
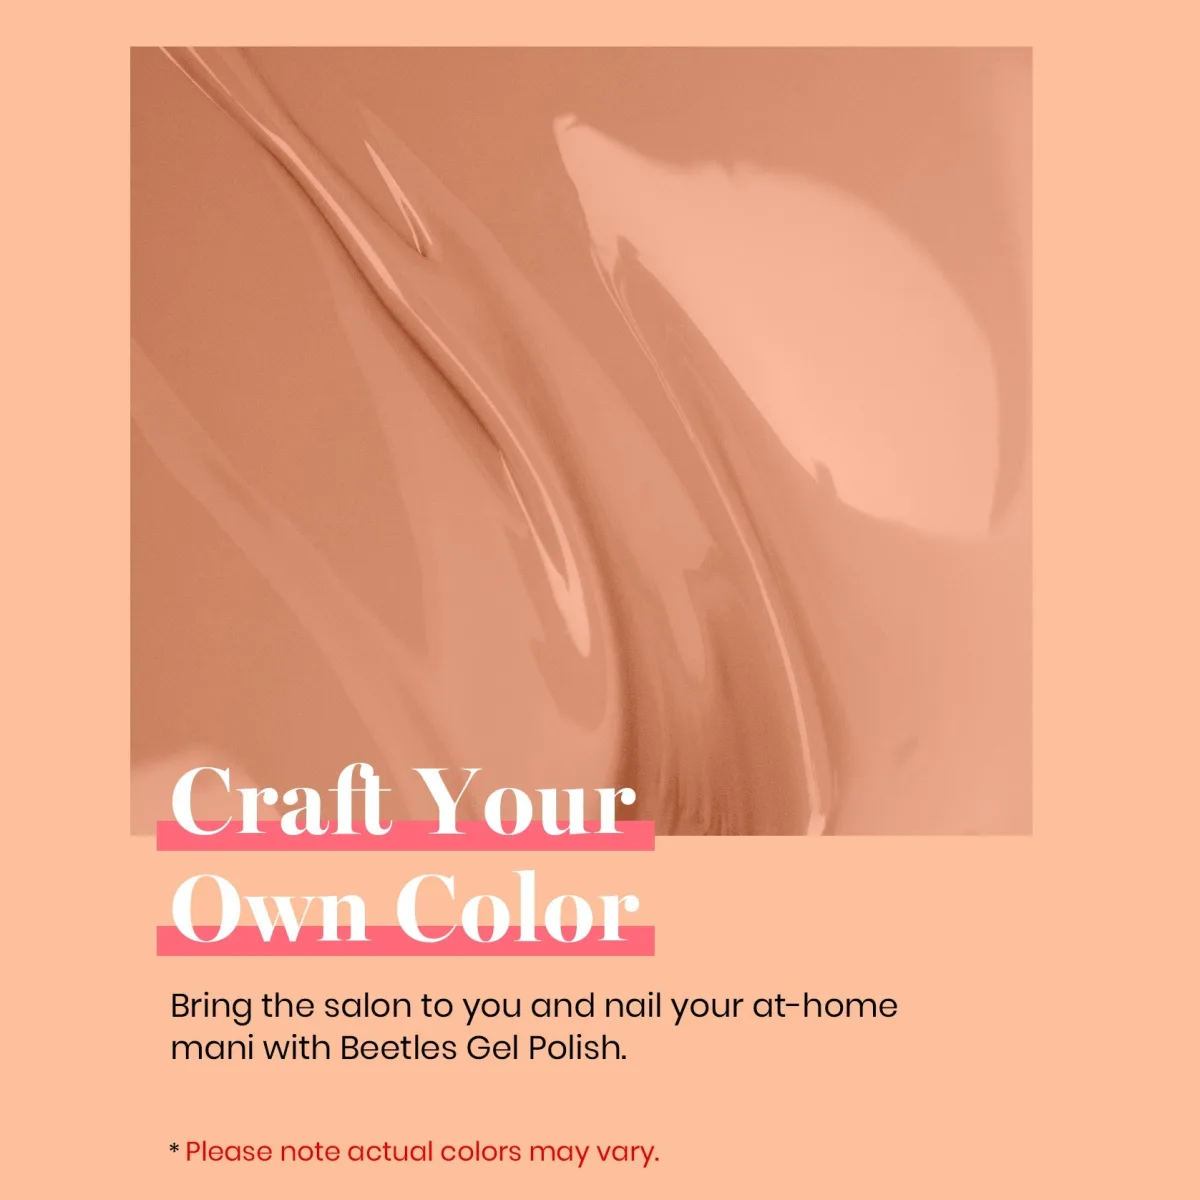
Caramel gel polish shows its true depth in a swatch photo. The first photo shows no nails at all, and that is deliberate. It is a close-up of flowing caramel brown gel polish, thick glossy swirls of color filling the top of a square ad graphic on a peach background. This is the shade itself before nail shape, skin tone or lighting get involved. Studying a color this way before buying is the most honest test it can pass, because it shows depth and warmth without styling to hide behind.
What a swatch photo really tells you
Caramel gel polish reads as a rich neutral on the nail. Look at the tone and you can see why caramel earns its food name. It is a warm mid brown with a golden, almost honeyed pull, sitting squarely between pale nude and deep chocolate. On the nail it reads as a rich neutral: noticeable enough to count as a color, quiet enough for the office. It flatters warm undertones naturally, and against cool undertones it adds warmth that can wake up pale hands. Because the swirls are photographed in fluid polish, you can also see the pigment is dense and even, which matters, because patchy browns are the ones that streak.
Caramel can drift orange, so plan for it
One detail in the photo deserves honesty. The printed fine print says actual colors may vary, and it is right. Screens shift warm browns, and caramel is one of the shades that drifts: it can arrive richer or more orange than expected. The fix sits in your hands, not the bottle: one thin coat over a sheer nude base cools the result down, while two full coats give the deepest, warmest version.
Caramel Brown and Glitter Coffin Nails: Shop the Look
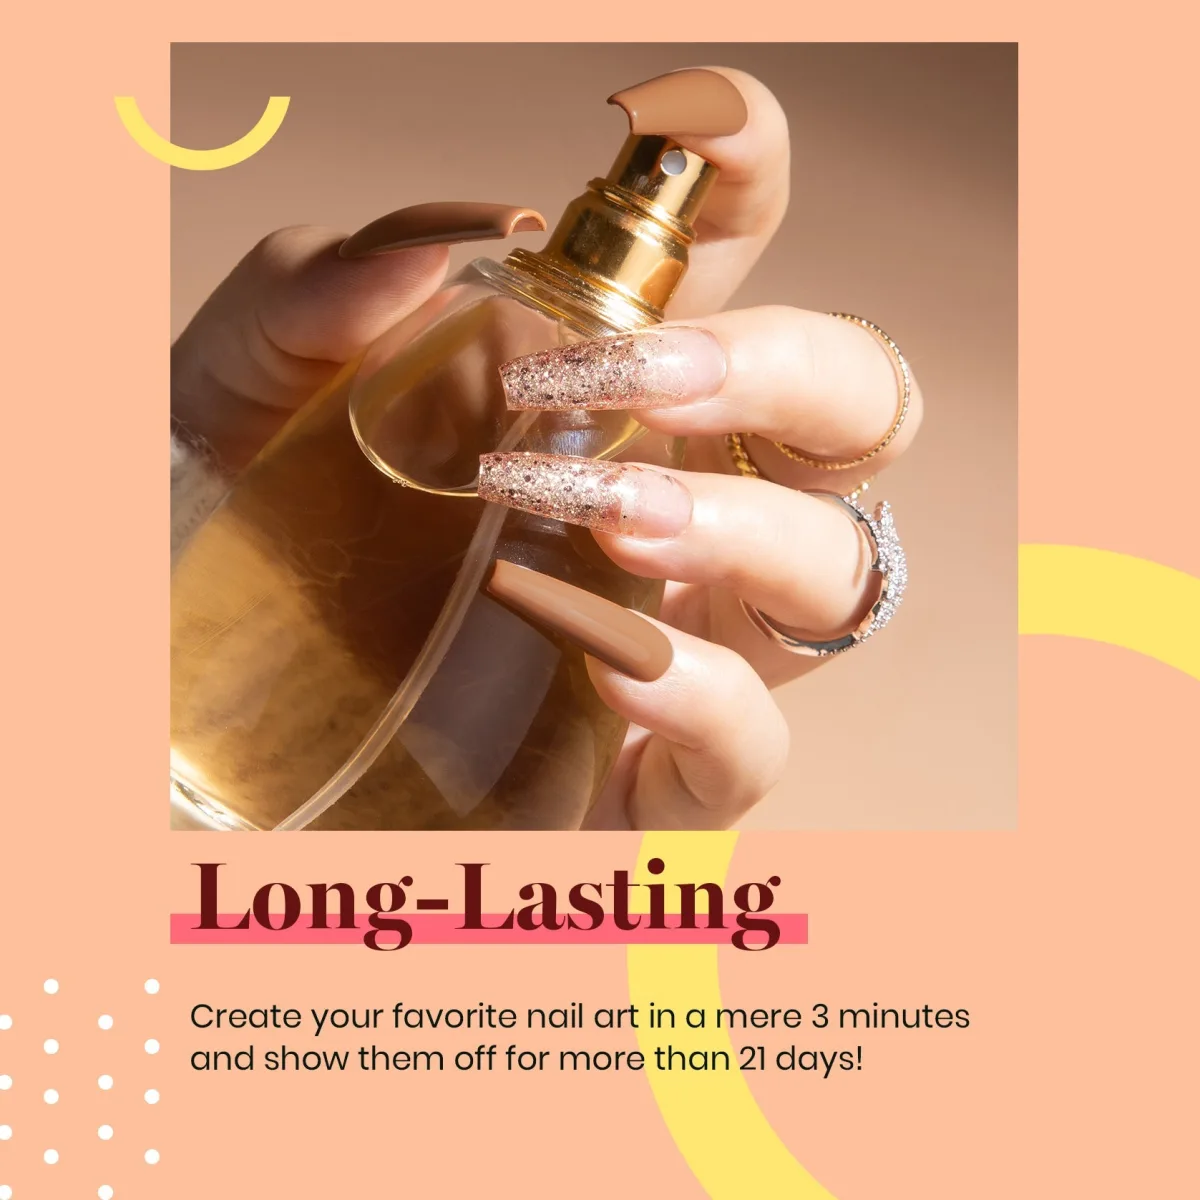
Caramel gel polish looks glossy and rich on coffin nails. Here is the shade on actual nails, on long coffin nails held around a glass perfume bottle with a gold spray cap. Most nails are glossy caramel brown. Two accents, on the middle and ring fingers, carry rose gold glitter over a sheer base. Gold rings, including a pave band, sit on the fingers, and the graphic rests on a peach background with yellow arcs and white polka dots.
Why two glitter accents beat five
Caramel gel polish stays elegant with two glitter accents. Glitter is the easiest way to overdo a manicure, and this photo shows the restraint that keeps it elegant. Only two nails carry glitter, and both sit in the same warm family as the caramel, so nothing clashes. The glitter itself is a rose gold over a sheer base rather than a solid metallic, which keeps the accents light instead of heavy.
If you want more glitter ideas in this vein, our glitter gel polish set guide covers the same principle across full sets. The rule transfers to any shade: pick your accent nails first, keep them in the same color temperature as your base, and let the other nails stay quiet.
Coffin shape makes brown look longer
The coffin shape does real work here. Tapered sides and a flat tip give a mid brown polish a long, smooth surface to sit on, which stretches the color out and makes fingers look longer. Shape guides note that coffin suits long, slender fingers and needs real length to look right, as this photo shows. The trade is everyday practicality. Long coffins catch on things, so if you type all day, keep this length for the weekend and wear the same shade shorter during the week.
Caramel and Gold Glitter Stiletto Nails: Shop the Look
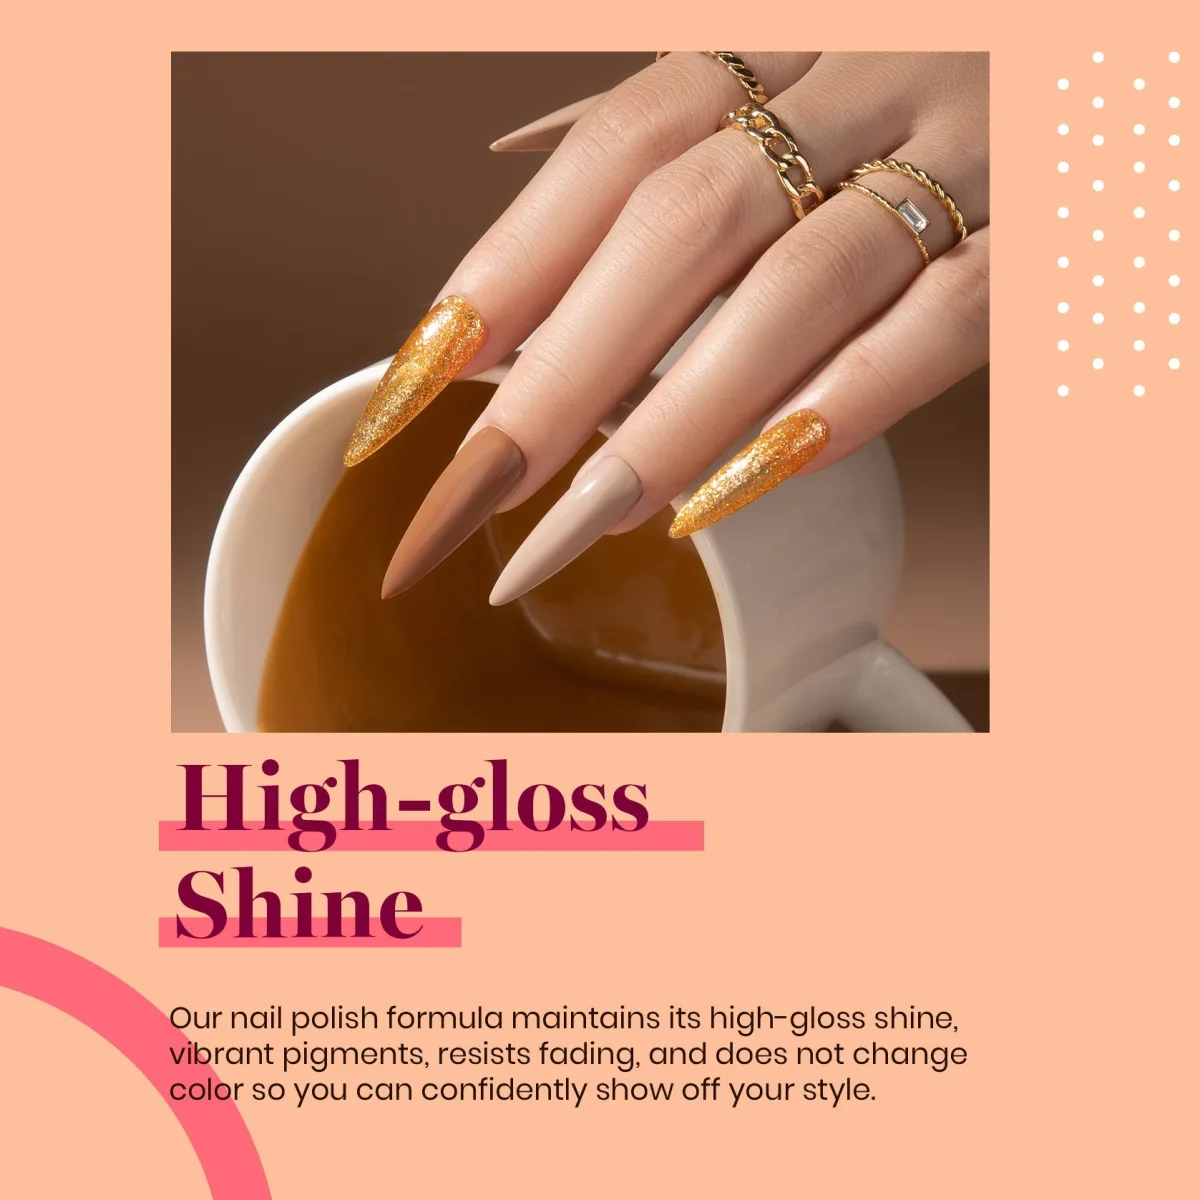
Caramel gel polish turns dramatic on stiletto nails. The third photo turns the drama up. Very long pointed stiletto nails drape over a white coffee mug, in glossy caramel brown, creamy nude, and two gold orange glitter accent nails. Gold chain link rings sit on the fingers. Where the last set kept glitter to a supporting role, this one mixes three finishes, caramel, nude and glitter, across one hand, and it works because all three stay inside the same warm family.
Three colors, one warm family
This is the photo to study if you like variety but fear a messy result. The rule it follows is simple: vary the finish, not the temperature. Caramel brings the color, creamy nude brings the lightness, and gold glitter brings the sparkle, but every one of them leans warm. That shared warmth is the invisible thread holding the set together. Beauty writers make the same point about caramel sets in general: too many competing details, glitter plus foil plus rhinestones plus designs, drain the depth out of the color instead of adding to it.
Stiletto is a statement, plan around it
Be honest about the length before you commit. Stiletto this long is occasion wear, not keyboard wear. It photographs beautifully, which is why ad graphics love it, but daily tasks like typing, fastening jewelry and digging in a bag get noticeably harder. If you love the look but live a practical life, borrow the color story at a shorter almond length: you keep the caramel, nude and gold combination and lose the liability. Either way, seal everything with a proper gel top coat and cap the free edge, because pointed tips are the first place gel starts to lift.
Caramel Marble and Glitter Accent Nails: Shop the Look

Caramel gel polish pairs marble and glitter without clutter. The fourth photo returns to long coffin nails, this time resting over a pink cup. The nails are glossy caramel brown with two different accents: one rose gold glitter nail and one white and caramel marble nail. Gold rope rings sit on one finger. Beside the hand, the graphic prints a small three step how to, which makes this the most useful photo in the post.
One marble nail, one glitter nail, zero clutter
Two different accent styles on one hand sounds like a lot, and it would be, if they fought. They don’t, because marble and glitter do opposite jobs here. The marble nail, white veined through caramel, is soft and cloudy. The glitter nail is bright and sharp. Together they give the eye two places to land without competing, while the solid caramel nails between them keep the set grounded. Marble rewards a light hand: one marble nail per hand is plenty.
The three steps printed on the photo
The graphic’s own instructions are worth quoting because they match the brand’s official guidance. Step one: apply the color coat. Step two: cure under a UV or LED lamp for 60 to 90 seconds. Step three: apply twice for better effect, meaning two thin coats rather than one thick one. The official Beetles application page says the same things in more detail: thin color layers cured about 60 seconds each, and the warning that the thinner each coat is, the better, because thick gel shrinks and peels. Our gel curing tips walk through the same timing. The printed steps also confirm what this post keeps repeating: thin coats are the whole game with pigmented shades like caramel.
Beetles Beyonce Caramel Gel Polish Bottle: Shop the Look
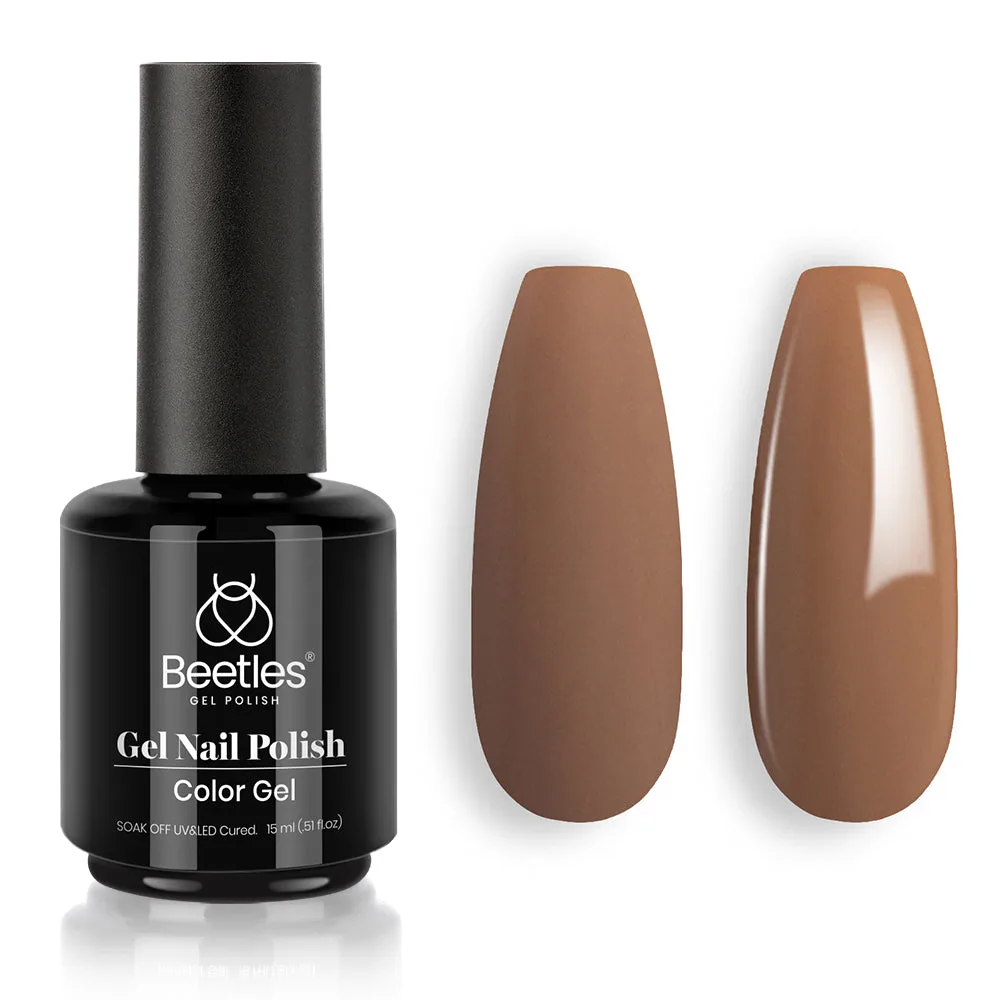
Caramel gel polish shows matte and glossy in one bottle. The last photo is the only one without styling: a clean product shot on a white background. A black Beetles bottle stands next to two caramel nail tips, one looking matte, one glossy. No hands, no props, no ad text beyond the label. This is the buying decision in one frame, so read it the way you would read a label in a store.
What the label actually says
The bottle reads Gel Nail Polish, Color Gel, and SOAK OFF UV and LED Cured, 15 ml. That tells you the practical facts and nothing more. It is a soak off color gel, meaning it comes off with remover and foil rather than filing alone. It cures under UV or LED light, so it is not air dry polish. The shade name is Beyonce Caramel, which is the name to search if you want this exact warm brown rather than a lookalike. The bottle tells you nothing about wear time, and neither should anyone else: how long any gel lasts depends on your prep, your lamp and your daily habits, not the bottle.
Matte tip and glossy tip, same bottle
The two nail tips are the cleverest part of the photo. Same shade, two finishes: one matte looking, one glossy. That difference does not come from the color gel, it comes from the top coat you seal it with. Glossy shows off caramel’s depth and warmth, which is why most of the nail photos in this post wear it. Matte gives the same shade a modern, velvety read, but a matte top coat over an uneven base highlights every streak, so thin coat discipline matters even more under matte. Whichever finish you choose, it is decided at the last step, not the first, so buy the color for the color and the top coat for the finish.
How to Apply Caramel Gel Polish at Home
- Prep the nail. File your shape, push cuticles back, lightly buff the shine off the natural nail, and clean away dust and oil so the surface is dry.
- Apply a thin base coat and cure it for the time your brand and lamp specify. Beetles own guidance is 60 to 90 seconds under UV or LED.
- Apply the caramel color in thin coats, curing each one fully before the next. Two thin coats usually give full, even coverage; one thick coat streaks and shrinks.
- Add your accents now. Paint glitter or marble on the chosen accent nails only, then seal the whole set with a thin top coat, capping the free edge before the final cure.
- Finish with cuticle oil massaged around each nail to keep the skin soft against the warm brown.
One safety step is worth adding. The American Academy of Dermatology recommends a broad spectrum, water resistant sunscreen with SPF 30 or higher on your hands before a gel manicure, since the polish is sealed using ultraviolet light.
Frequently Asked Questions
Which skin tones suit caramel gel polish best?
Caramel is a warm brown, so it sits most naturally on warm and neutral undertones, where it blends like a richer nude. On cool undertones it still works, but expect it to read warmer and more noticeable. If your caramel keeps looking orange on you, that is the shade’s warm pull showing; wearing it over a sheer nude base for the first coat cools it down a notch.
How many coats of caramel gel polish do I need?
Two thin coats, cured separately, is the standard for full coverage with this kind of pigmented warm brown. One coat usually leaves sheer patches, and one thick coat in place of two thin ones risks shrinking and peeling during the cure. The brand’s own printed steps say the same: apply twice for better effect, twice thin, never twice thick.
How do I add glitter accents without making the set look busy?
Keep the glitter to one or two accent nails and keep it in the same warm family as your base, rose gold or gold over caramel, not silver or holographic. The photos in this post all follow this rule: solid caramel nails do the quiet work while one or two decorated nails take the spotlight. Three or more accent styles in one set is where busy starts.
Should caramel gel polish be matte or glossy?
Both work, and the product photo in this post shows the same shade in both finishes. Glossy is the safer default: it shows off caramel’s depth and warmth and forgives minor unevenness. Matte looks modern and velvety but highlights every streak, so only choose it if your application is smooth and even. Remember the finish comes from your top coat, not the color bottle.
Pick the version that fits your week, save your favorite, and follow Beautylicious Hub on Pinterest for more nail ideas like these.