Holiday Nail Art: Stunning Festive Designs to Try
Holiday nail art is where December stops being just a colour and becomes a picture, and this post follows five photos that show that change at every level, from candy stripes and Santa hats through gold snowflakes to gingerbread men, with a solid burgundy set in the middle to prove that plain colour still has a place. Every photo here is a worn look, photographed on a real hand, which matters for art more than for plain polish: you can see the true size of each motif, how much nail it covers, and how it sits next to plain nails on the same hand.
The art in this post shares one discipline that is easy to miss when you only admire the finished photos. In every set, detailed nails sit beside plain nails, so the art reads as a highlight rather than as noise. Keep that discipline in mind while you read, and every look here becomes reproducible, even the gingerbread set, because the art is always the accent, never the whole hand.
Candy Stripes and Santa Hats in Holiday Nail Art: Shop the Look
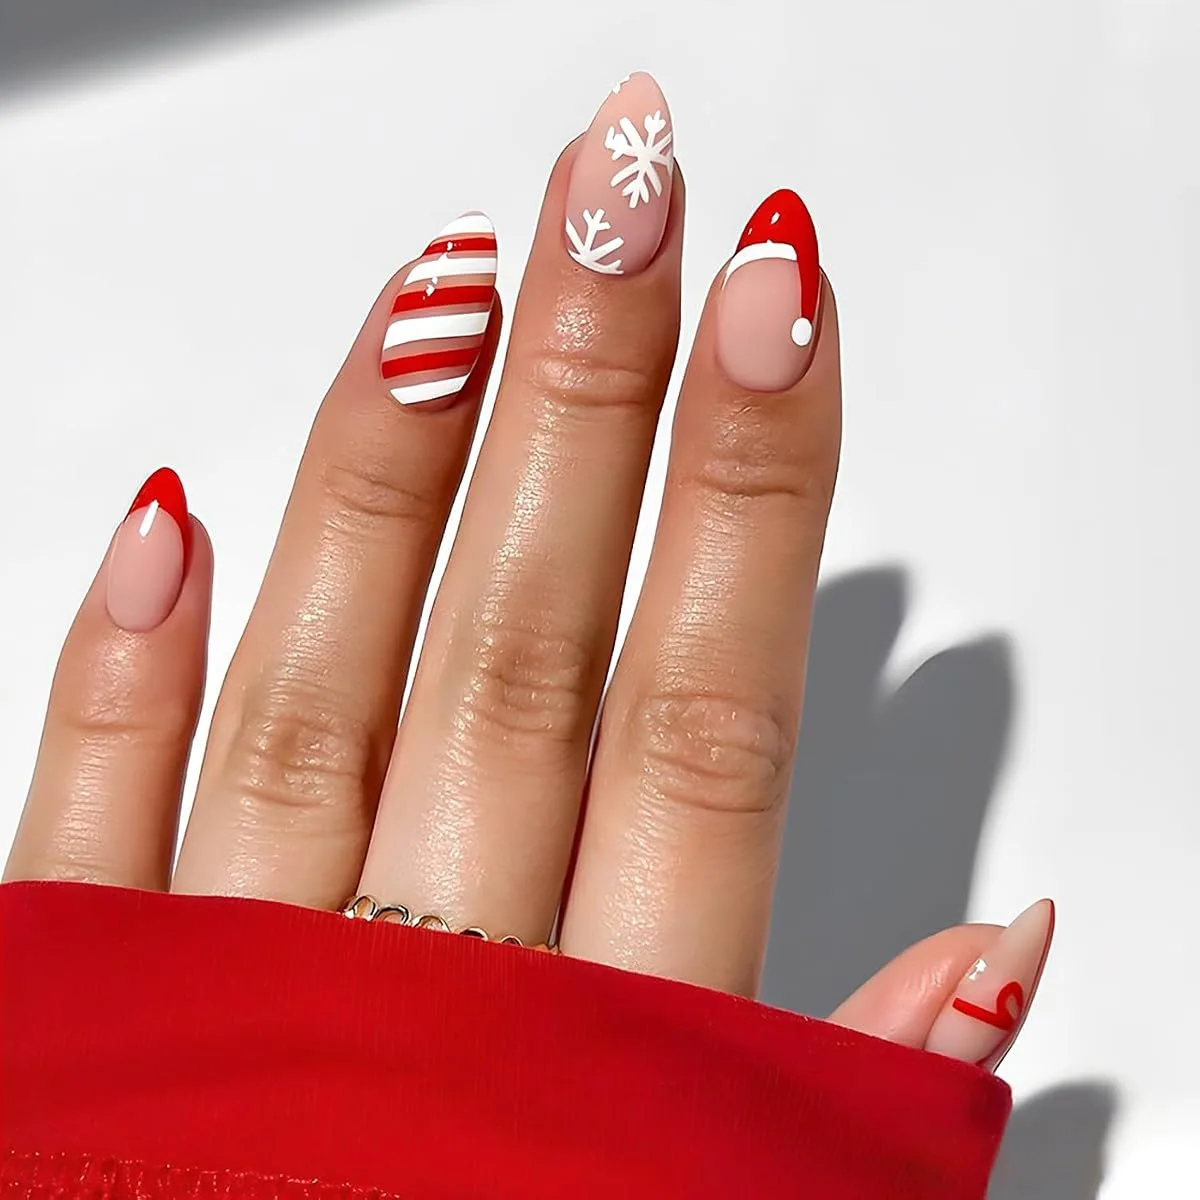
The first photo shows long almond nails on a hand in a red sleeve, carrying a bright, playful festive set: nude bases with red French tips, a nail in full red and white candy cane stripes, a nail with white snowflakes on nude, a nail with a Santa hat tip detail in red and white, and a small red hook detail on the thumb.
Stripes are the most useful motif in this set for a home painter of holiday nail art, because they teach brush control without needing a steady hand for curves. Paint the nude base first, then lay stripes across one nail with a thin brush or striping tape, keeping the stripes even in width and letting each stripe dry before painting the next, so colours do not drag into each other. The Santa hat tip is simpler than it looks: paint the tip red, add a white band across its base and a white dot at the very tip, and the hat reads instantly. Snowflakes need only a simple six-arm star with dot details, painted in white over the nude base, rather than a complex crystal.
Keeping a multi-motif set coordinated
Stripes on one nail, snowflakes on another, a Santa hat on a third, and plain French tips elsewhere keep the hand festive without turning it into a catalogue. If you add a fourth motif, drop one of the first three, since four heroes rarely share a hand gracefully.
Stripes as a beginner art skill
Stripes reward patience more than talent, because even width and clean edges matter more than speed. Our festive holiday looks post shows more stripe and character combinations, for readers who want to practise the same skills on different sets.
Gold Snowflakes on Deep Red in Holiday Nail Art: Shop the Look
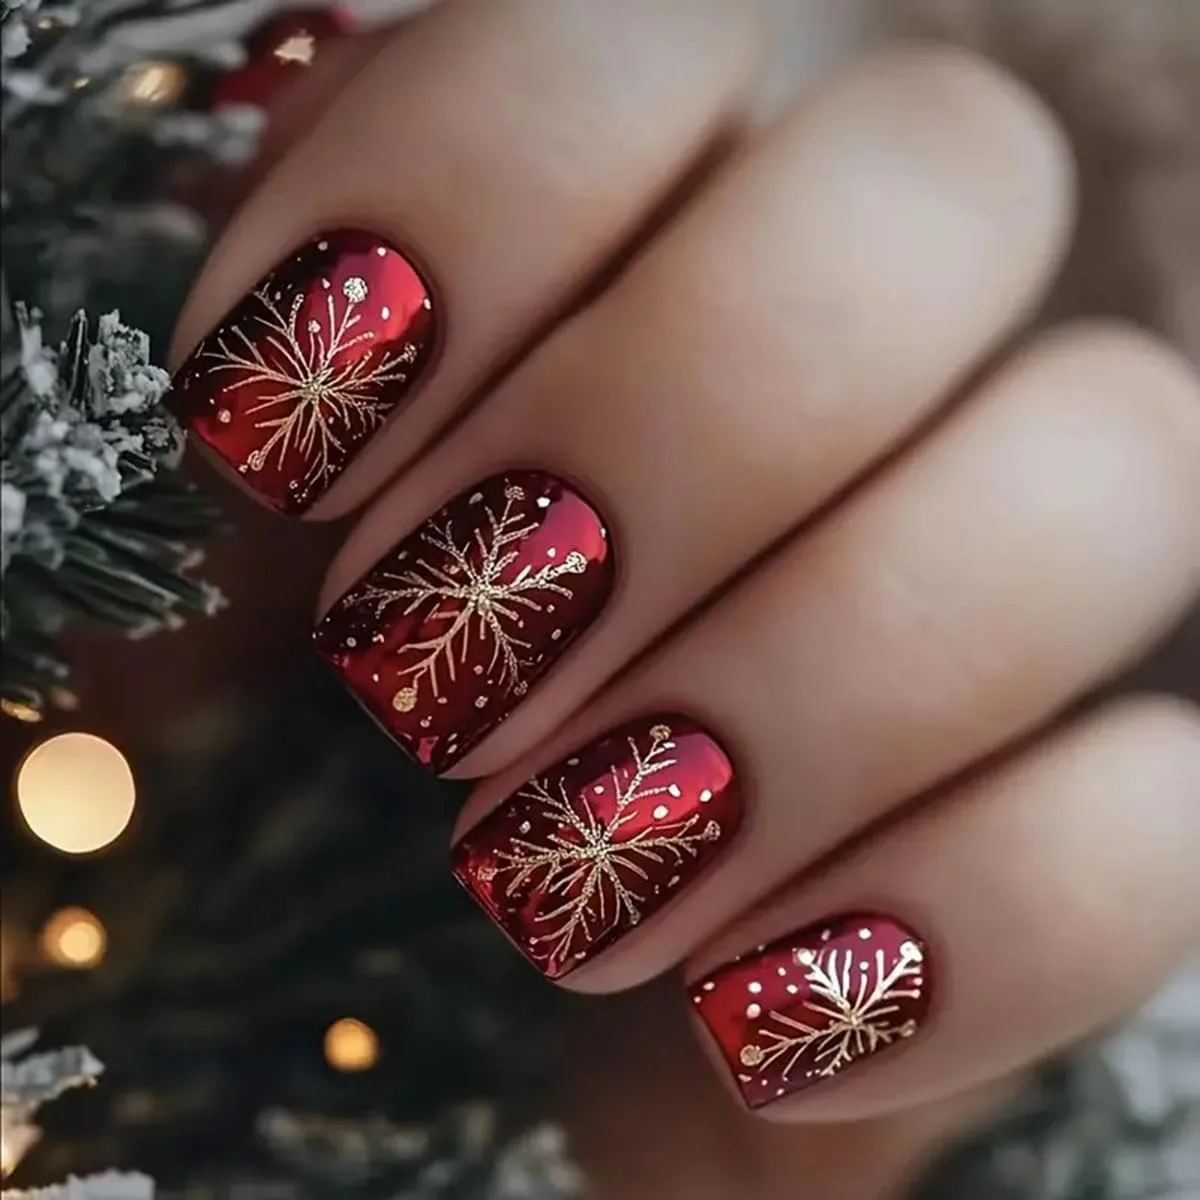
The second photo is the most glamorous art in the post: short squoval nails in a deep red metallic base, each carrying a large gold snowflake, with white dots and frosted branch details, photographed against frosted greenery and blurred festive lights. Short nails suit this look for holiday nail art surprisingly well, because a single large snowflake fills a short nail completely, turning the small canvas into an advantage.
Painting a gold snowflake well depends on the base being fully dry or cured before the gold goes on, since gold line work drags badly over a tacky base. Draw the centre dot first, then six arms radiating outward, then short branch strokes along each arm, working with a fine brush barely loaded with gold. Add white dots last for snowfall, scattered rather than patterned, since random dots read as snow while even dots read as decoration. One snowflake per nail is enough, and keeping the same snowflake size across nails gives the set its calm, expensive feel, even though each snowflake is hand-painted.
Drawing a snowflake that looks delicate
Delicacy comes from thin lines and empty space. Keep the arms fine, leave red base visible between them, and resist filling every gap with extra branches. A snowflake with breathing room looks like frost, while a snowflake packed solid looks like a gold sticker.
Deep red as an art base
Deep red is an ideal art base because it is dark enough for gold to stand out, yet warm enough to feel festive rather than severe. It also hides minor imperfections better than white or nude bases, which makes it forgiving for a first attempt at gold line work.
A Second View in Holiday Nail Art: Shop the Look
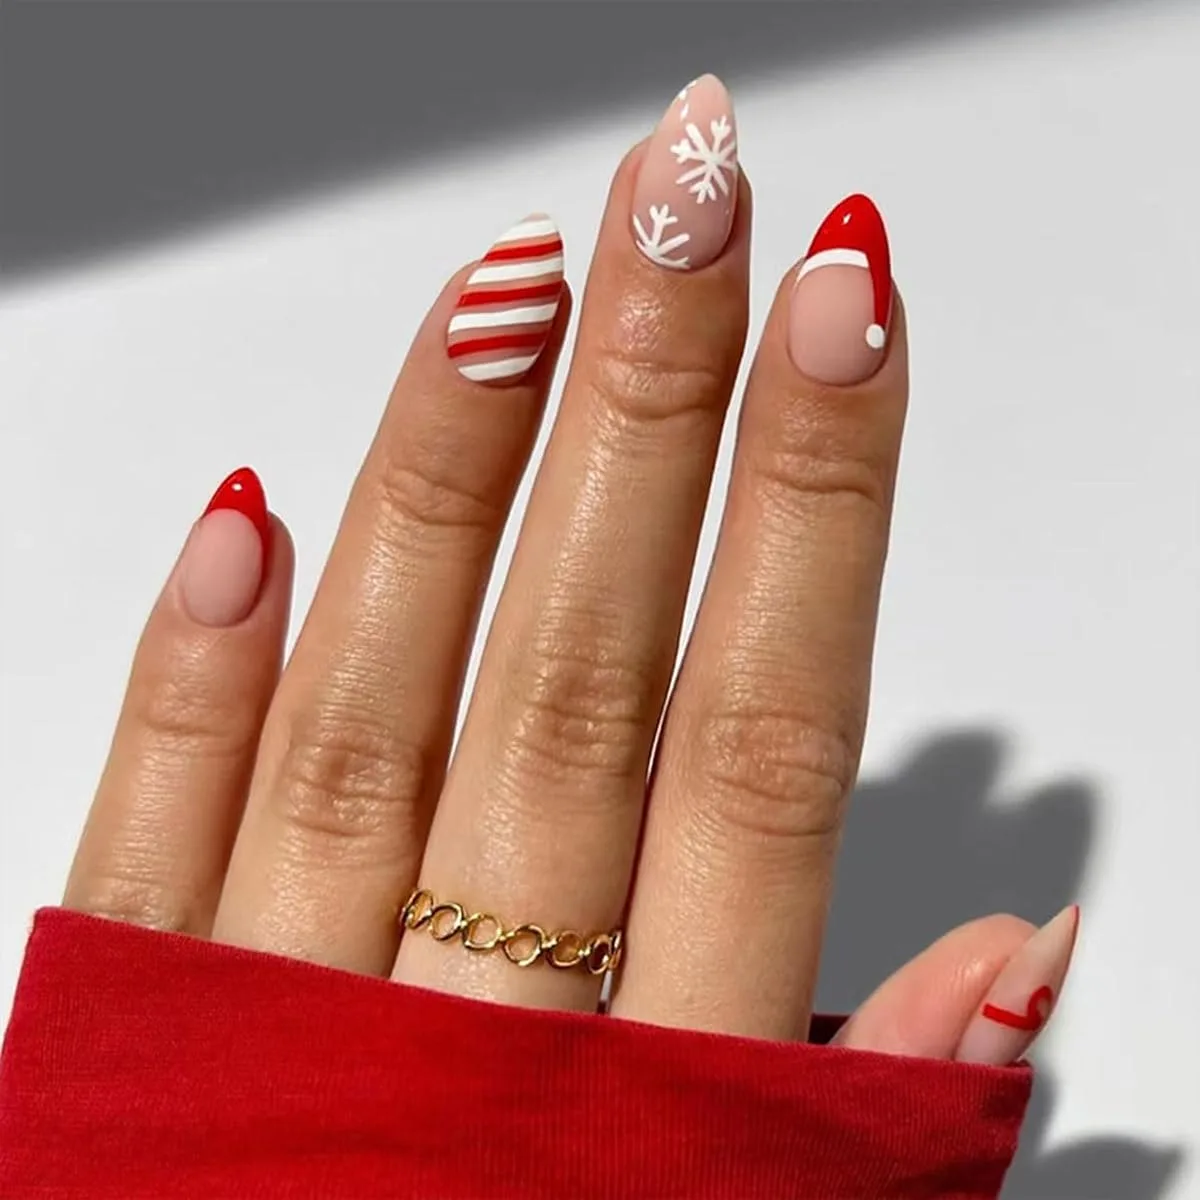
The third photo needs an honest note before anything else: it shows the same manicure as the first photo, not a new design. The candy cane stripes, white snowflakes, Santa hat tips and red sleeve are all the same, seen in a slightly different crop with a gold ring now visible on one finger.
The second view shows the Santa hat construction more plainly than the first: the red tip shape, the white band and the white pom dot read as three separate strokes, which is exactly how to paint them. It also shows how the candy stripes behave at the nail edge, staying crisp where the stripe meets the sidewall, and how the snowflake sits on the nude base without crowding the cuticle. For readers planning this set, the two views together are more useful for holiday nail art than either alone, since the first view sells the idea and the second view teaches the execution.
Learning from two views of one set
When you find a look you love, seek a second angle before painting it, since a single front view hides edge work, tip construction and cuticle clearance.
Planning this set from both photos
Plan the set as one striped nail, one snowflake nail, one Santa hat nail and French tips elsewhere, using the first photo for colour and the second for construction. Painting in that order, stripes first, then snowflakes, then the hat, moves from the easiest motif to the most detailed, so your hand is warmest for the hardest step. Our pink white French styles post covers the French tip foundations this set relies on, for readers who want to practise tips before adding art.
Solid Burgundy Anchor in Holiday Nail Art: Shop the Look
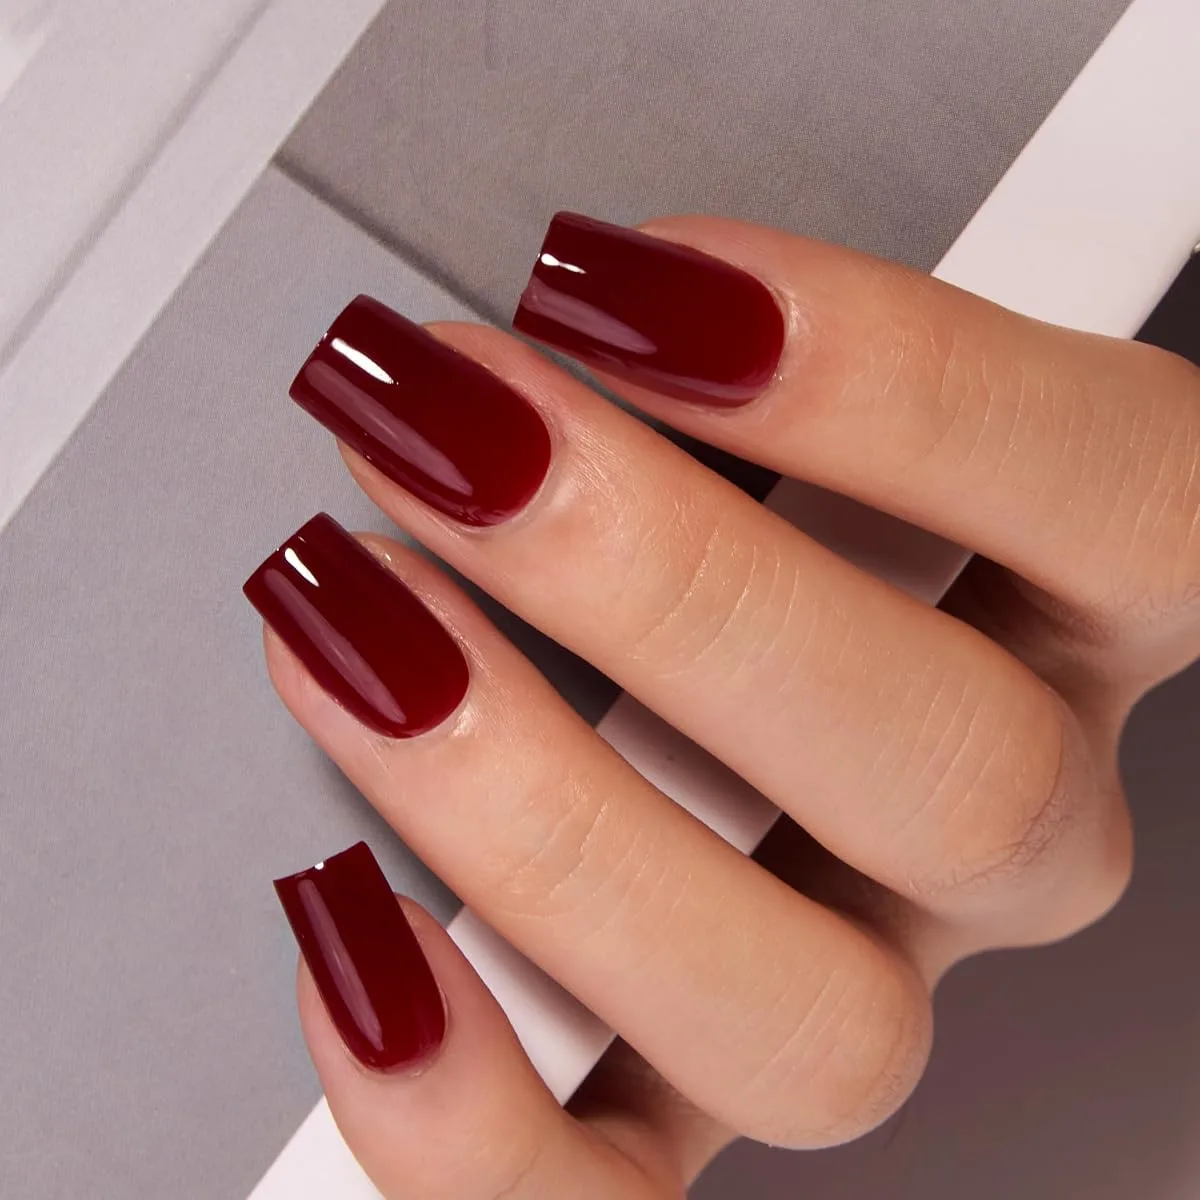
The fourth photo is the quiet anchor of the post, and it earns its place precisely by having no art at all: a hand with medium square nails in solid glossy deep burgundy red, photographed against a grey and white background. After three sections of stripes, snowflakes and Santa hats, this photo is a reminder that festive art needs a plain partner, and that a single deep shade, worn well, is itself a December statement.
A solid shade like this also serves as the supporting colour for every holiday nail art set in the post. The gold snowflakes of the second photo would sit beautifully on burgundy, the candy stripes of the first photo pair with burgundy nails on the remaining fingers, and the gingerbread set of the next section uses burgundy-adjacent browns throughout. When you plan an art set, painting the non-art nails in a shade like this, rather than leaving them nude, gives the hand depth and makes the art stand out more, not less.
Why every art post needs a plain shade
Plain shades give the eye somewhere to rest, which is what makes art look intentional rather than busy. A hand with art on every nail has no focal point, while a hand with art beside burgundy has a clear hero and a calm background.
Wearing burgundy beyond December
Burgundy outlasts Christmas, which makes it the most economical shade in the post. It suits January workdays, winter evenings and formal events long after the art sets have been removed, so a bottle of deep burgundy earns its place in any winter collection.
Gingerbread Men in Holiday Nail Art: Shop the Look
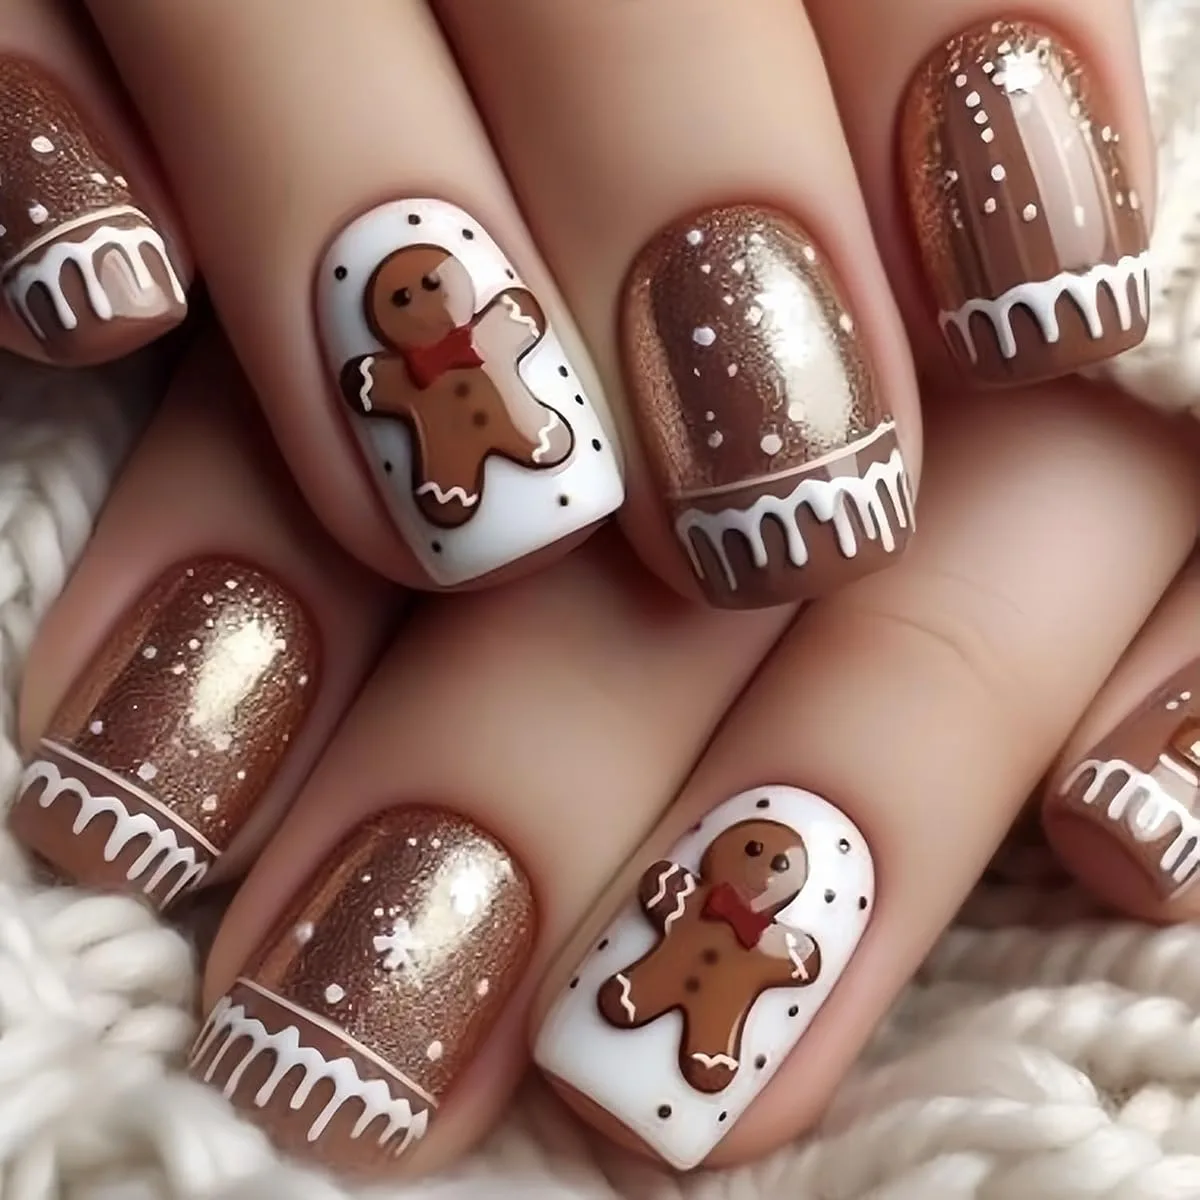
The fifth photo closes the post with its most charming set: short squoval nails on hands against a white knit background, carrying gingerbread men on white bases with red bows, copper glitter nails with white icing drip tips and white dots, and a partial gingerbread detail on one nail. The gingerbread men are painted as brown figures with white icing outlines, dot eyes and red bows, on clean white bases that make the brown figures pop.
Gingerbread art for holiday nail art is best approached as a simple figure, not a portrait. Paint the white base first, then the brown body as a rounded rectangle with arms and legs suggested by short strokes, then the white icing outline, then dot eyes and a red bow last. The icing drip tip is a separate, easier motif: paint the copper glitter base, then add white drips of varying lengths along the tip edge, with small white dots for snowfall. Our elegant ready-made styles post offers an alternative for readers who love this look but prefer ready-made nails to hand-painted figures.
Painting a gingerbread man that reads clearly
Clarity comes from the icing outline, which separates the brown figure from the white base, and from the red bow, which gives the figure a focal point. Without the outline, brown on white can blur, and without the bow, the figure can read as a plain brown shape rather than a gingerbread man.
Copper glitter as a warm partner
Copper glitter warms the gingerbread set in a way silver glitter would not, because copper shares the brown and baking tones of the figures. One or two copper nails per hand are enough, placed beside the gingerbread nails so the warmth carries across the hand without turning the set metallic.
How to Create Holiday Nail Art at Home
- Choose one art hero per set. Pick stripes, snowflakes, a Santa hat or gingerbread, and let the remaining nails be plain supporting colours.
- Keep the palette narrow. One base shade, one art colour and one glitter cover almost every look in this post.
- Prep every nail the same way: push cuticles back gently, buff away shine, and clean off dust and oil so polish grips properly.
- Paint the base fully first, letting each regular coat dry to the touch or curing each gel coat before the next, and never paint art over a tacky base.
- Paint art one nail at a time with a fine brush, starting with the simplest motif, and seal detailed nails with two thin top coat layers.
- Protect your hands and remove gently. Before any lamp session, apply a broad spectrum, water resistant sunscreen with SPF 30 or higher on your hands, and soak gel off rather than peeling it away.
Frequently Asked Questions
Can a beginner paint candy stripes and snowflakes?
Yes, stripes are the best beginner motif, since even width matters more than speed, and a simple six-arm star with dots reads as a snowflake without complex crystal work. Practise both on spare tips before painting your real nails.
How do I keep white art crisp over a dark base?
Paint art over a fully dry or cured base, use two thin white layers for opacity, and keep the brush barely loaded. Thick white paint drags and streaks, while thin layers stay crisp and even.
Is a solid burgundy set enough for a festive occasion?
Yes, deep burgundy reads as festive on its own, especially with a glossy finish and neat edges. It suits formal occasions where character art would feel too playful, and it pairs with every art idea in this post as a supporting shade.
How do I paint a gingerbread man without it looking messy?
Keep the figure small and centred, outline it in white icing, and add the red bow last as the focal point. One figure per hand is enough, with icing drip and glitter nails carrying the rest of the festive theme.
Festive art works best when one picture leads and the rest of the hand follows quietly. Pick the design that makes you smile, keep its supporting nails calm, and follow Beautylicious Hub on Pinterest for more seasonal nail ideas.